


Budget 1×10: Making the Most of Old Shimano Tech
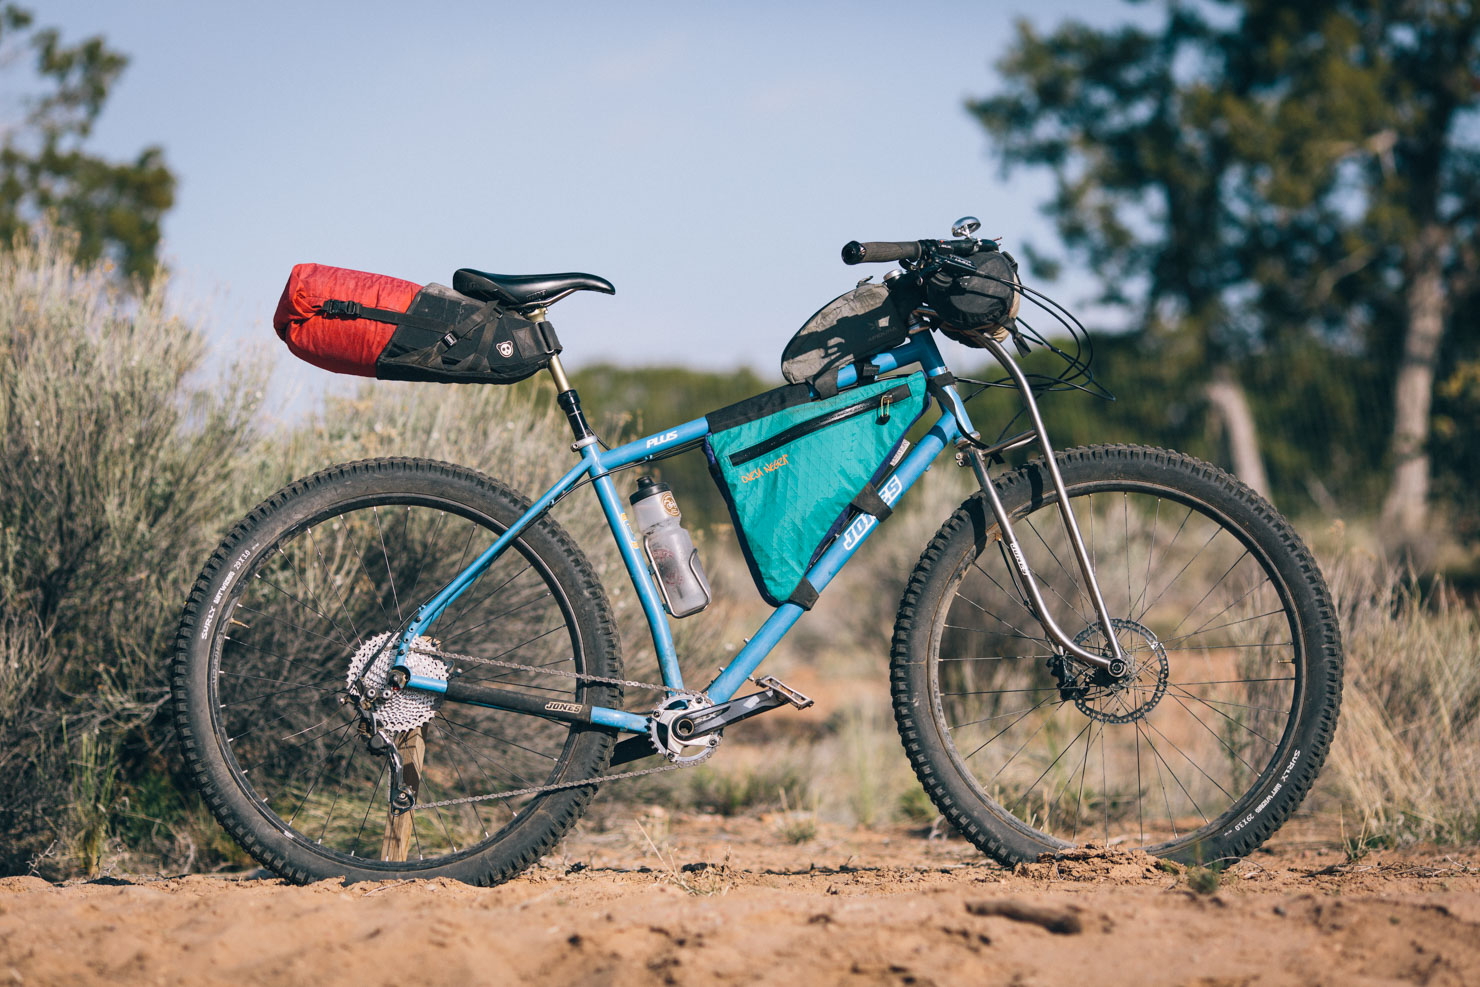
Thinking about giving a 1x drivetrain a whirl for bikepacking? It’s easy to get carried away by the latest and greatest. But if you’re not ready for the investment of a dedicated 11 or even 12-speed drivetrain, there’s a budget option at hand, recycling parts close to hand. For those already running a Shimano-compatible 8 or 9-speed freehub, switching to a relatively wide range, 1×10 drivetrain is both easy and affordable.

In a world of ever-changing ‘standards’, here’s some good news! Older Shimano and Shimano-compatible hubs are mostly cross-exchangeable with new ones, so you can marry a more recent 10 (or even 11-speed) cassette to your tried and tested 8 or 9-speed freehub body. This, in turn, means there’s no need to build up a new wheel for such an experiment. The process itself is actually very simple. But with so many options and variables to consider, it can be a little tricky to navigate the waters of what you actually need, and figure out which parts work with what… So here’s how to go about it:
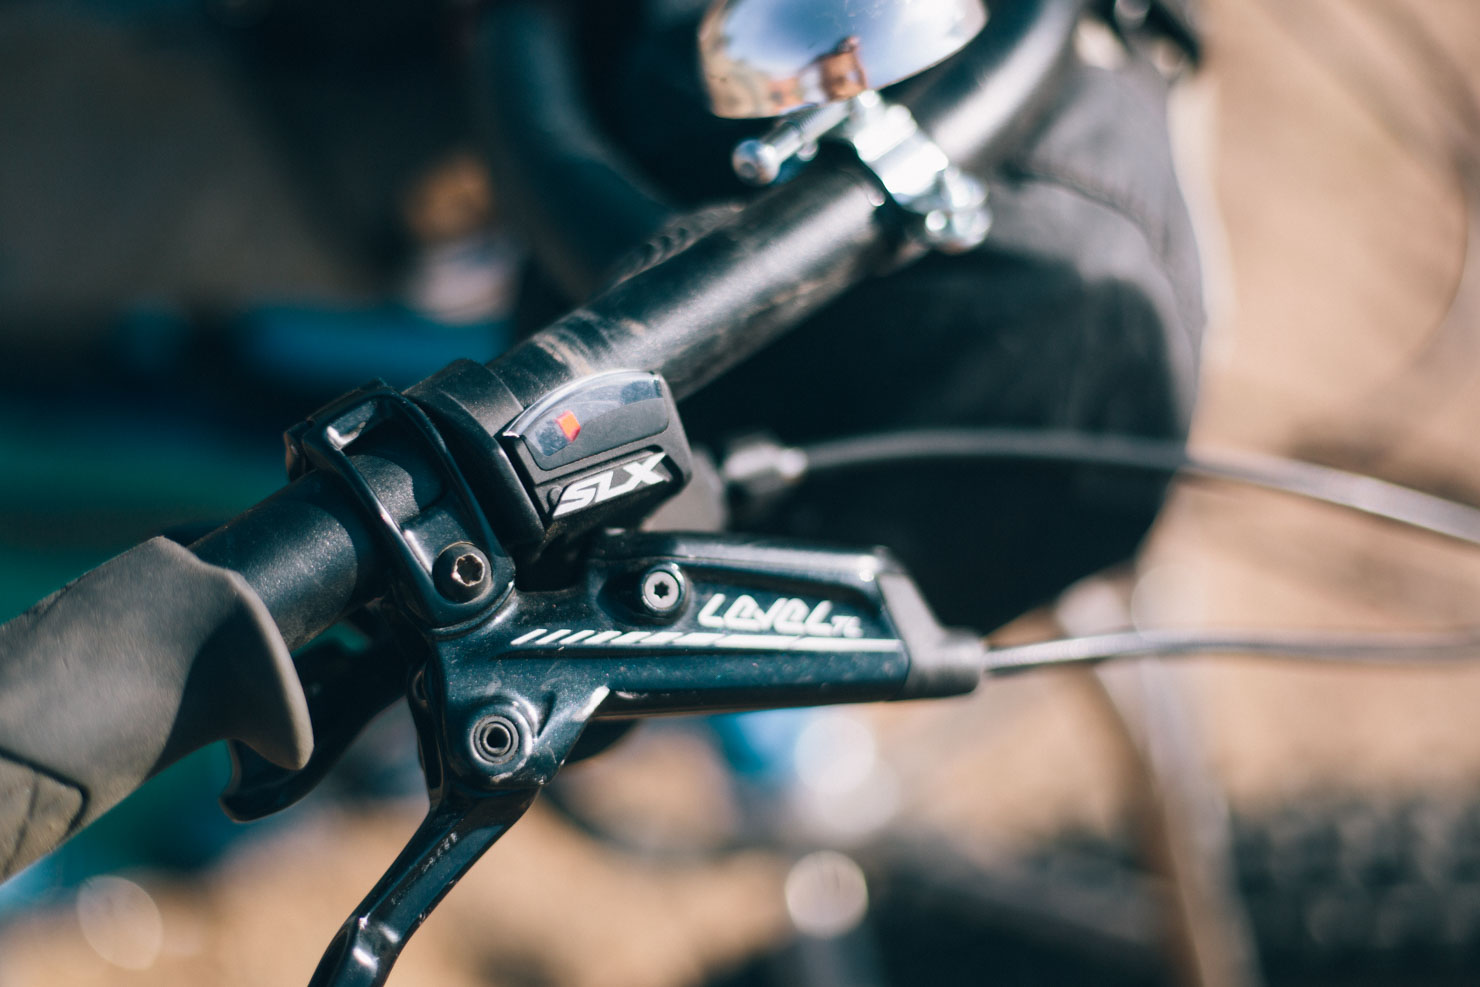
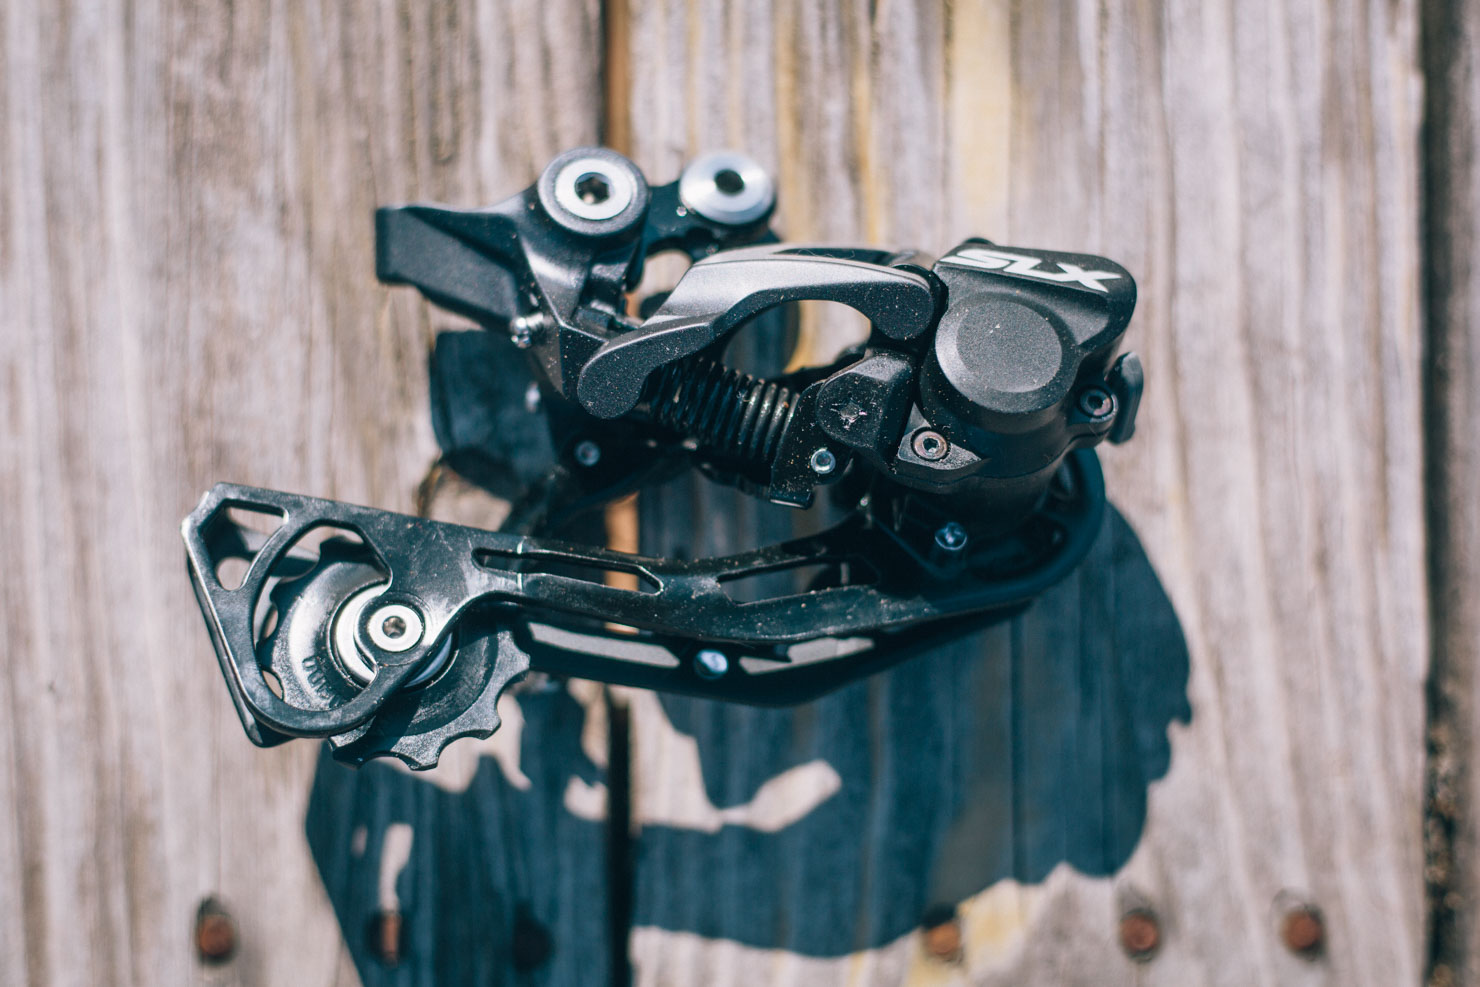
1. Track down a new (or second hand) 10-speed derailleur and shifter, plus chain.
First, you’ll need a replacement 10-speed derailleur, shifter, and chain. The advantage of choosing 10-speed gear is that it’s a rung down the evolutionary drivetrain ladder. This means there are often great deals to be had, whether at your local bike shop, at bikes swaps, eBay, Craiglist, or online (perhaps a friend has upgraded and you can inherit the leftovers!) And of note to those headed on overseas adventures, 10-speed parts also tend to be easier to find than 11/12 speed ones, outside of Western Europe and Australia.
Ideally you’ll want a long cage derailleur to help handle the wide range cassette and extend its life, though if there’s only a mid range on offer, it will probably work too (see below and comments too); SLX grade components are a great place to start, as they offer almost all the performance of the XT groupset at a significantly lower cost. Models with a clutch system are recommended, as this stops the chain from rattling around. Note that if you’re running an old school friction shifter, you may even be able to recycle it into glorious 10-speed. As for chains, KMC often have some affordable options.
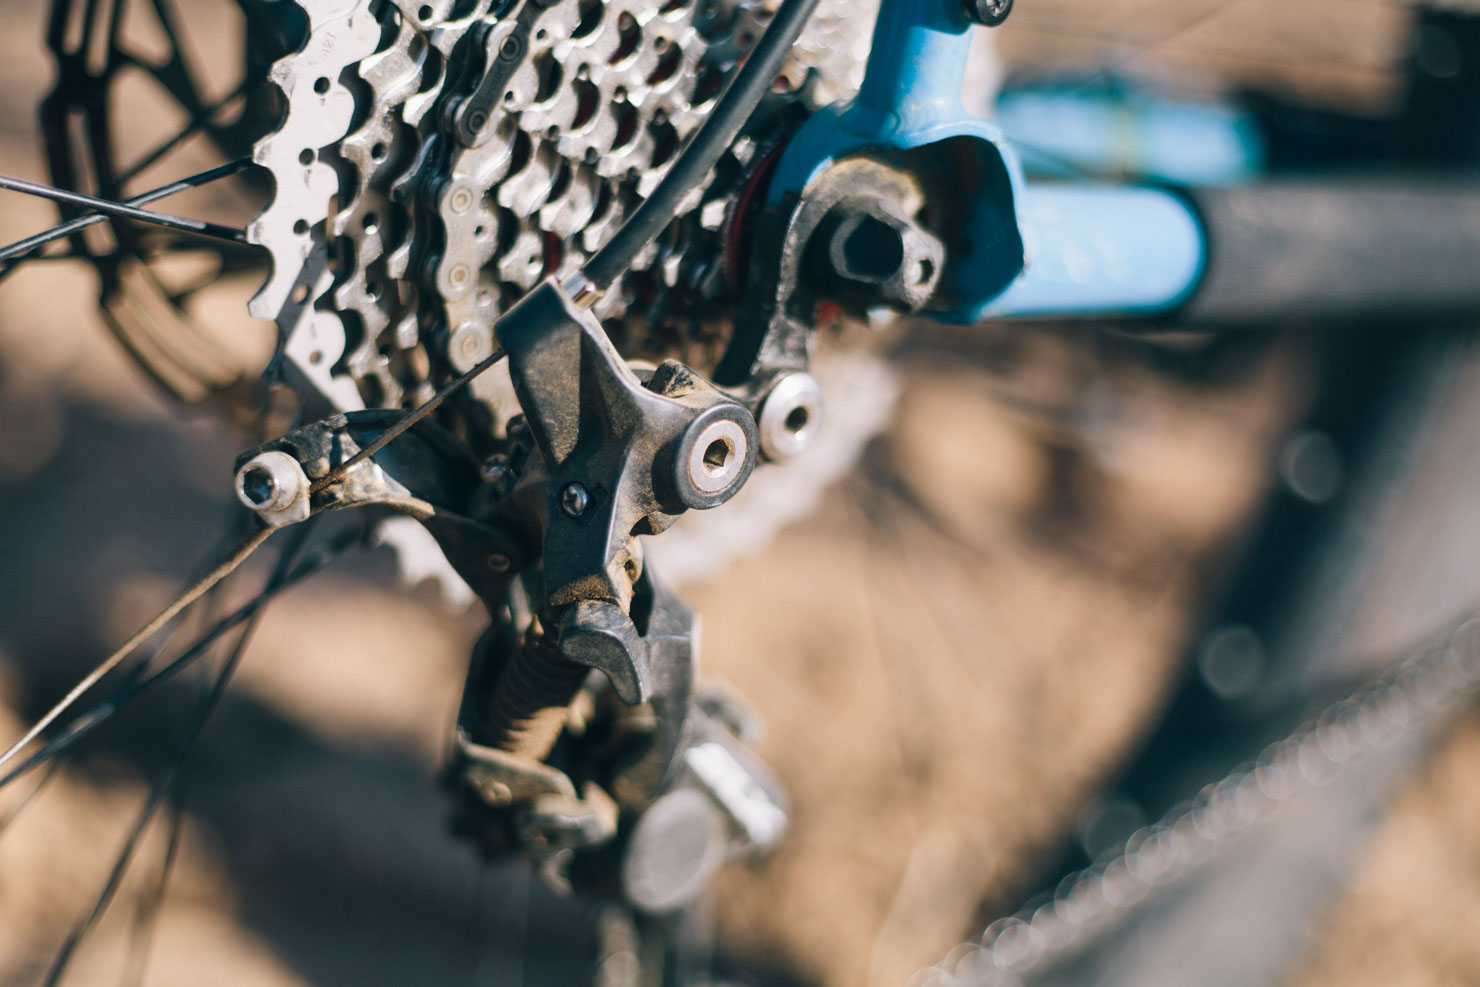
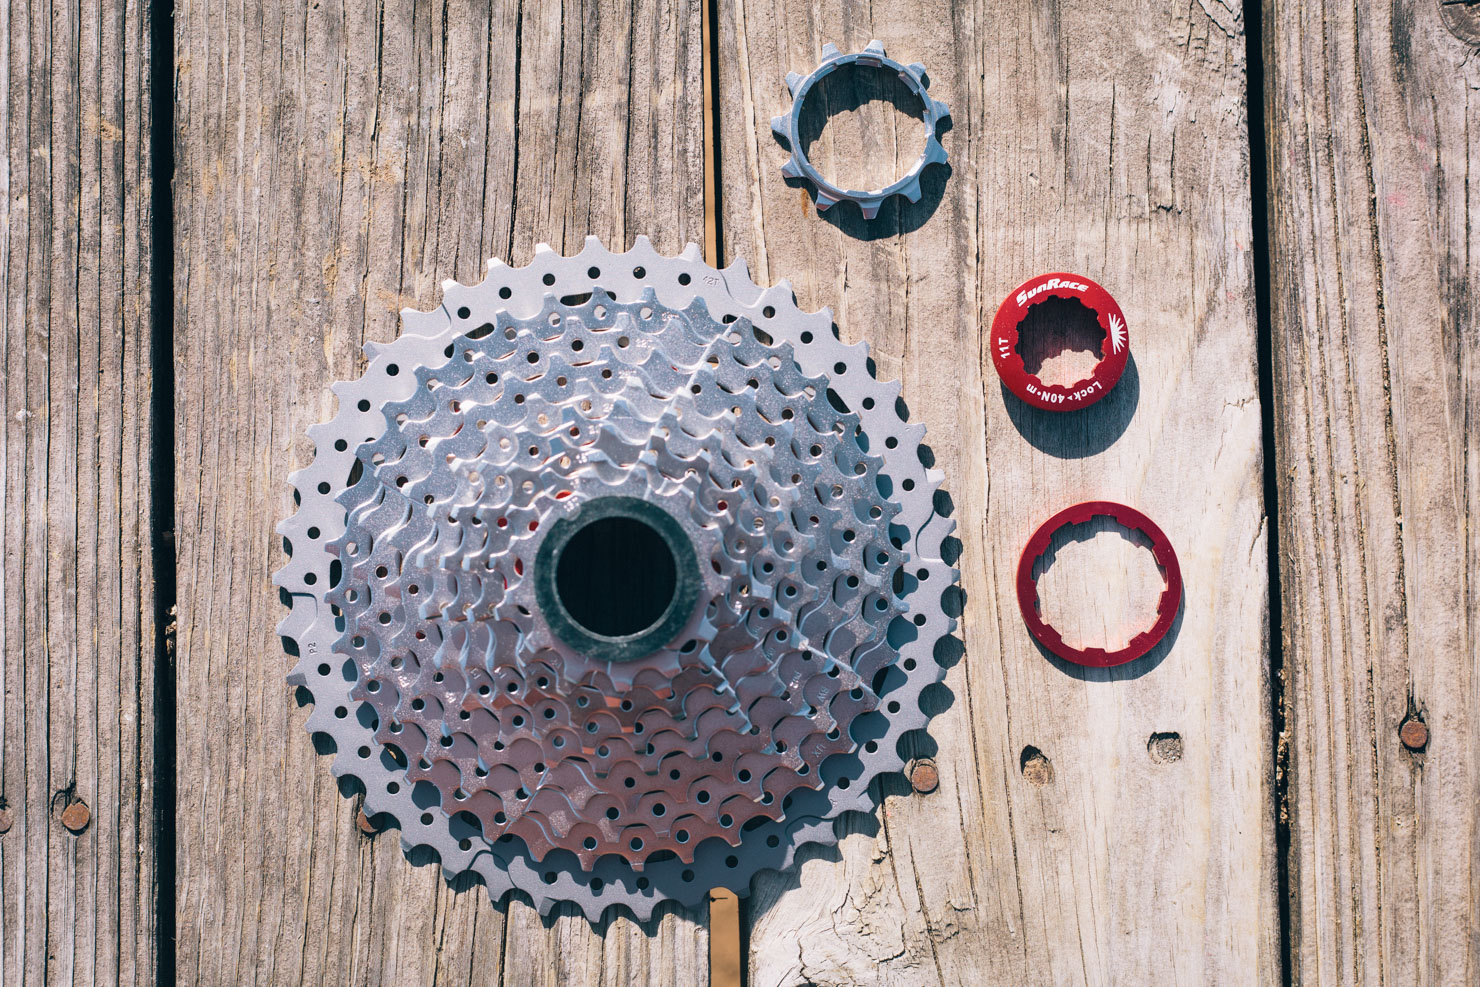
2. Fit a Sunrace CXMS3 Cassette.
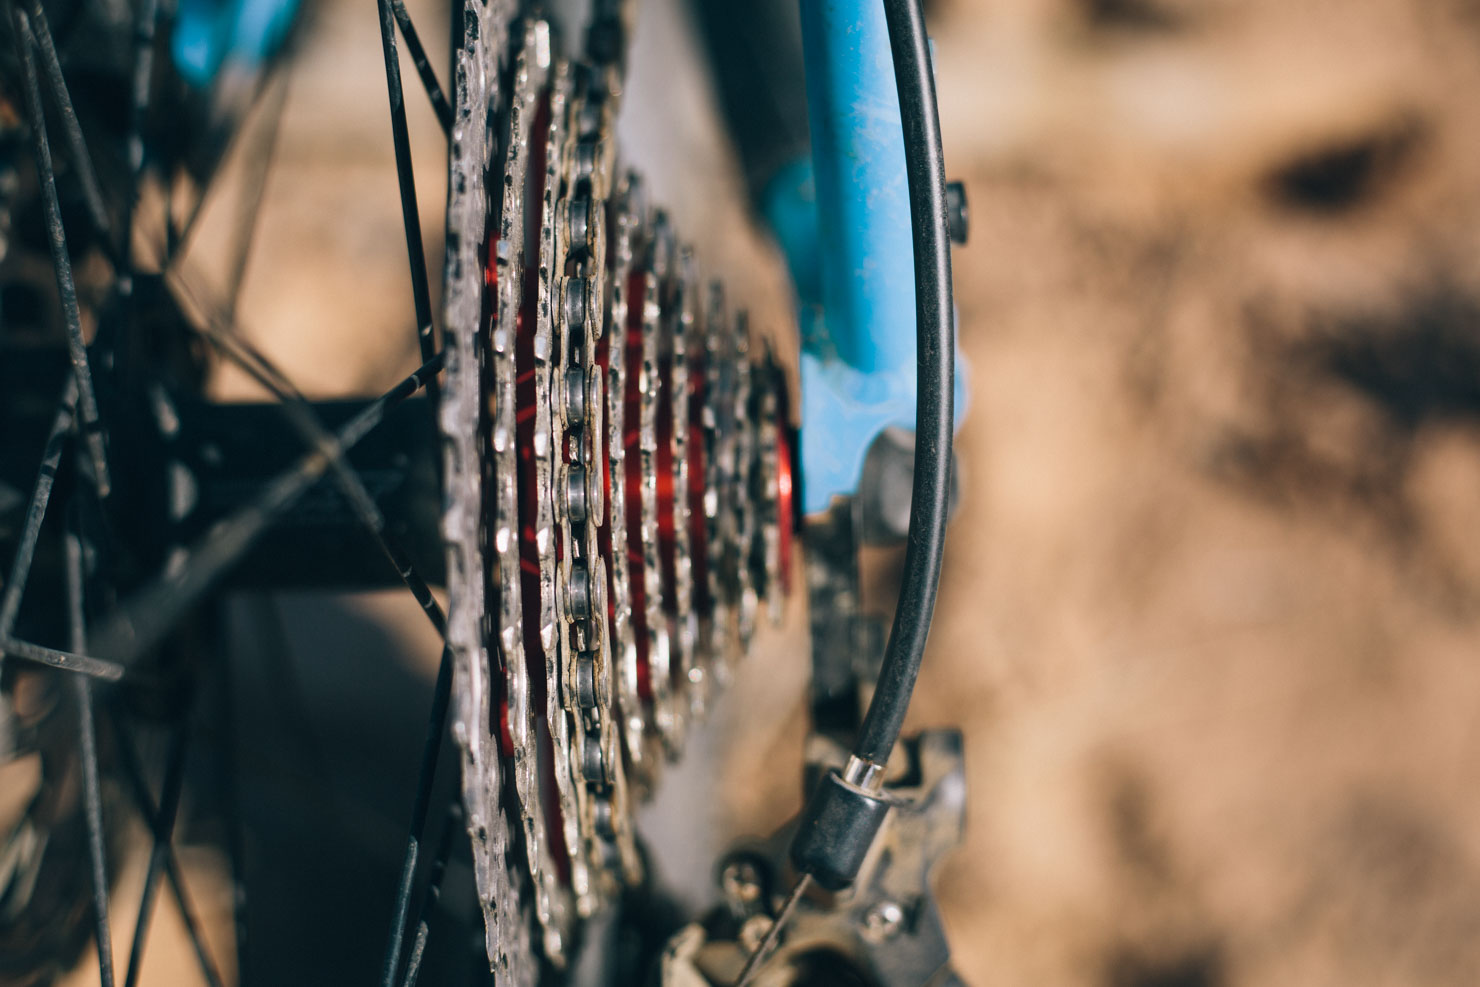
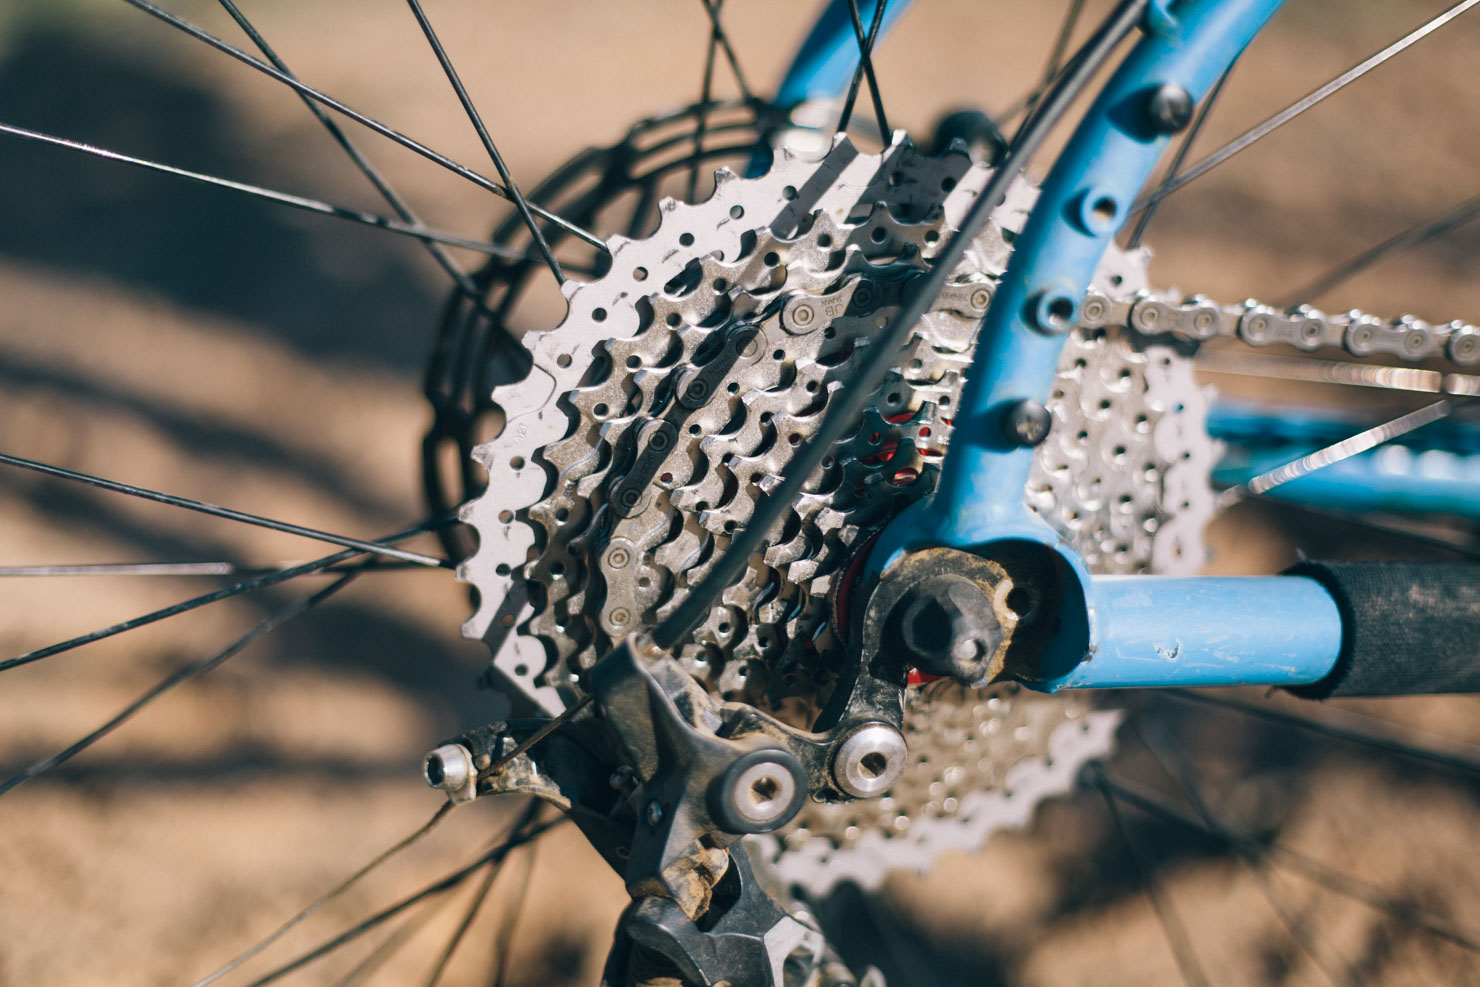
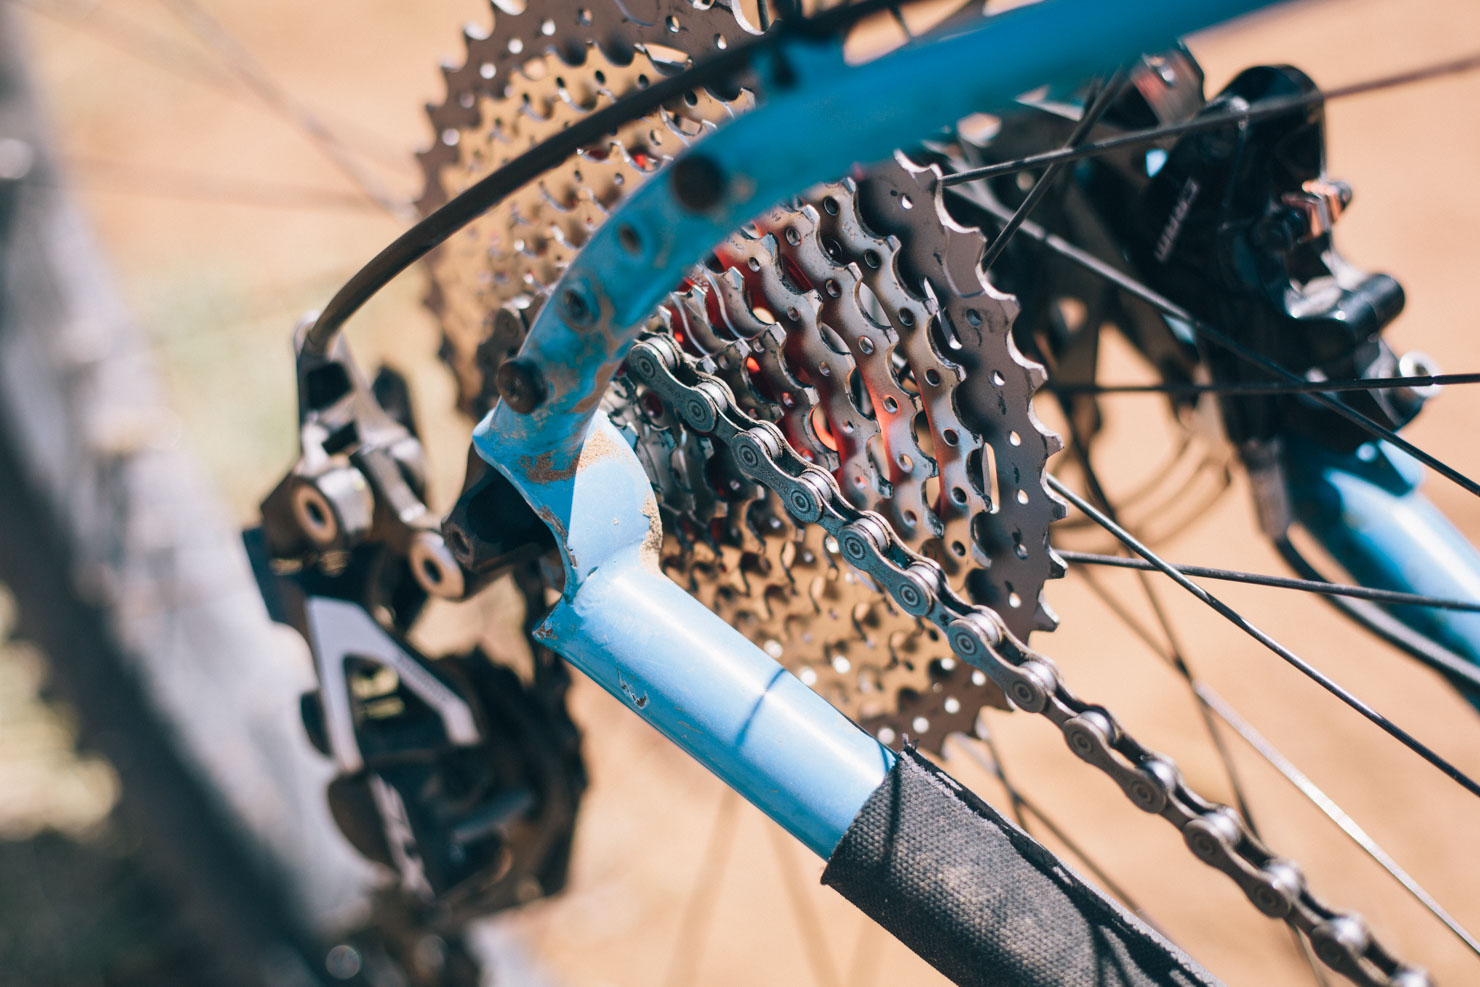
Next, you’ll need to replace your cassette. More good news. Sunrace makes the CXMS3 Wide-Ratio Cassette (11-42T) in a 10-speed flavour (387g, $70) and the slightly cheaper and heavier MS3 version. Longterm feedback is really good, in terms of wear and tear, while shifting is perfectly reasonable. The downside is that you’ll be limited to a 11-42T range, rather than the 11-46T+ spectrum available for 11-speed drivetrains.
3. Swap out your chainring for a 30T narrow-wide model.
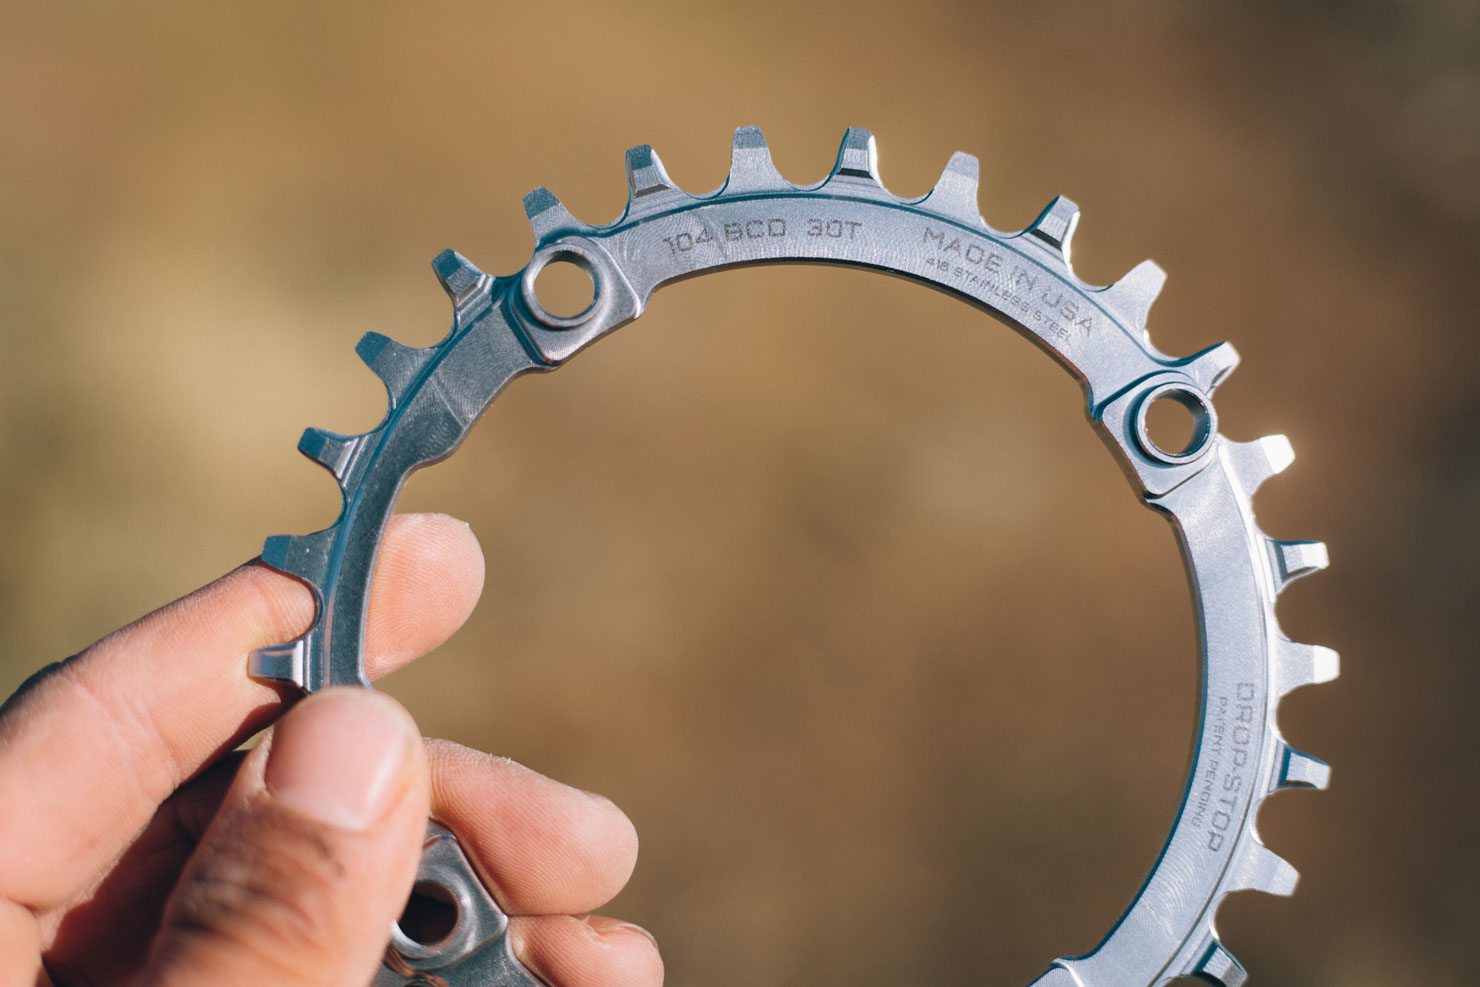
If you’re morphing from an 8 or 9-speed drivetrain, chances are you’ll be running a 104 BCD, 4 bolt crankset. Traditionally, this would have limited you to a 32T chainring as your lowest option. But if you don’t think this will provide a lower enough gear to run with a 42T cassette – and remember, you’ll be bikepacking with weight on your bike – then it’s worth investing in a Wolf Tooth Components Drop Stop 30T chainring, which uses threaded posts in order to clear the spider on your average 104 BCD crankset. Wolftooth offer two versions: steel and aluminum. Given the demands of bikepacking, for my build I went for the rather more expensive steel version ($100), as it’s claimed these rings last as much a 5-10 times longer than conventional aluminum rings. If you’re going for the 30T option, bear in mind you’ll need longer chainring bolts than usual; Wolf Tooth can provide a set of 10mm bolts for $15.
Even if you’re gearing your bike with a 32T chainring, invest in a narrow-wide model, as it help keep the chain in place, especially when used in conjunction with a clutched derailleur. Otherwise you can run a standard, cheaper chainring, like those from Surly, with a chainkeeper of some kind.

Gear inches
If you’re running a 30T chainring with a 11-42T cassette on a 29×2.35 tire, this will give you a range of around 19 to 79.5in. Compare this to a 22T/36T double with a 36T cassette, which comes in at 18 to 95.5in. Or, an old fashioned 22T/32T/44T triple with an 11-32T cassette, which works out at about 20 to 116in. As you can see, you’ll be matching doubles and triples at the low end but you’ll certainly be losing out on the top. Due to the less extreme angles a chain is subjected to, its life is often better too, though manufacturers claim new chains are designed with this in mind. 1x advantages include an easier setup, more intuitive use (especially for novices) and a lighter drivetrain. Note that if you’re moving to a B+ tire setup, changing to a 1x drivetrain should mean you won’t experience any chain rub in your lowest gears, as you would with a standard double. For more on the importance of knee-saving granny gears, check out this post.
4. Or… Go Frankenstein on your existing cassette and derailleur.
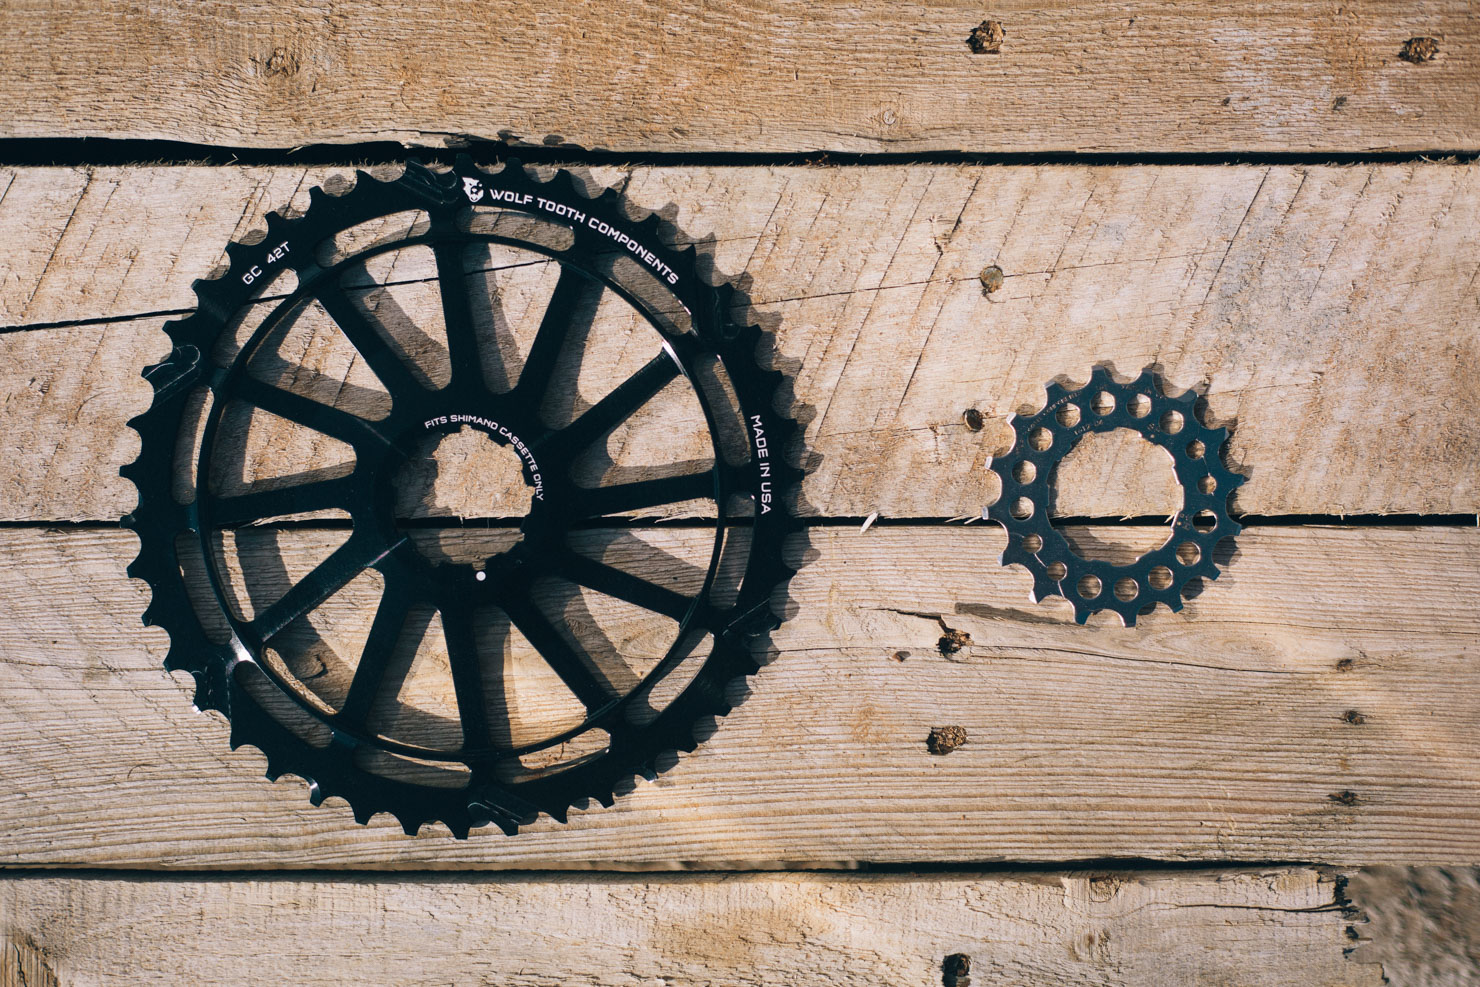
Already have a good quality cassette? You can also extend its range by swapping out two of the rings using one of Wolf Tooth’s GC Shimano cogs ($80) and a 16T replacement cog ($15) to smooth out shifting. As clever as it is, and as well as it works, bear in mind that it actually ends up costing conserably more than a complete Sunrace cassette. Also, you’ll need to check compatibility with the cassette you have.
Likewise, if you’re scavenging for parts, don’t turn the gift of a 10-speed mid cage derailleur down (especially a Shimano Shadow+), as it will likely work with a longer B-tension screw, to help shift into the largest sprocket. Otherwise, Wolf Tooth also offer a Goat Link extension kit, which is said to both help shifting and extend the life of your cassette.
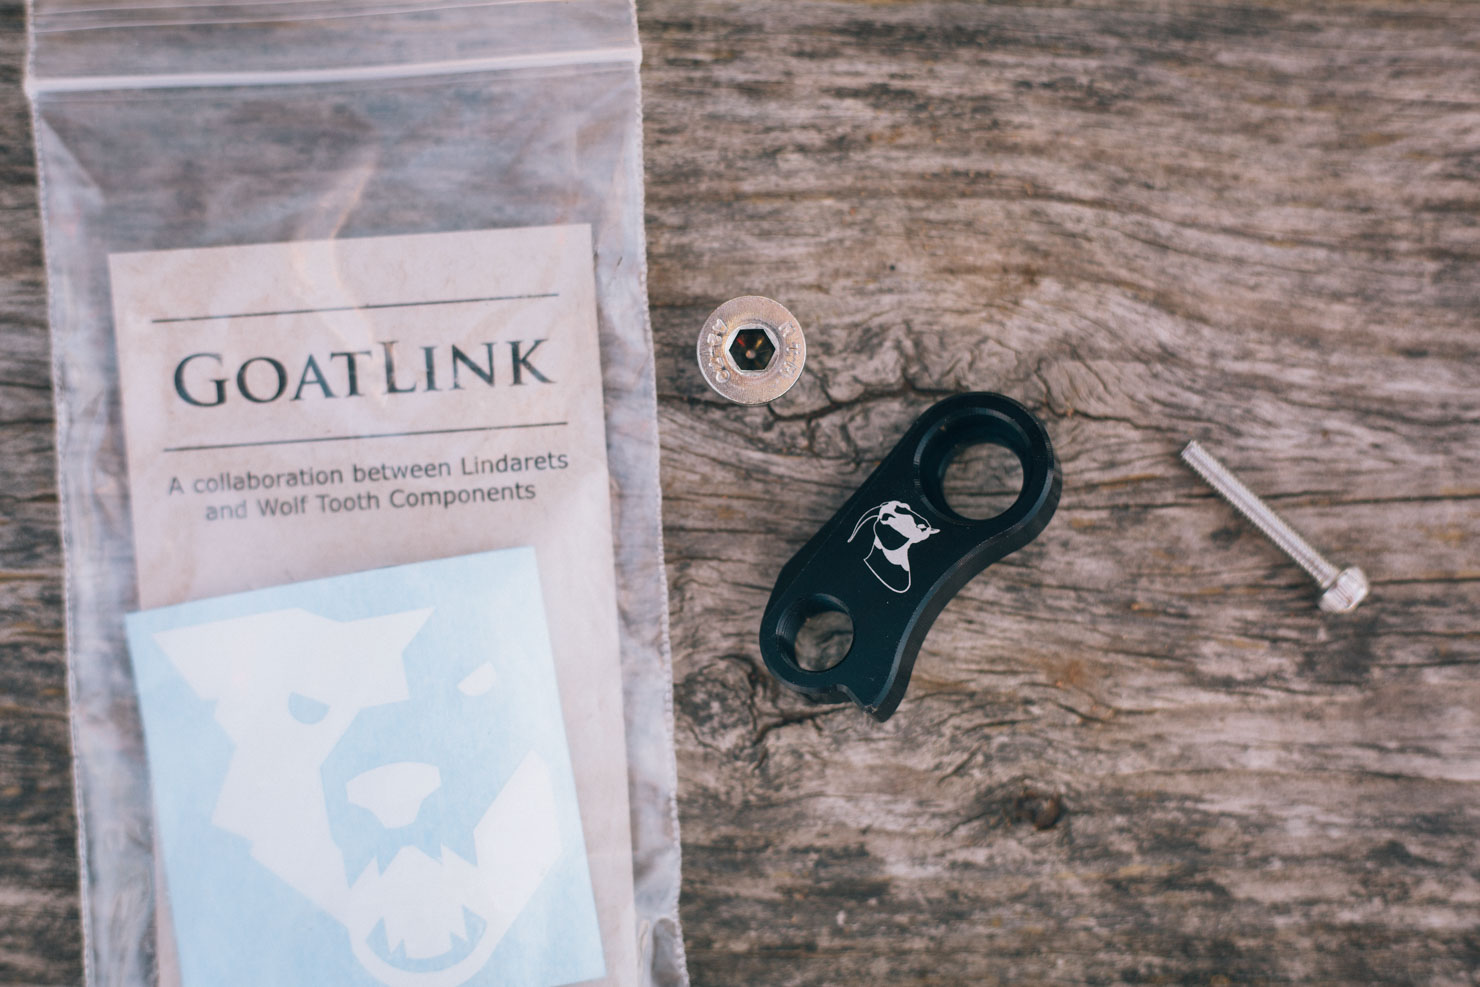
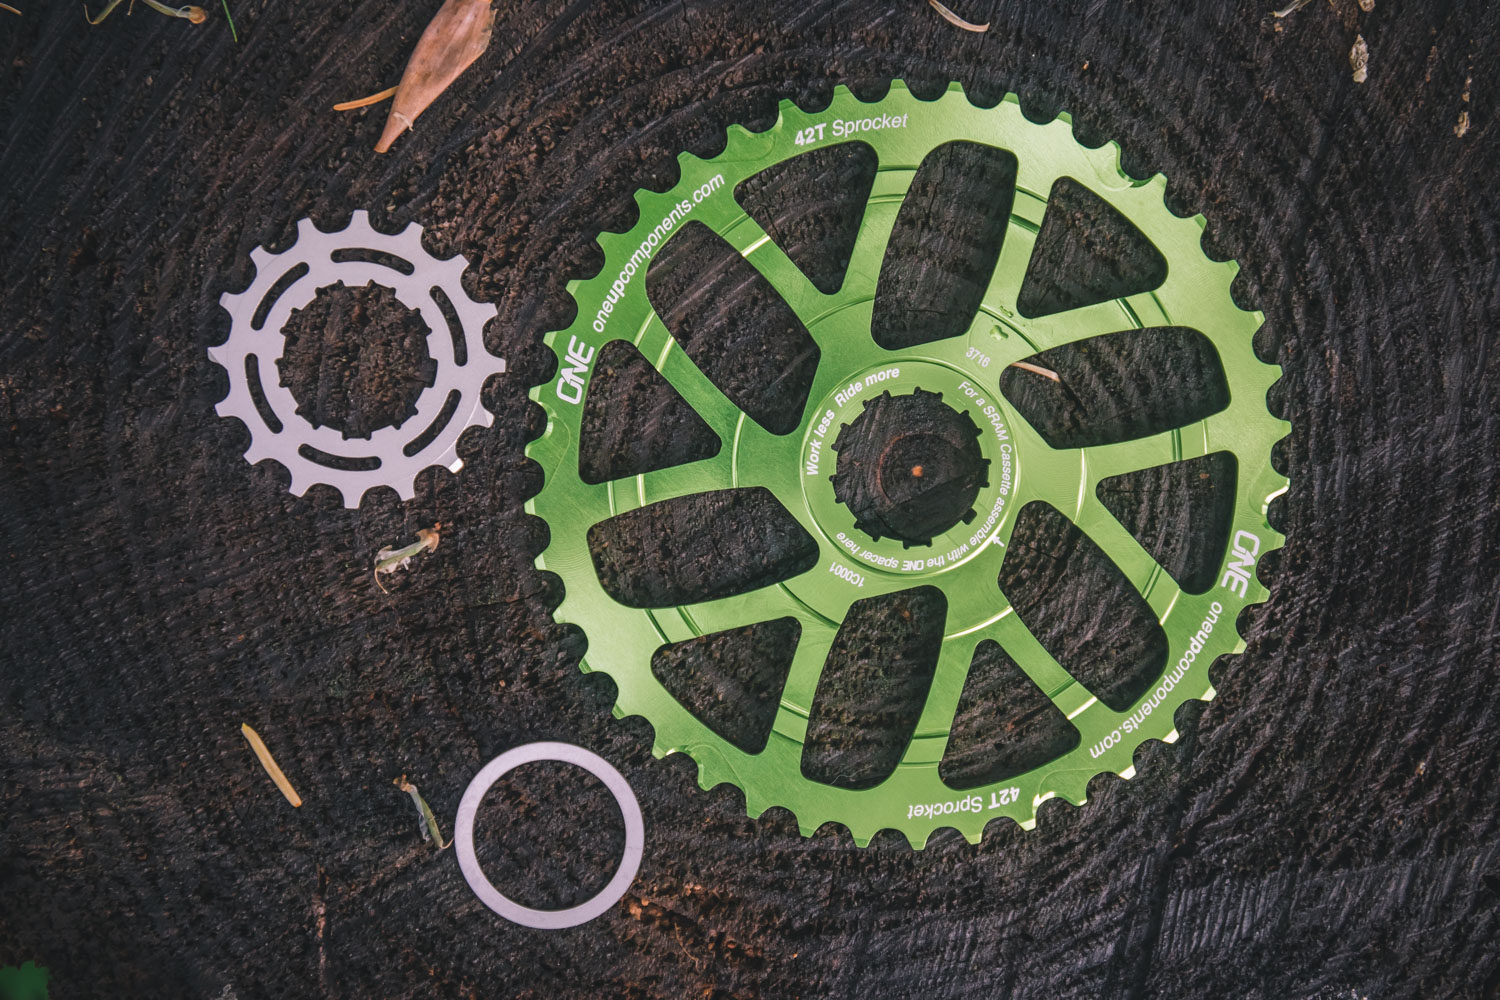
In the interest of thoroughness, we should also mention that OneUp Components has a similar solution with their 42T Sprocket + 16T kit ($80). And similarly, the idea is to remove the 17t sprocket and add a 42T in the back instead – check compatibility first though. You can also swap your 15t sprocket for the included 16t to gain smoother jumps between gears. Again though, note that this works out to be a more complicated and expensive way of doing things than simply buying a complete CXMS3 Sunrace cassette, as above. If your derailleur cage is too short to accommodate the 42T sprocket, One One’s version of the Goat Link is the RADr cage ($55) which works with all Shadow+ (clutch) rear derailleurs.
In terms of narrow-wide chainrings, One Up offer a 104 BCD 30T aluminium option ($47), as well as a an oval chainring too ($47). Curious about oval rings? It’s claimed a 32T oval ring actually equates to a 30T-34T range. In theory, this should be great for this kind of setup, as it won’t suffer from the quite same top end capping of speed. Logan’s certainly a fan.


Wide Range 9 Speed
On an tighter budget and happy to sacrifice a couple of cogs? We’re really pleased to see that Sunrace also offer an M9 9-Speed Wide-Ratio Cassette (11-40T), which should work great, as long as you have a derailler that’s long enough to handle the extra range. If you have only have a medium cage derailleur to hand, try using a long B-tension screw to help to the chain move into the largest cog.
Wrap Up
The conversion from a 9 speed to a 1×10 proved to be an extremely easy and affordable one. Even with the more costly steel chainring, it like likely cost you less than $250 for a complete drivetrain overhaul – and cheaper still if you hunt around or inherit some second hand parts.
In realworld terms, I found a 30T/42T combination worked perfectly well for relatively steep, singletrack-orientated bikepacking, giving me all the lower range I need. At the top end, I definitely spun out compared to the double I’m used to. But more often than not, this was more of an issue with unladen riding. If you use the same bike for bikepacking as you do for trail riding, an 11-speed drivetrain will open up the possibility of running a 11-46T cassette, allowing you to fit a 34T or 36T cog up front, upping your gear inch range to 90-95 – which means your cruising speed won’t be capped in the same way. Note that Sunrace offer a similarly priced 11-46T cassette that will fit on your old freehub, though investing in the rest of the 11-speed components is likely to cost you more.
All this said, I’ve been really happy with an extended range, 1×10 drivetrain for the way I ride. I love its simplicity and I’ll happily spin at the top end out to gain those valuable low, hill climbing gears, especially when laden. I can certainly see a 1×11 speed setup in my future, especially as it continues to drop down in price. But for now, this conversion has proved a great budget gateway into a viable, widerange 1x drivetrain. And as much as I see the benefits of a 2x drivetrain, I definitely prefer the simplicity of a single chainring.
Please keep the conversation civil, constructive, and inclusive, or your comment will be removed.
We're independent
and member-supported.
Join the Bikepacking Collective to make our work possible:


