


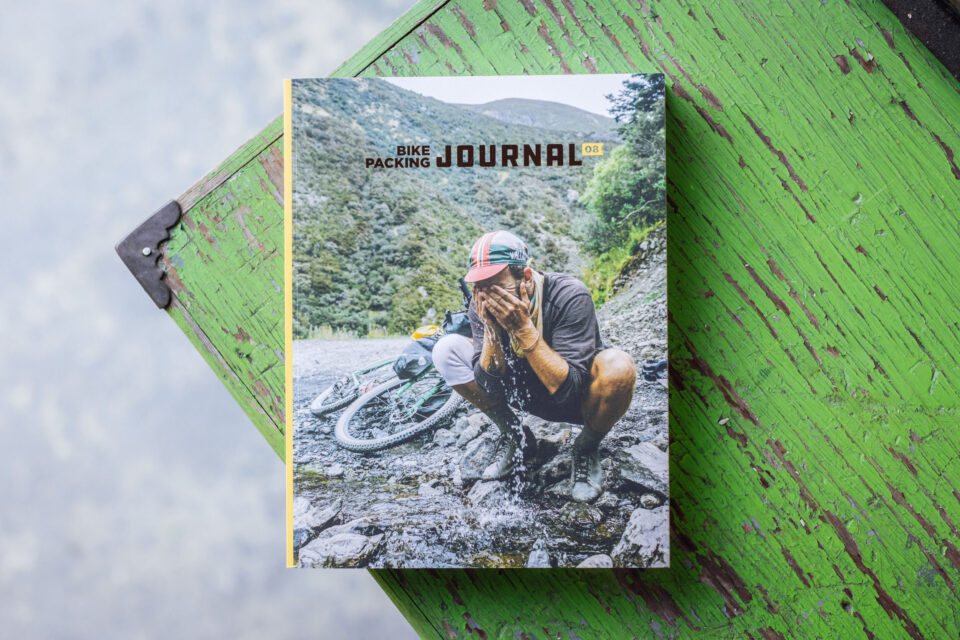
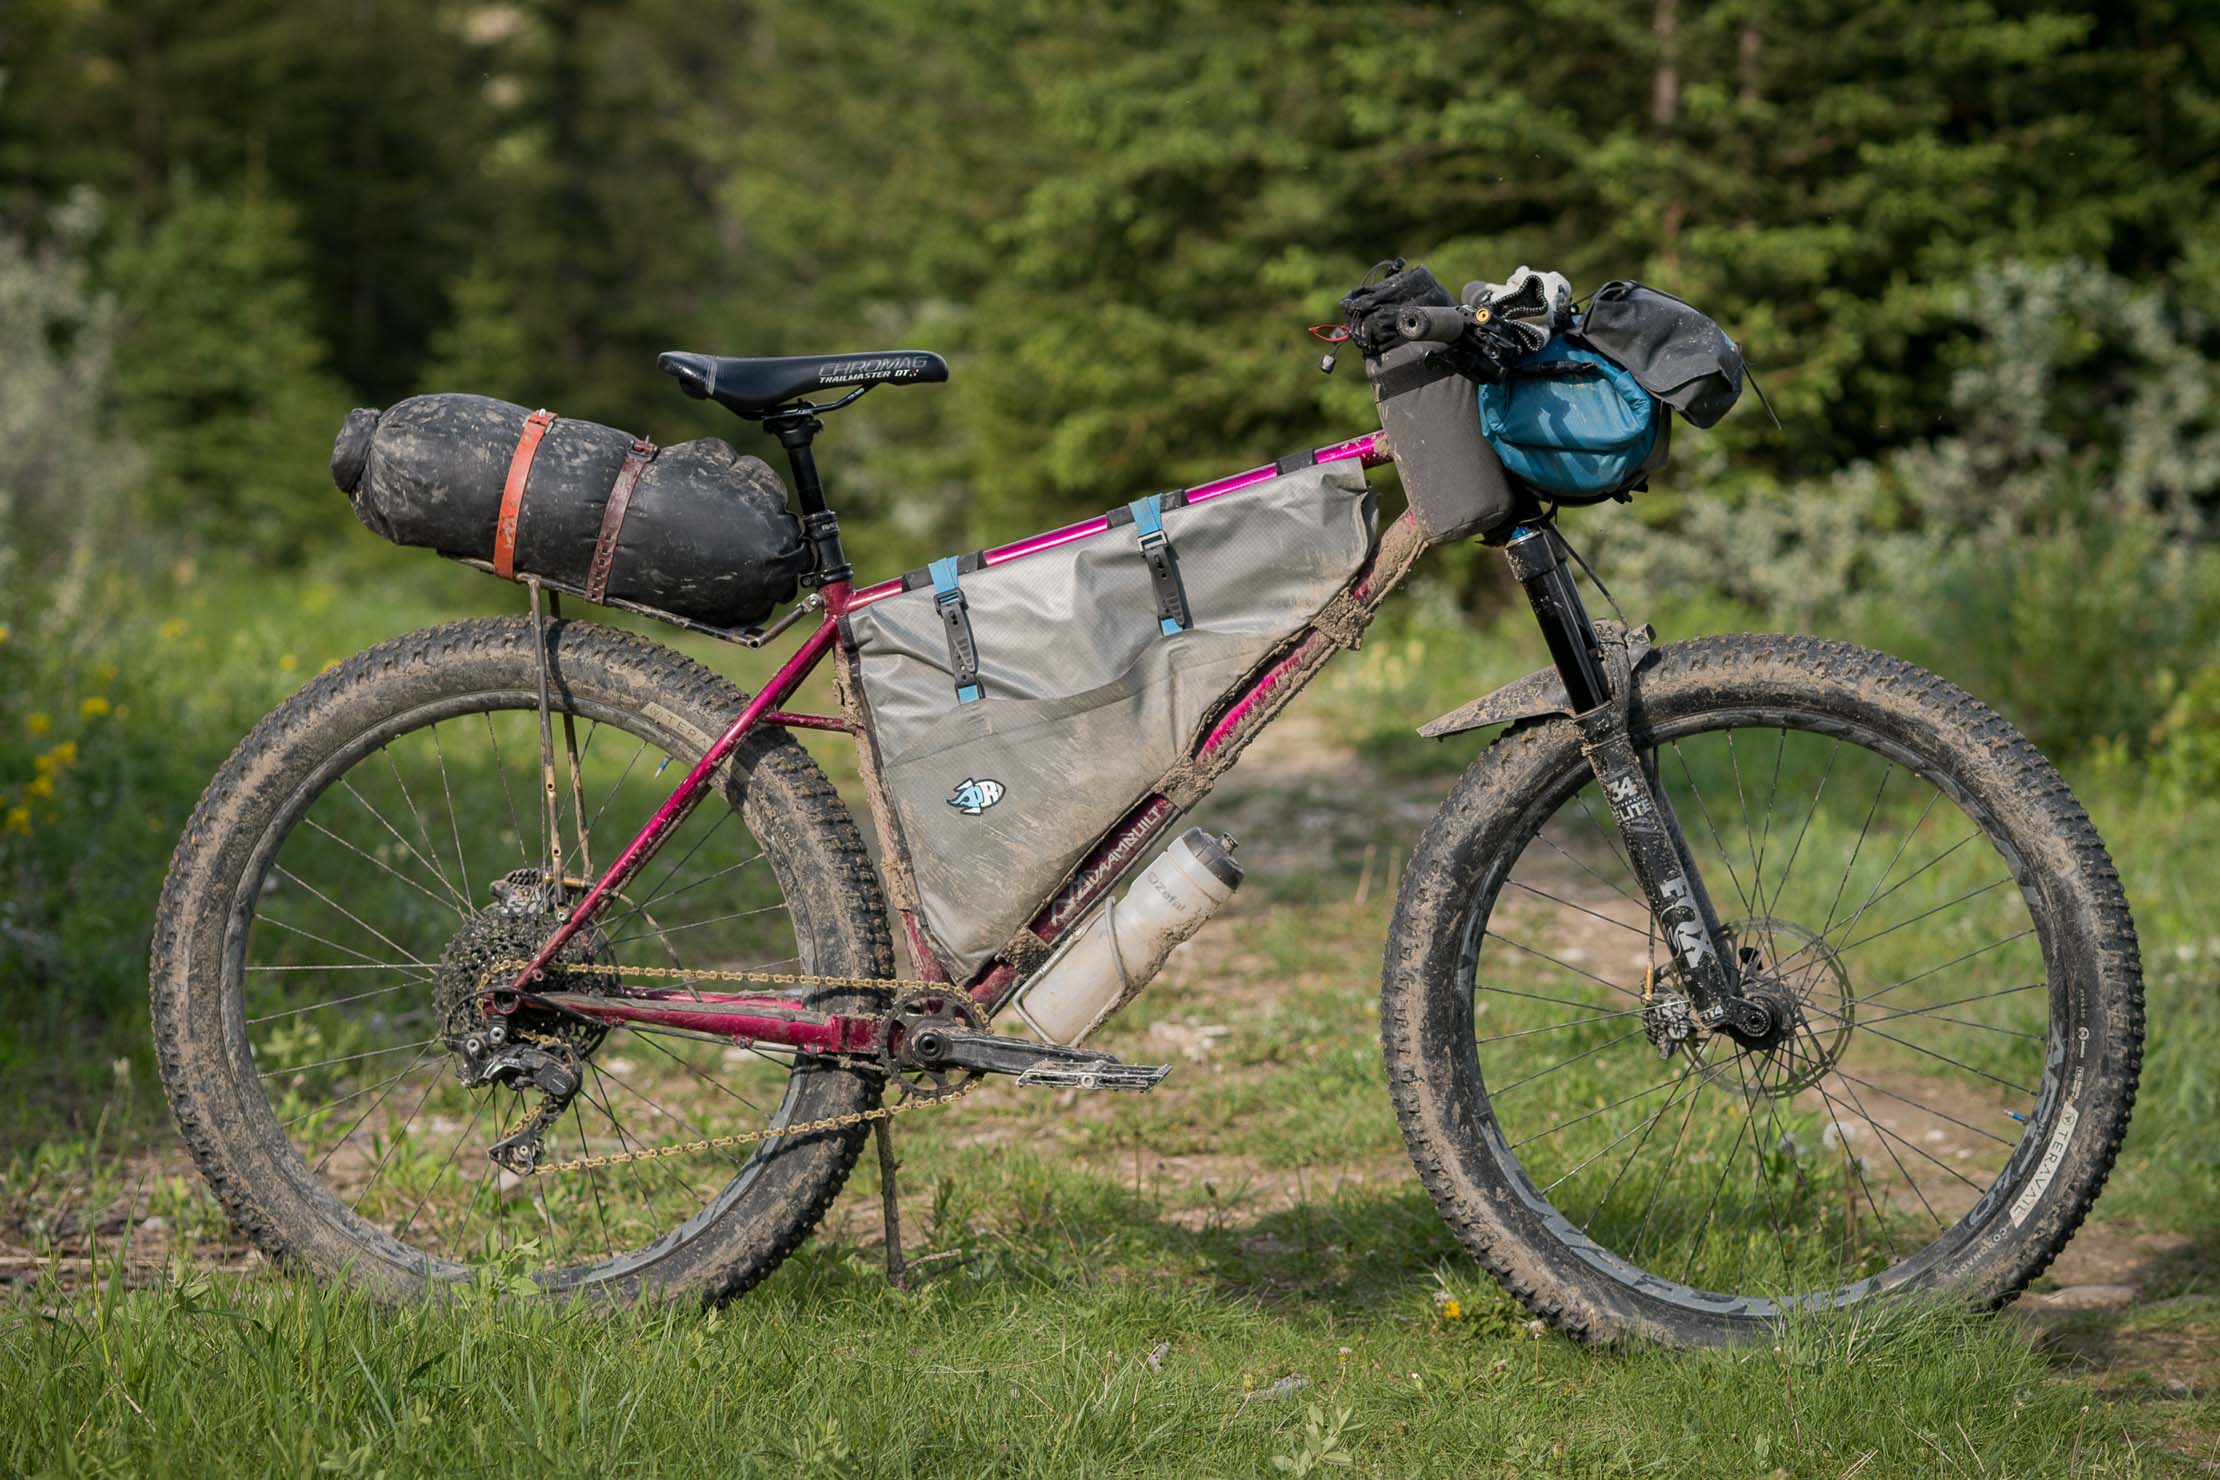
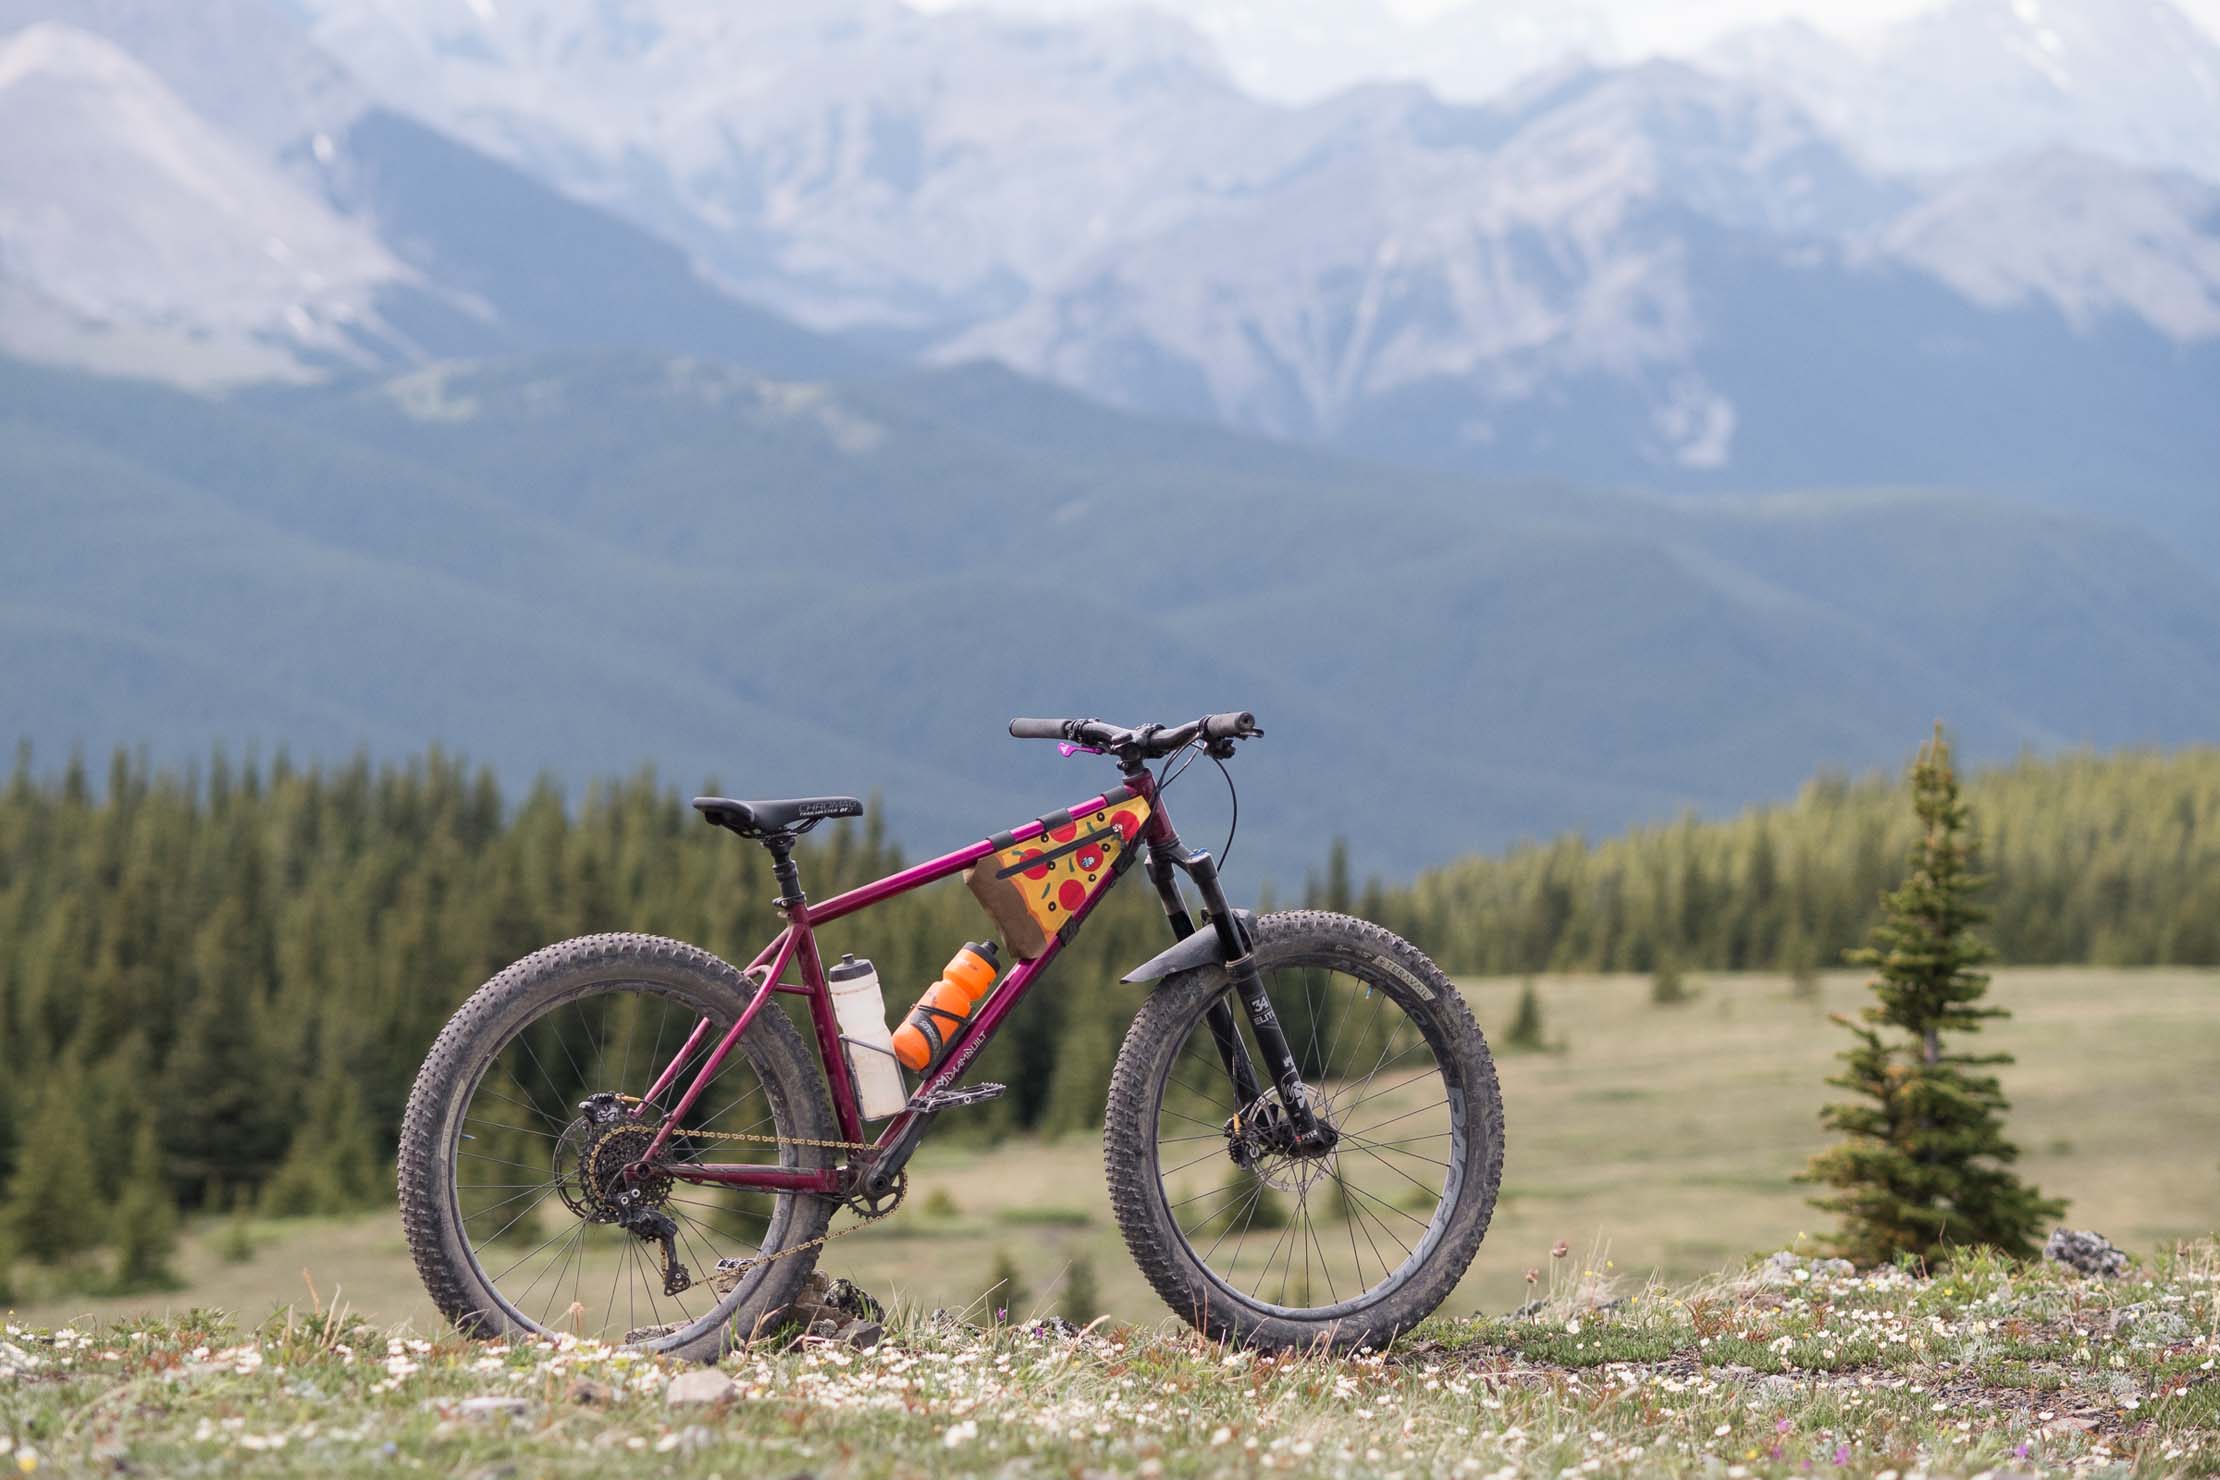
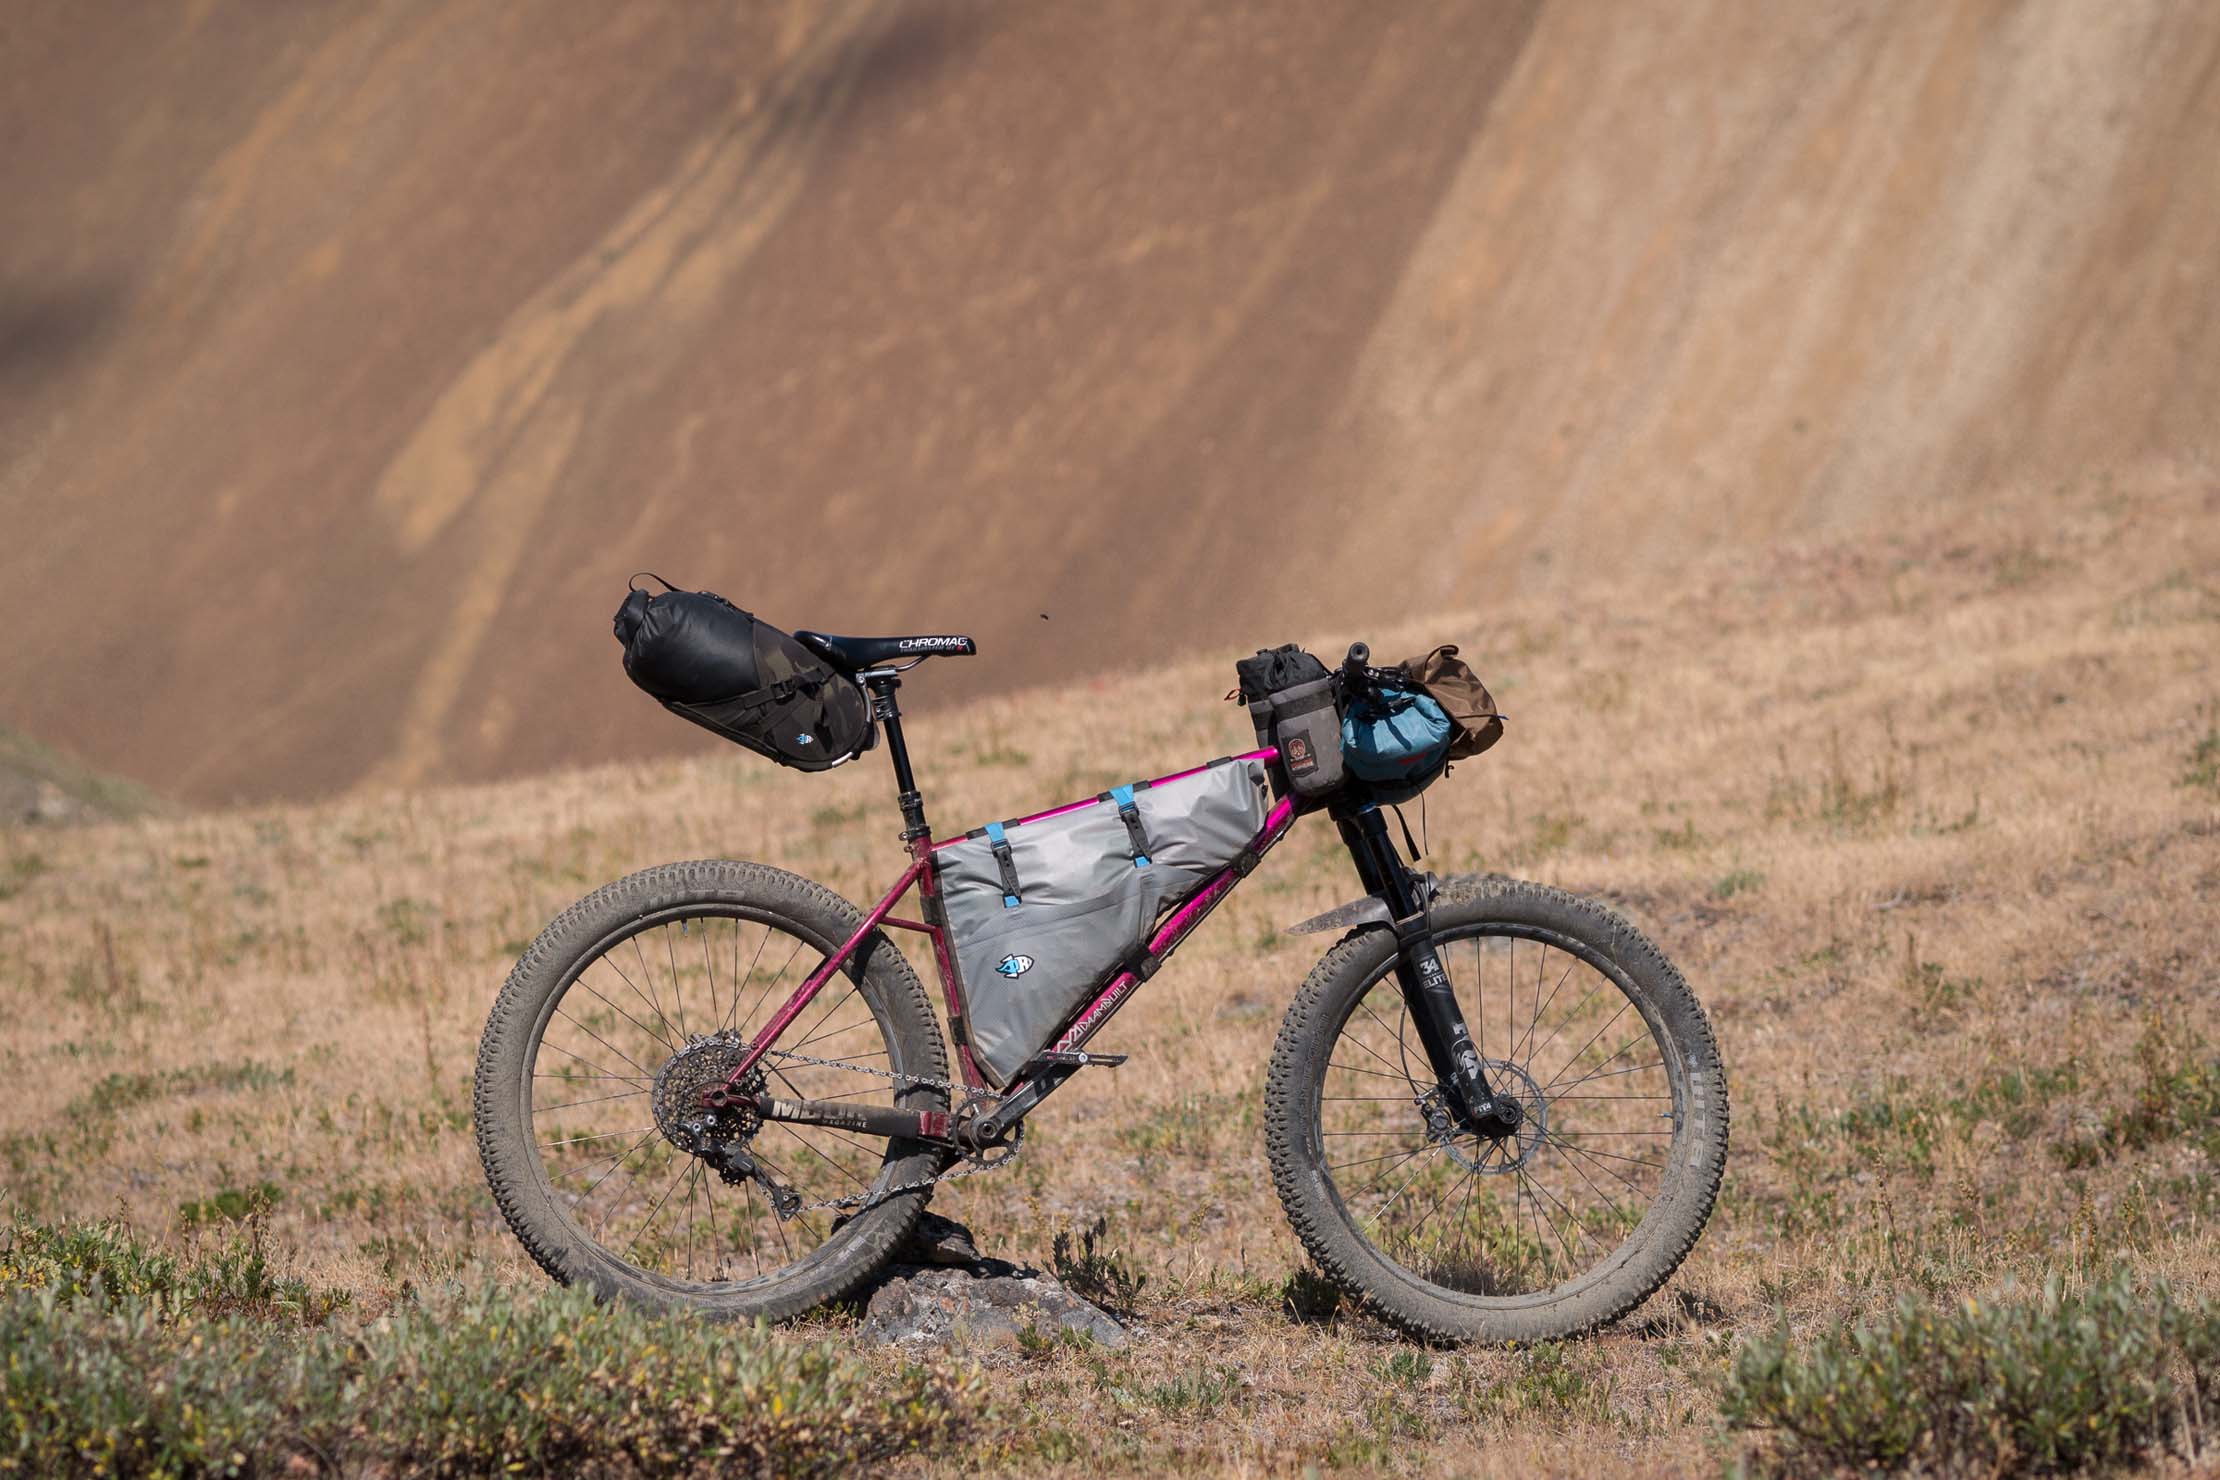
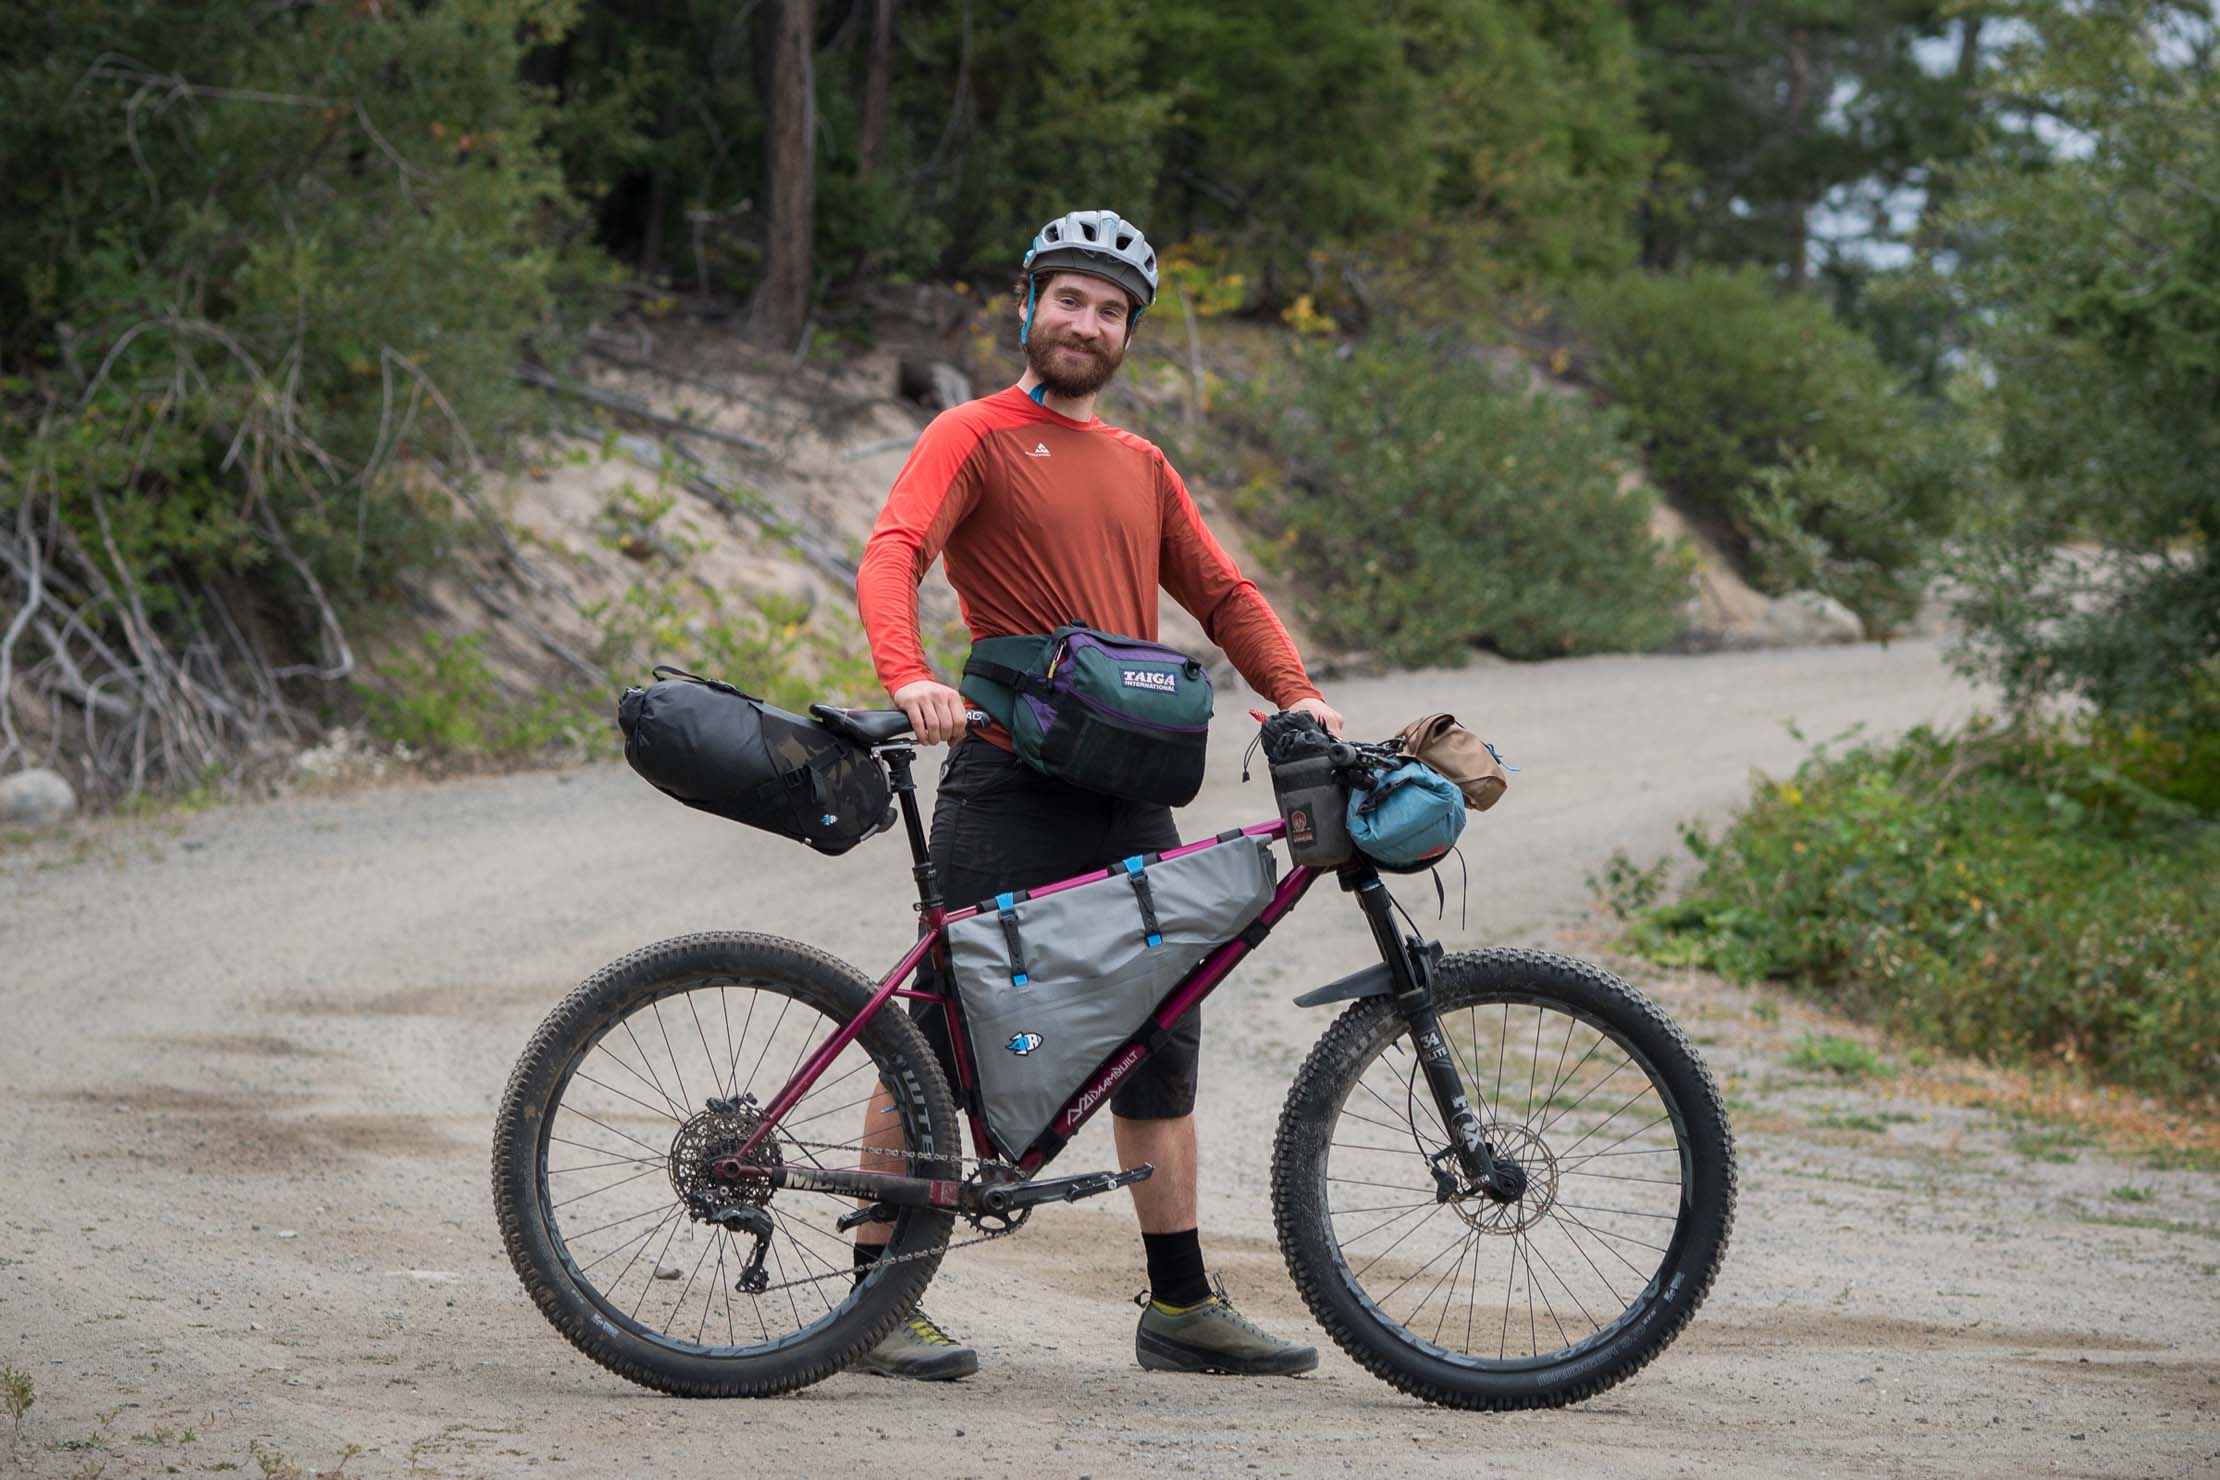
Skyler’s DaamBuilt Custom Bikepacking Rig
Share This

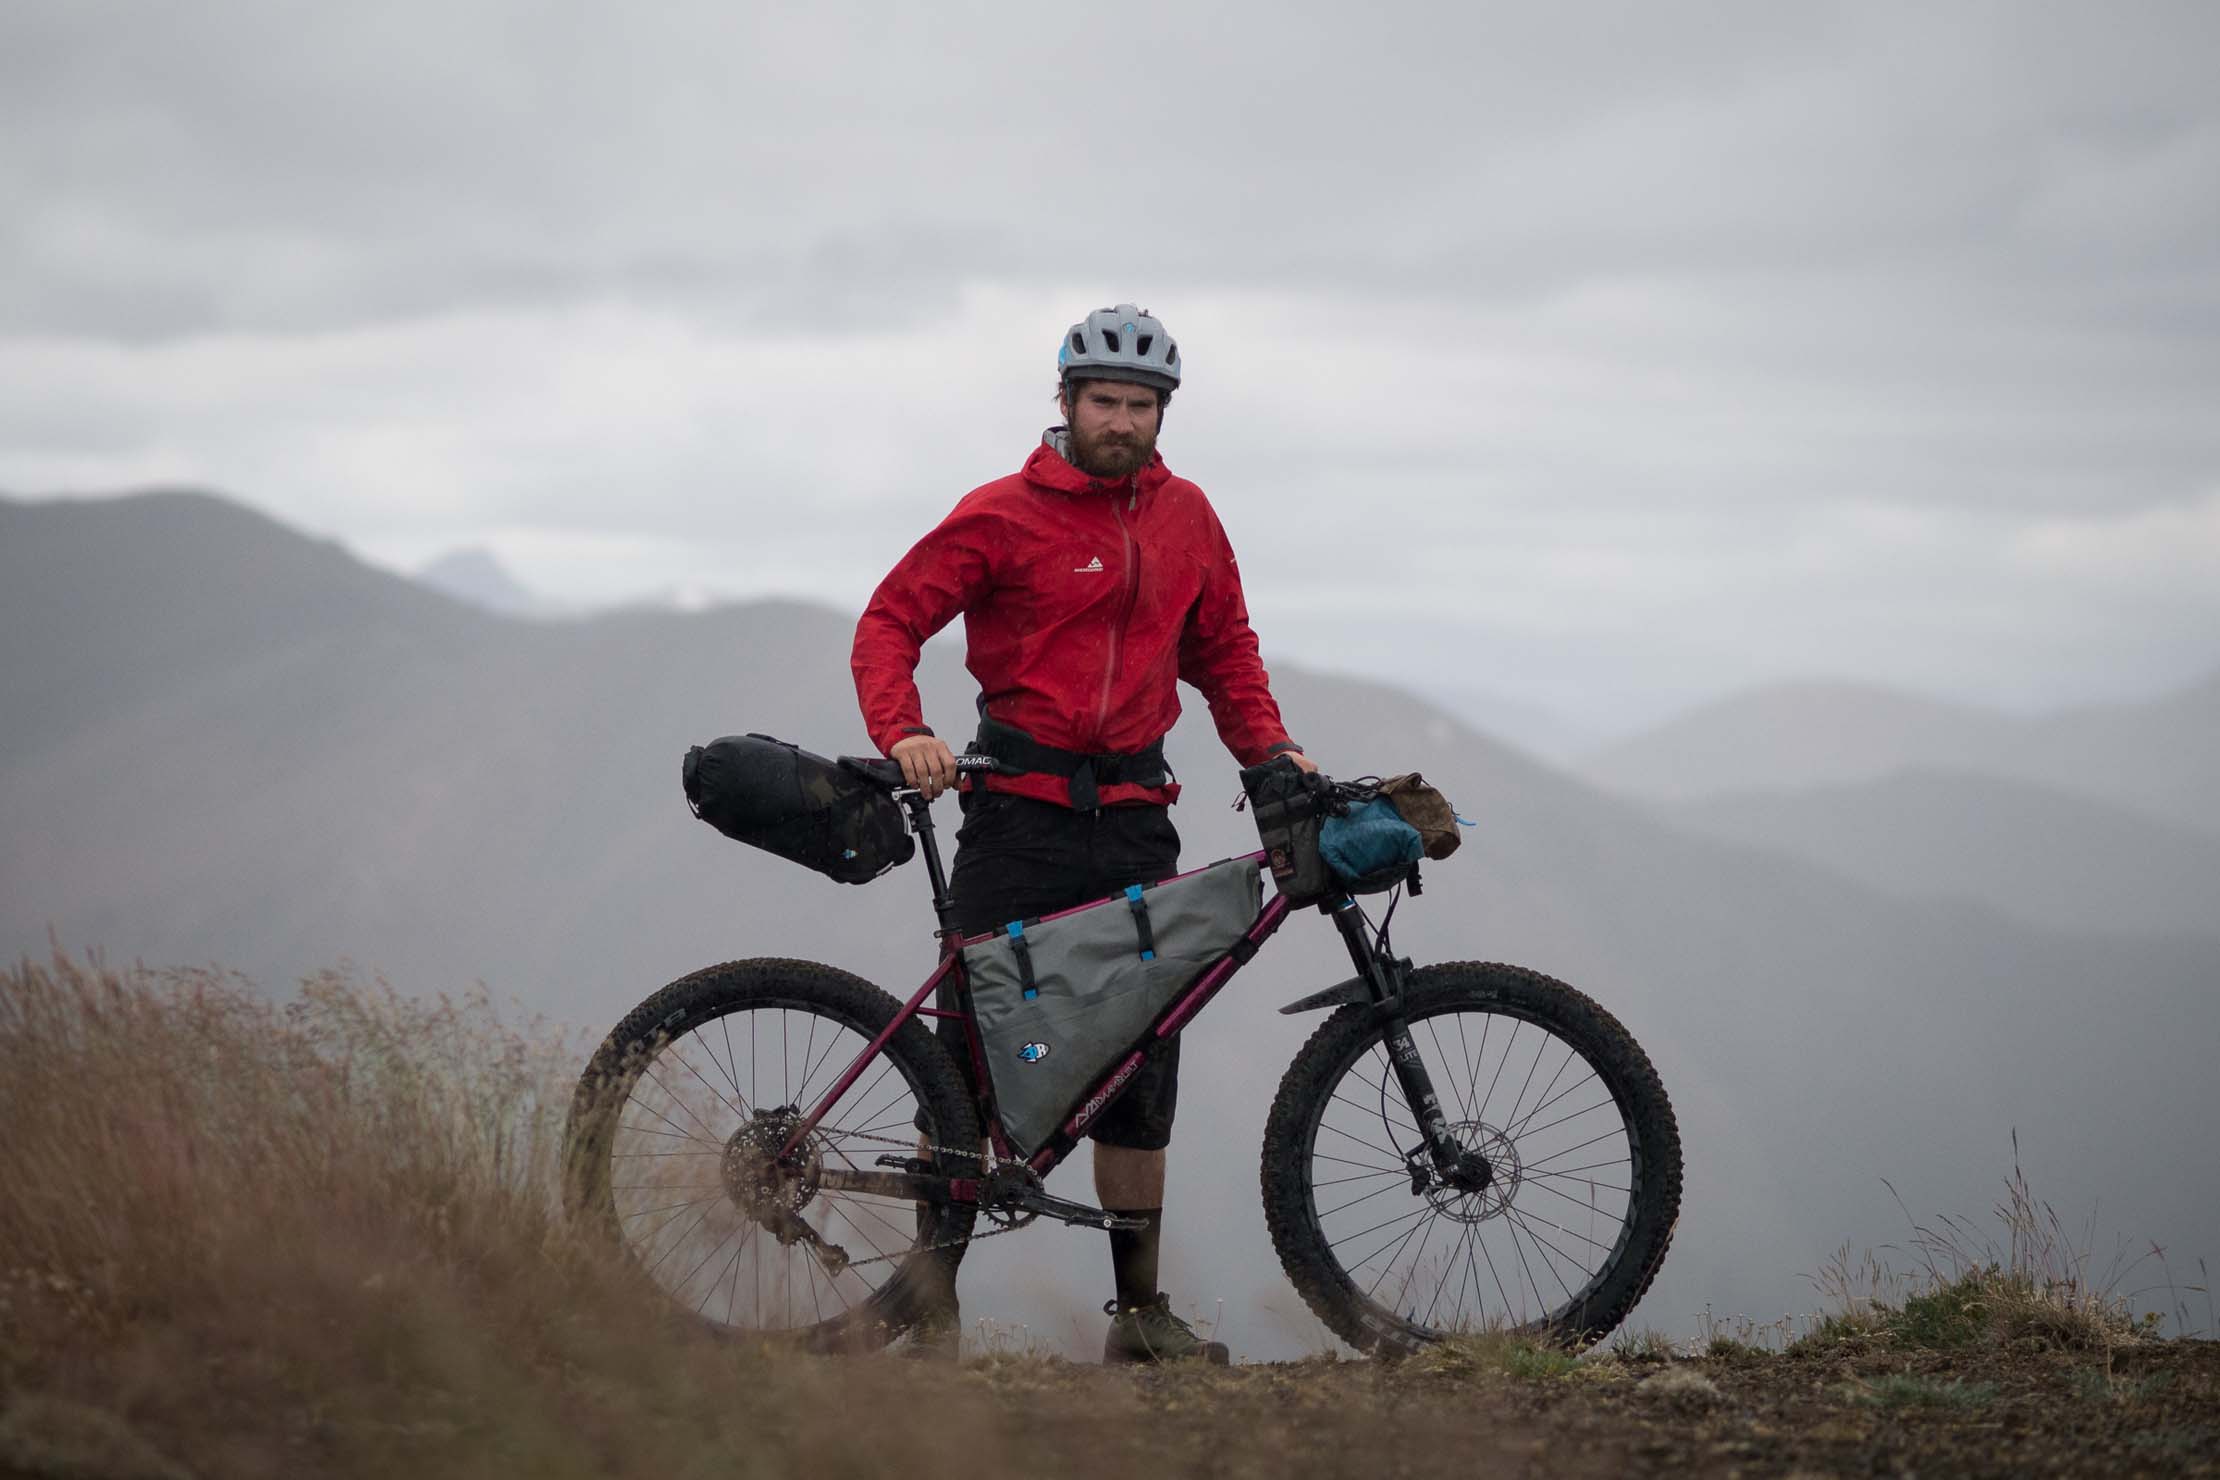
In our latest Rider and Rig, Skyler shows off his DaamBuilt No. 5 custom hardtail and digs deep into the nitty gritty of its angles, measurements, cable routing placement, and other intricate details that make it his near-perfect backcountry trail bikepacking rig…
By late 2016, after a few years with a Surly Krampus as my main machine, I was looking for a new bike that would best suit my riding interests, which could be summarized as “backcountry mountain biking.” I’d greatly enjoyed the Krampus as a rigid, off-pavement touring bike, but I wanted it to do double duty as a mountain bike on day rides near Vancouver. To this end, I’d added front suspension to the Krampus, which allowed me to descend those notoriously technical North Shore trails a bit more quickly and safely, but sucked the pep and spirit out of the ride. Even under-forking it with a 100mm travel fork, I found the jacked-up front end made for vague and lazy handling, and the bike felt like a handful going up and down.
Throughout September 2016, I spent time reviewing the Kona Big Honzo DL, as well as trying out a friend’s Chromag Surface. These particular hardtails opened my eyes to seemingly subtle geometry combinations that can have a dramatic effect on the way a bike handles. Around this time, I met Peter Daam in North Vancouver, who was taking his first step into a career as a custom frame builder. We bonded over an interest in this interplay of geometry variables and the question of what makes a good bikepacking bike. Our ideas evolved into a design and plans for him to build me a custom frame.

Going Custom
One allure of a custom frame is the human story that comes with it. It’s very easy to dismiss a mass-produced bike as a mere object, ignoring that all objects are made by breathing humans and that the value of a bike is really the value of the human effort that went into making it. Working with a custom builder, this often hidden story becomes your own. Thus, for some buyers of handbuilt frames, the technical details might be less important than the person who made it, and the unique style and aesthetic details they put into it.
For me, the primary motivation to go custom was that I wanted something that wasn’t being offered by any manufacturer. Peter Daam shares my preoccupation with technical details; form follows function on DaamBuilt frames. And indeed, a big appeal of his approach is that every tiny little detail is considered. Engineering takes precedence.

DaamBuilt No. 5
It appeared that the bike industry was finally prepared to wholeheartedly adopt bikepacking as a specific niche by 2016, and companies began marketing bike models for the purpose. One might assume that I had a glut of choice at the time I chose to go custom. It seems, however, that a majority of the models on the market were aiming to blend the concepts of mountain biking with touring by blending the designs behind mountain bikes and touring bikes.
My experience has taught me that a good bikepacking bike must first and foremost be a good mountain bike (this is convenient because any hardtail I own will serve as both my mountain bike and my off-road touring bike). To that end, I wanted relatively progressive geometry that distilled some of my favourite elements from the Kona and Chromag hardtails. Touring bike geometry is poorly suited riding on backcountry trails, whether loaded or not.
Though those wide-tired touring bikes are undoubtedly perfect for dirt road touring, my hope for this bike was something that would excel as a day-to-day mountain bike, and also when loaded up for singletrack-heavy and exploratory tours. To me, this type of riding is best suited to something less traditional.
My second complaint with the available crop of new age hardtails is that those that fit 27.5+ tires tend to be designed as 29ers first, with the 27.5+ clearance as a fortunate byproduct of the design. While wheel size cross-compatibility makes for good marketing, 27.5+ and 29er are sufficiently different in diameter that one size will always be a bit of a compromise. Given that many of the geometry details I was after are also typically paired with a low bottom bracket height, which can be a source of frustration on raw backcountry trails, the additional drop caused by running 27.5+ wheels is a deal breaker for me.
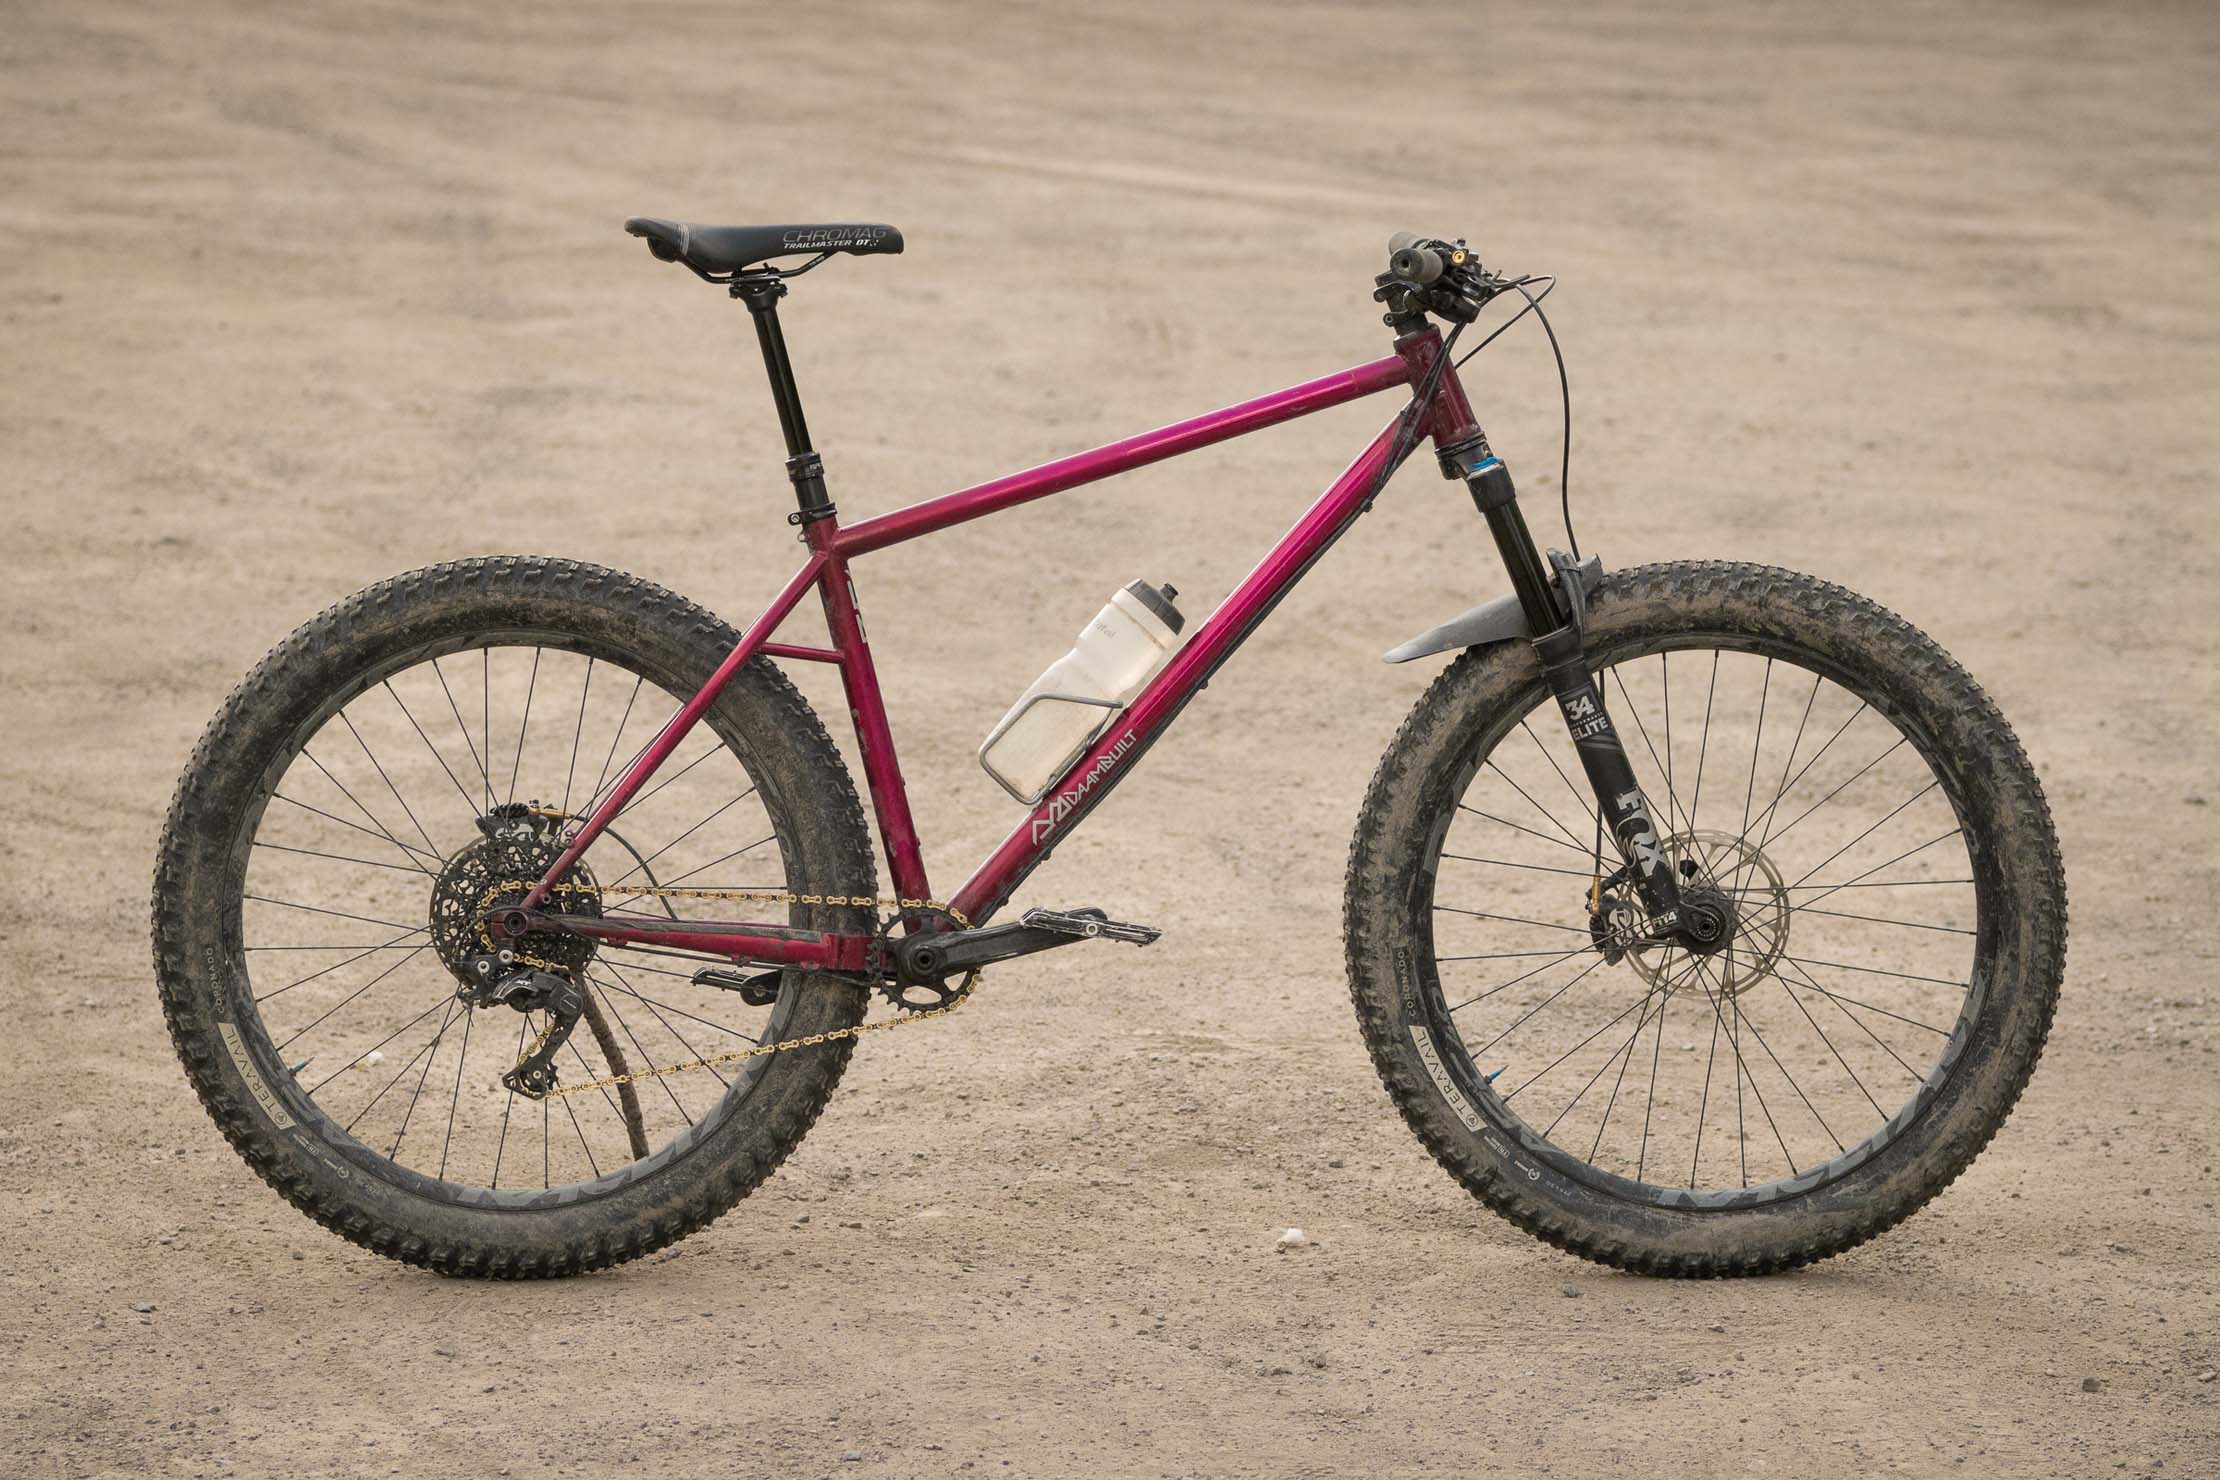
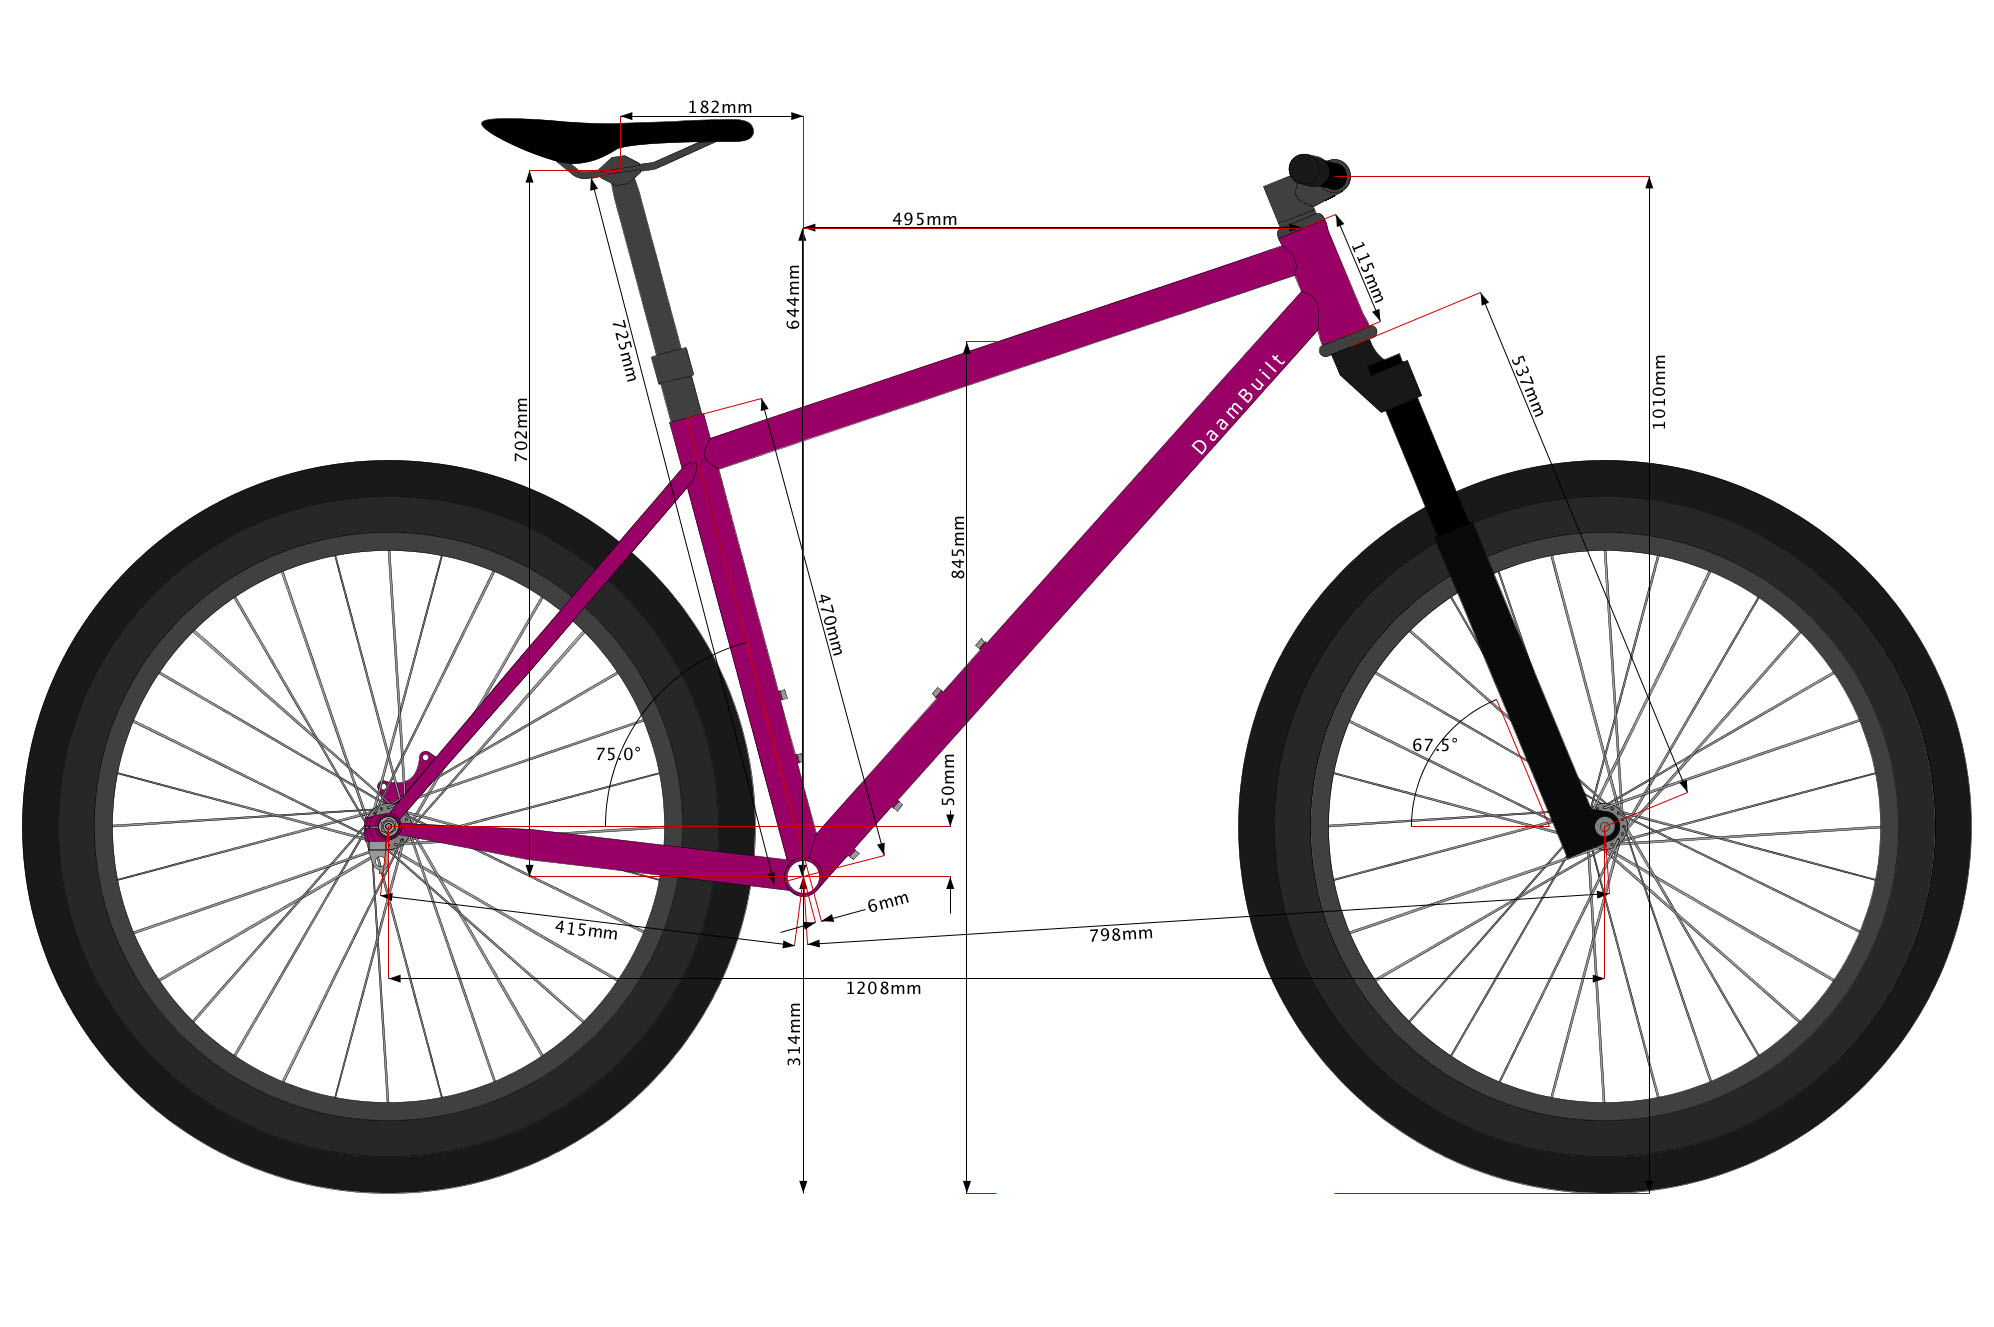
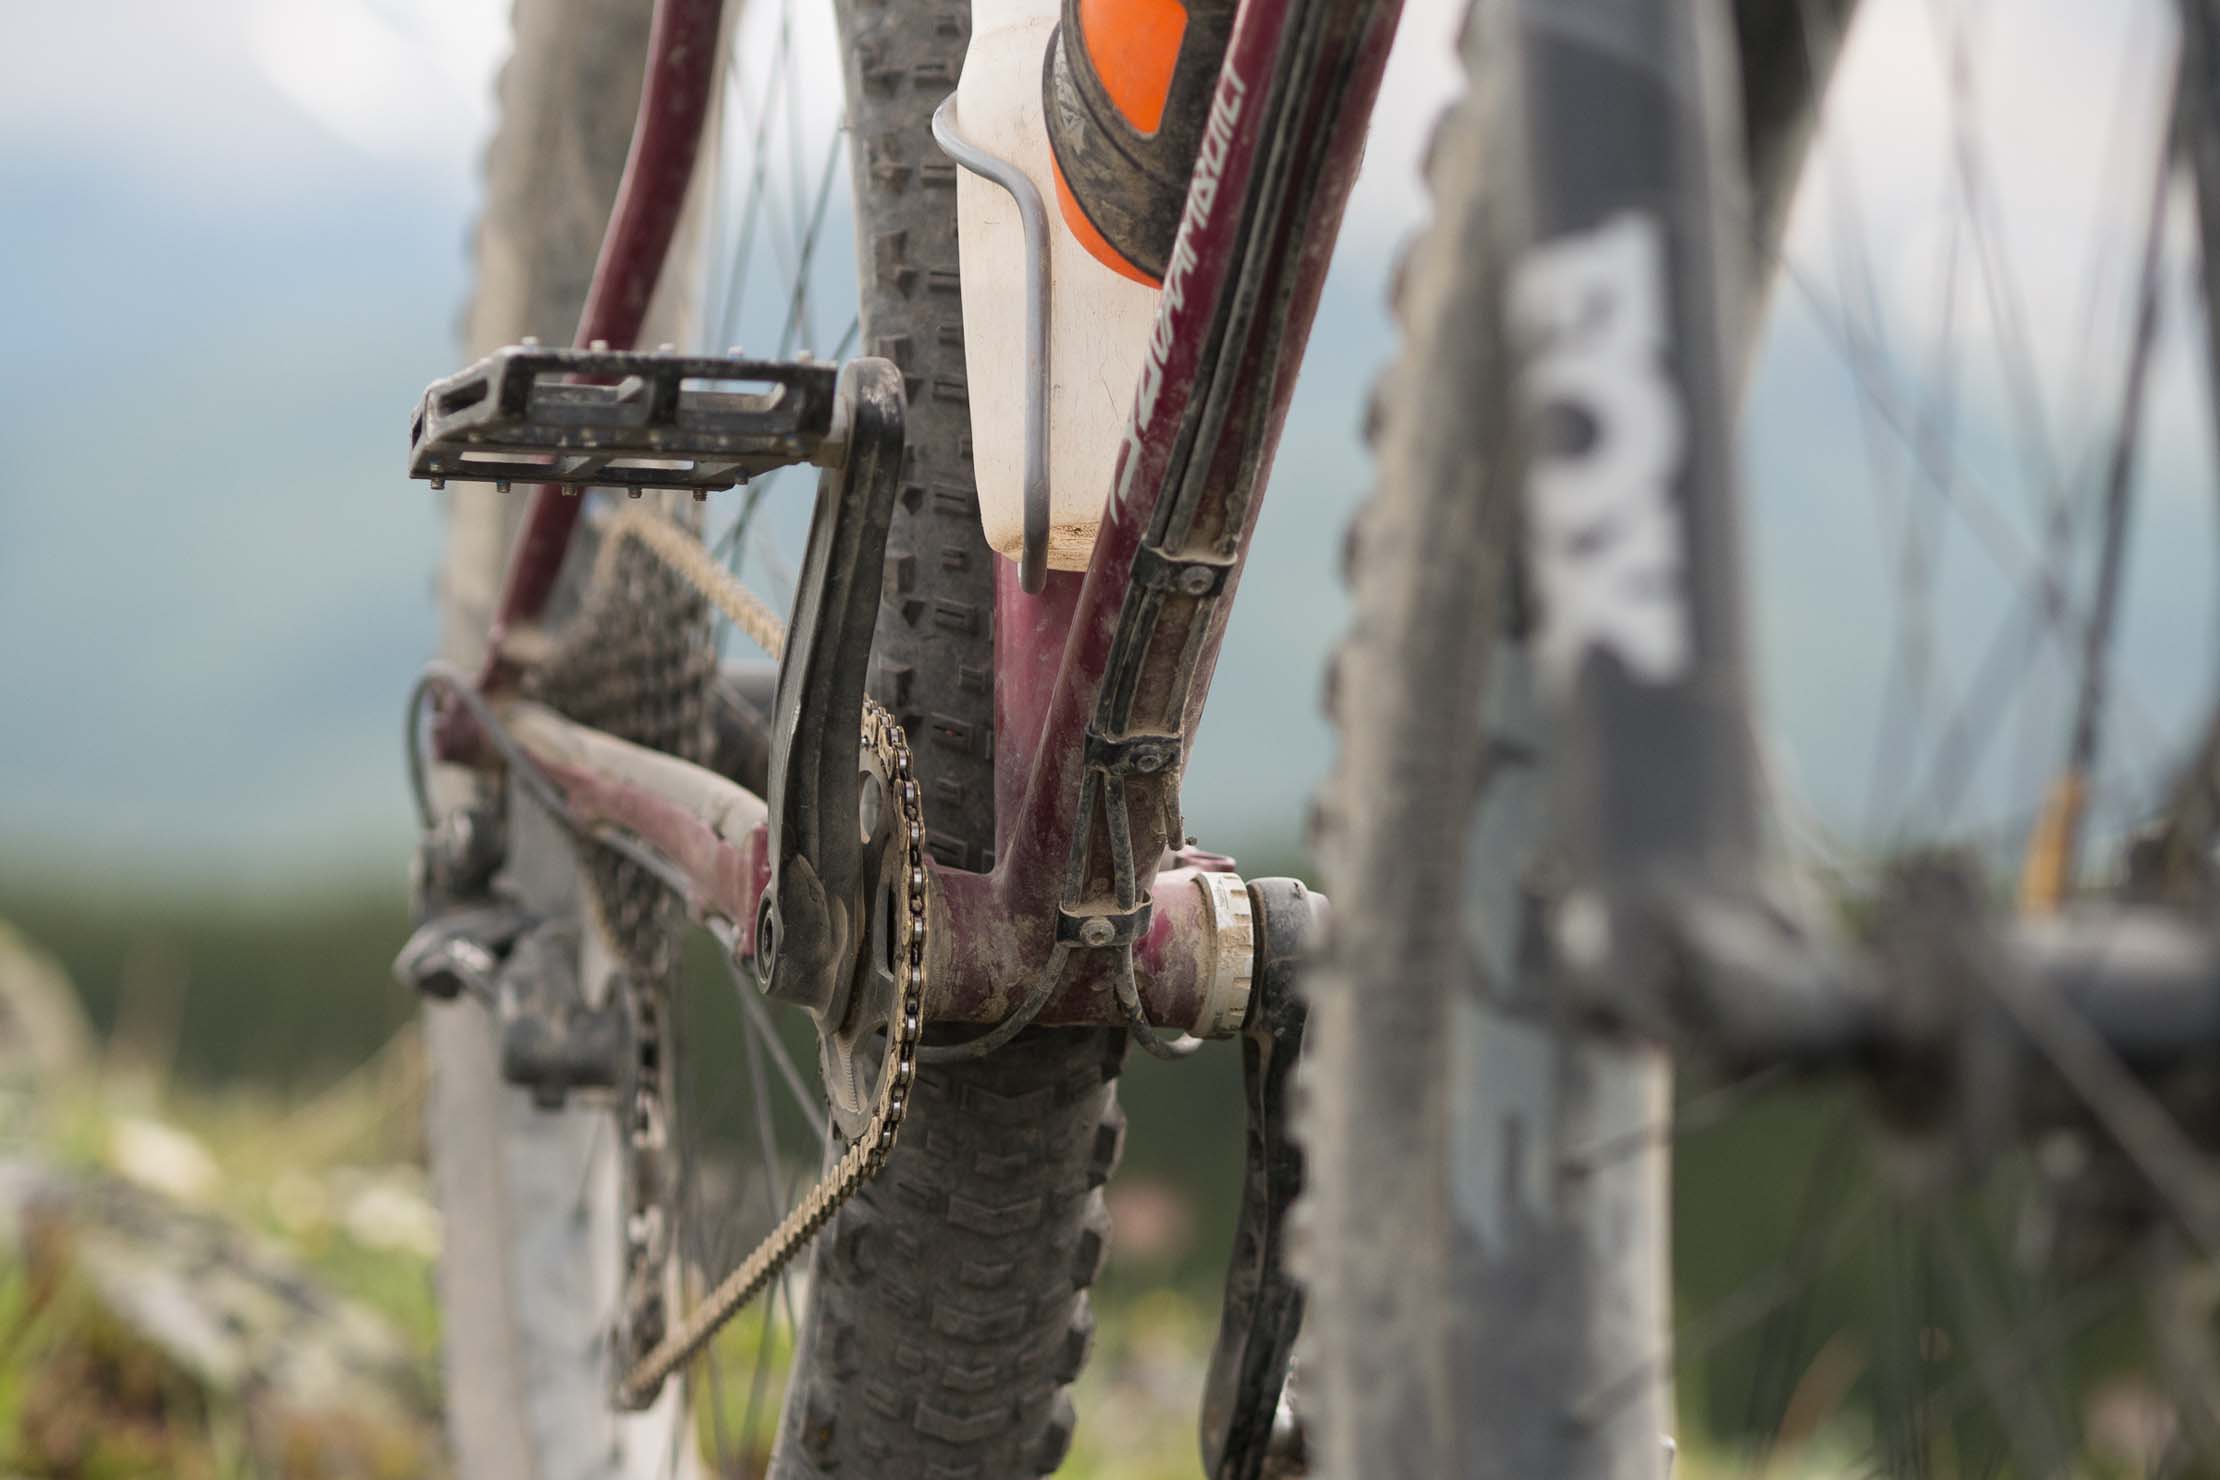
A low bottom bracket is desirable right up until the point that pedal strikes begin to hamper the ride. The aim with my custom DaamBuilt was to go as low as possible while eliminating pedal strikes, keeping in mind my preferred 170mm crank length and the fact that I intended to use a fast engagement freehub. Finding the BB height of the Kona Big Honzo too low, we aimed 5mm higher in the BB, while specing a 5mm shorter crank length, which adds up to a game-changing 10mm of extra ground clearance. The resulting BB drop of 50mm has proven perfect, suggesting that once tire sag is factored in, 27.5+ wheels are more similar in diameter to regular 27.5” wheeled bikes than they are to 29ers.

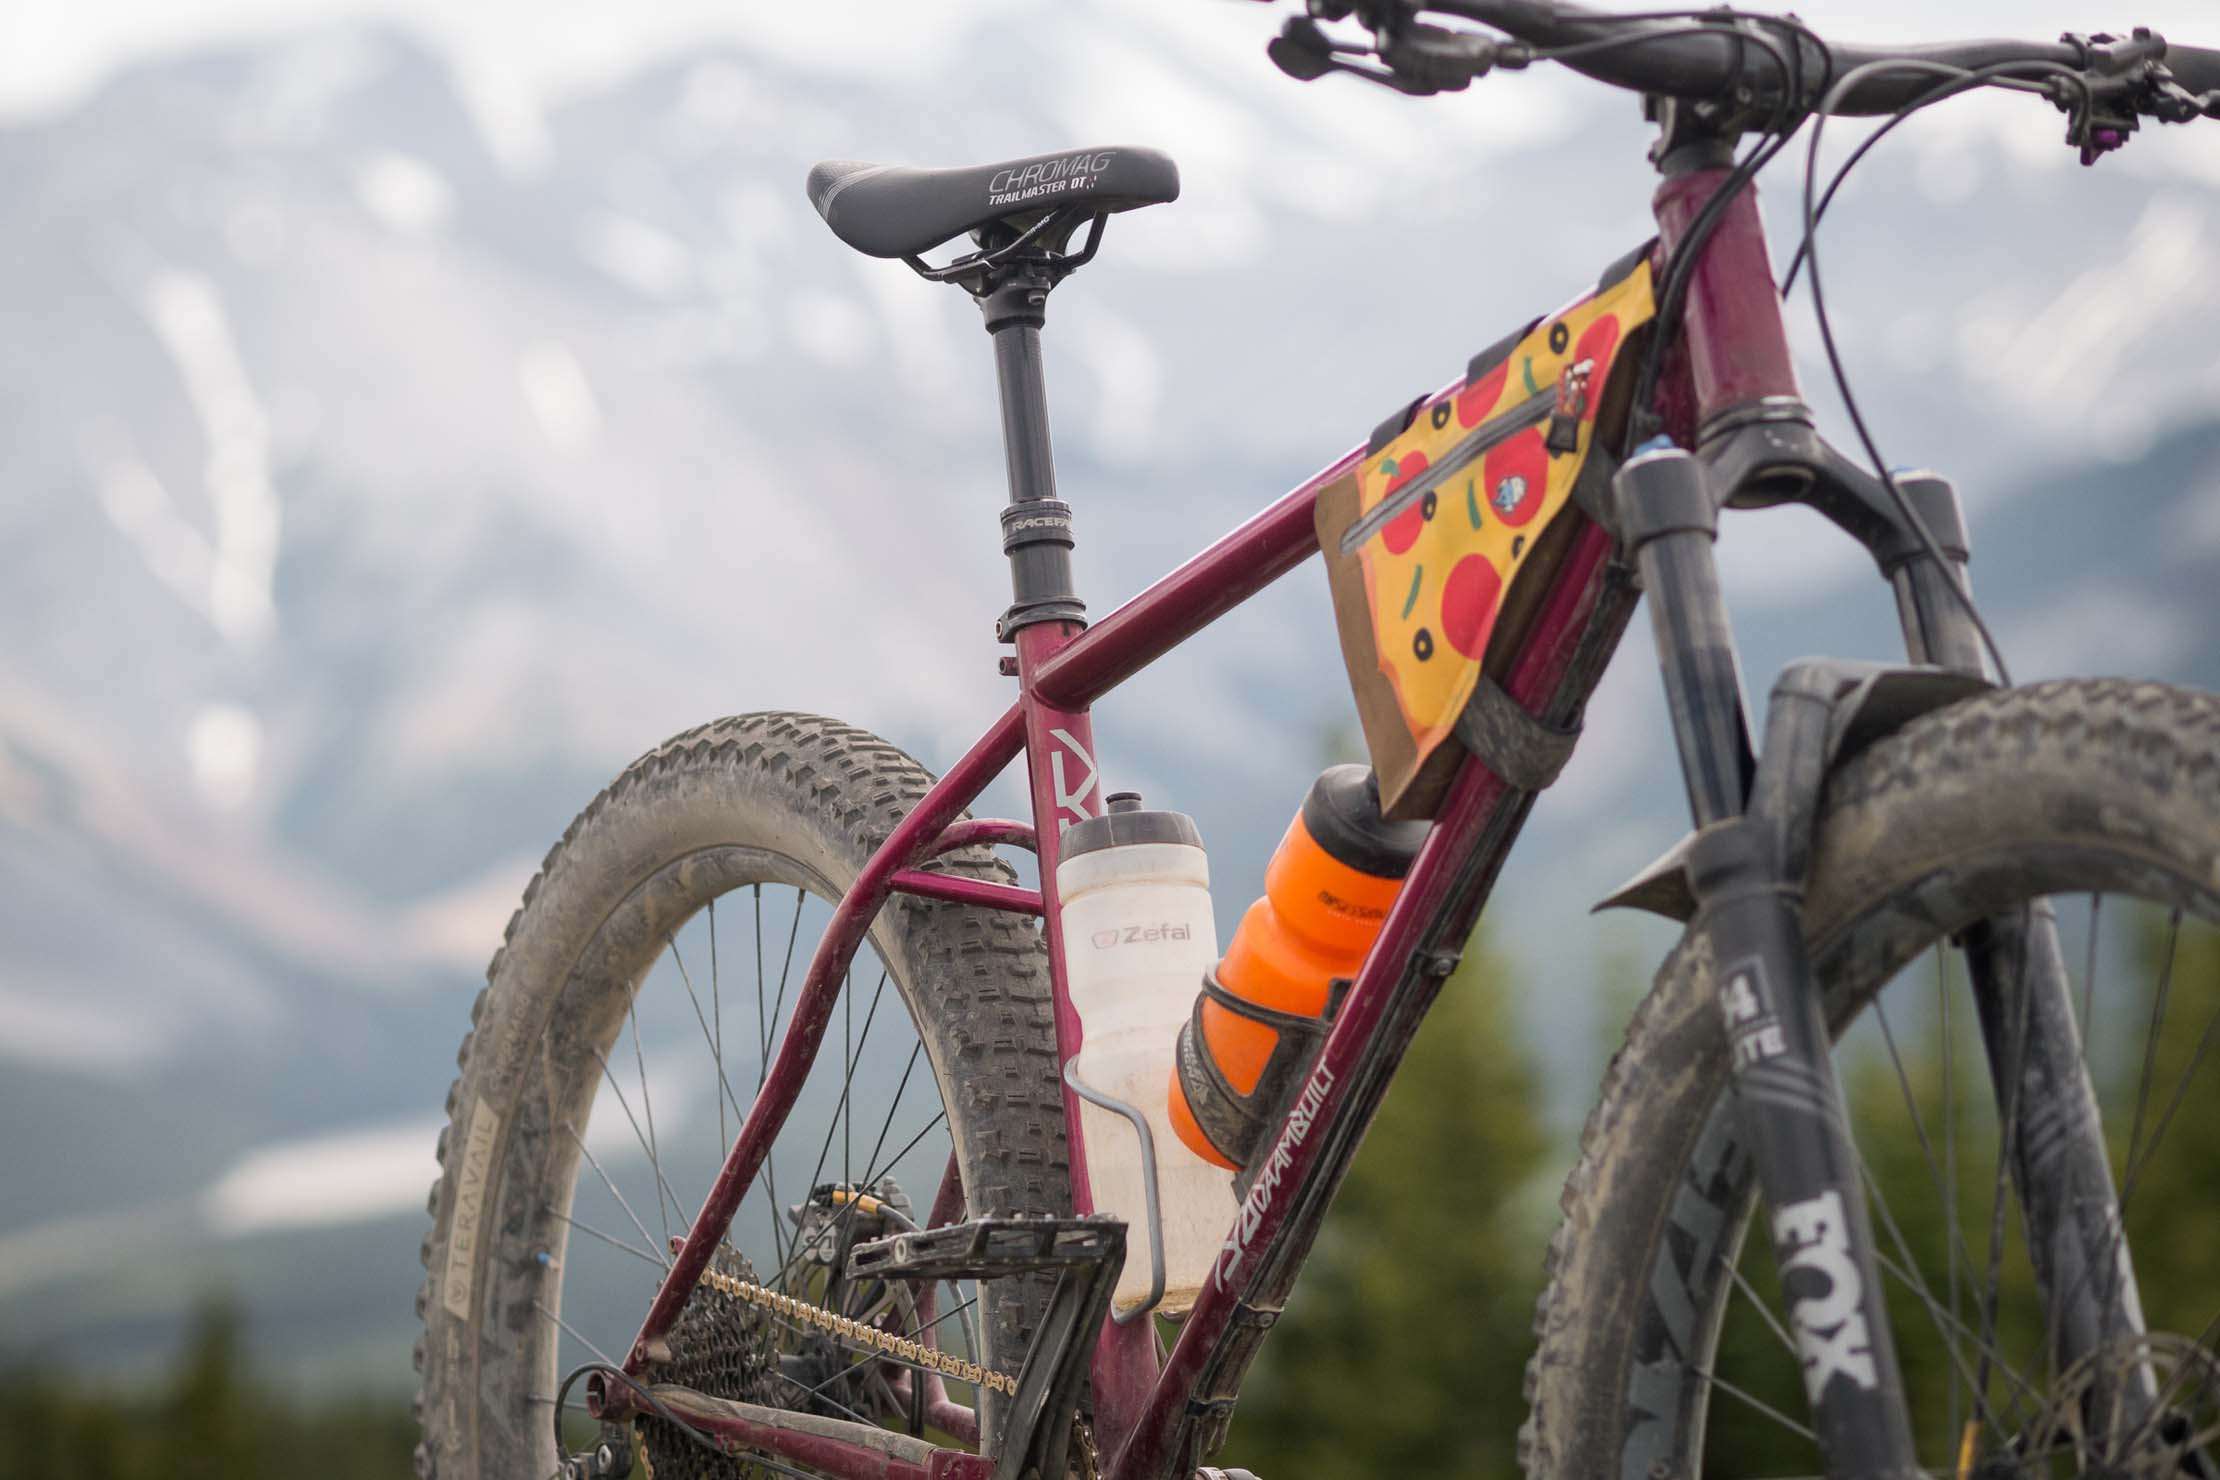
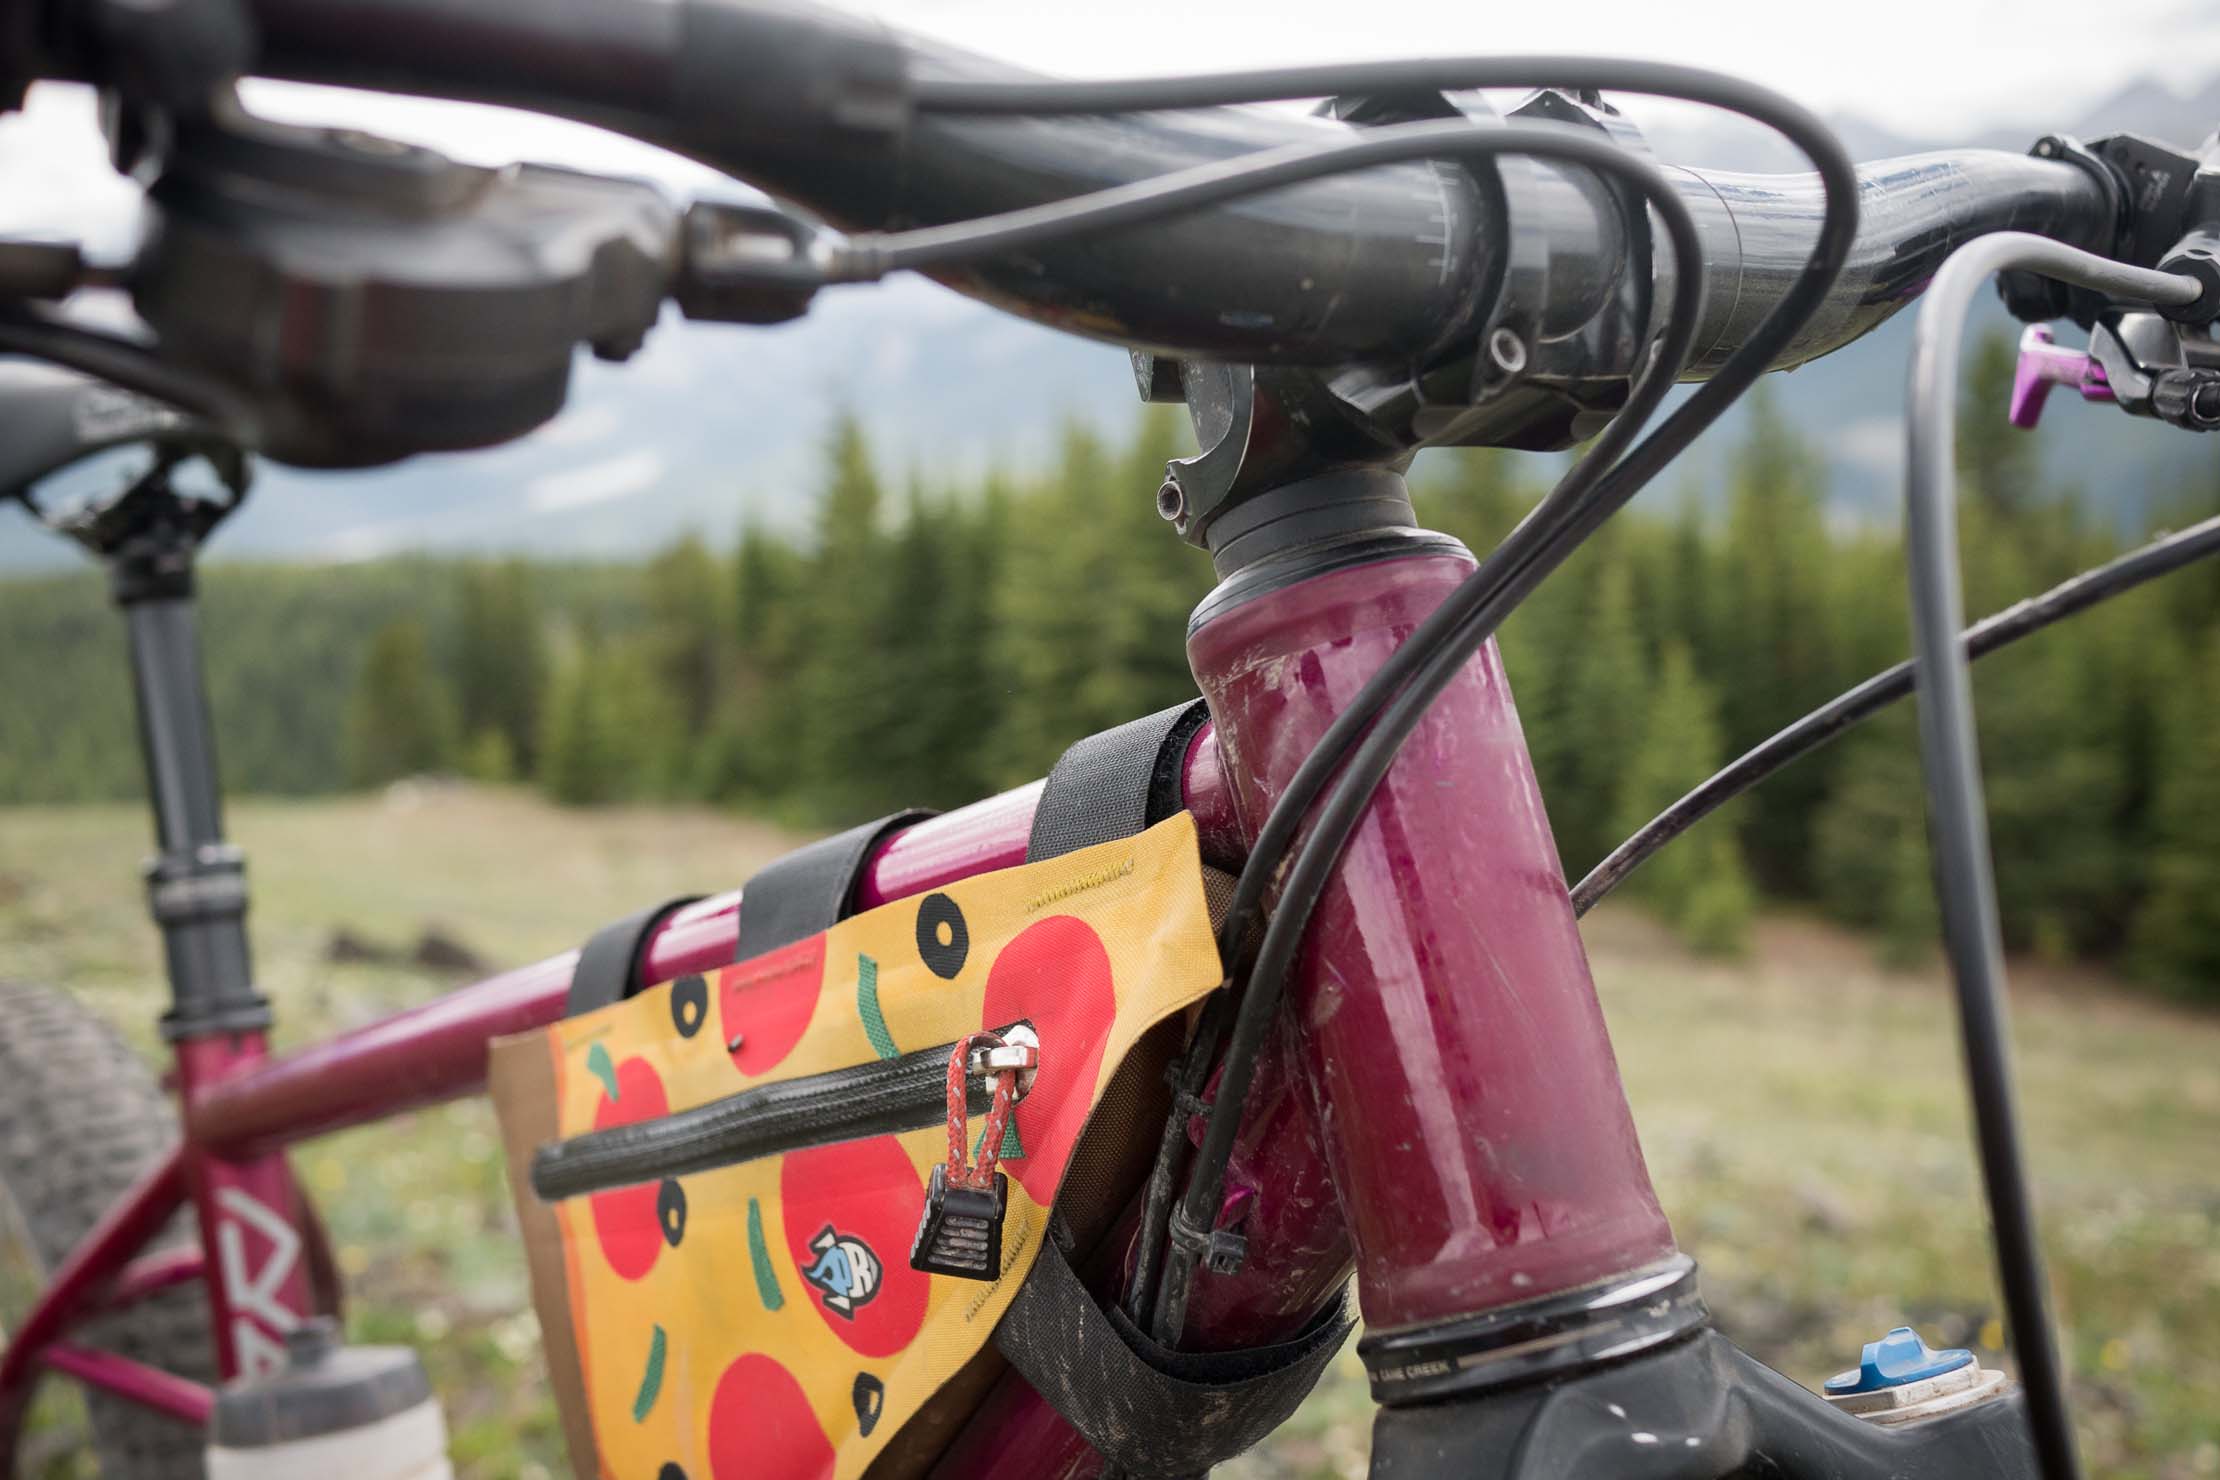
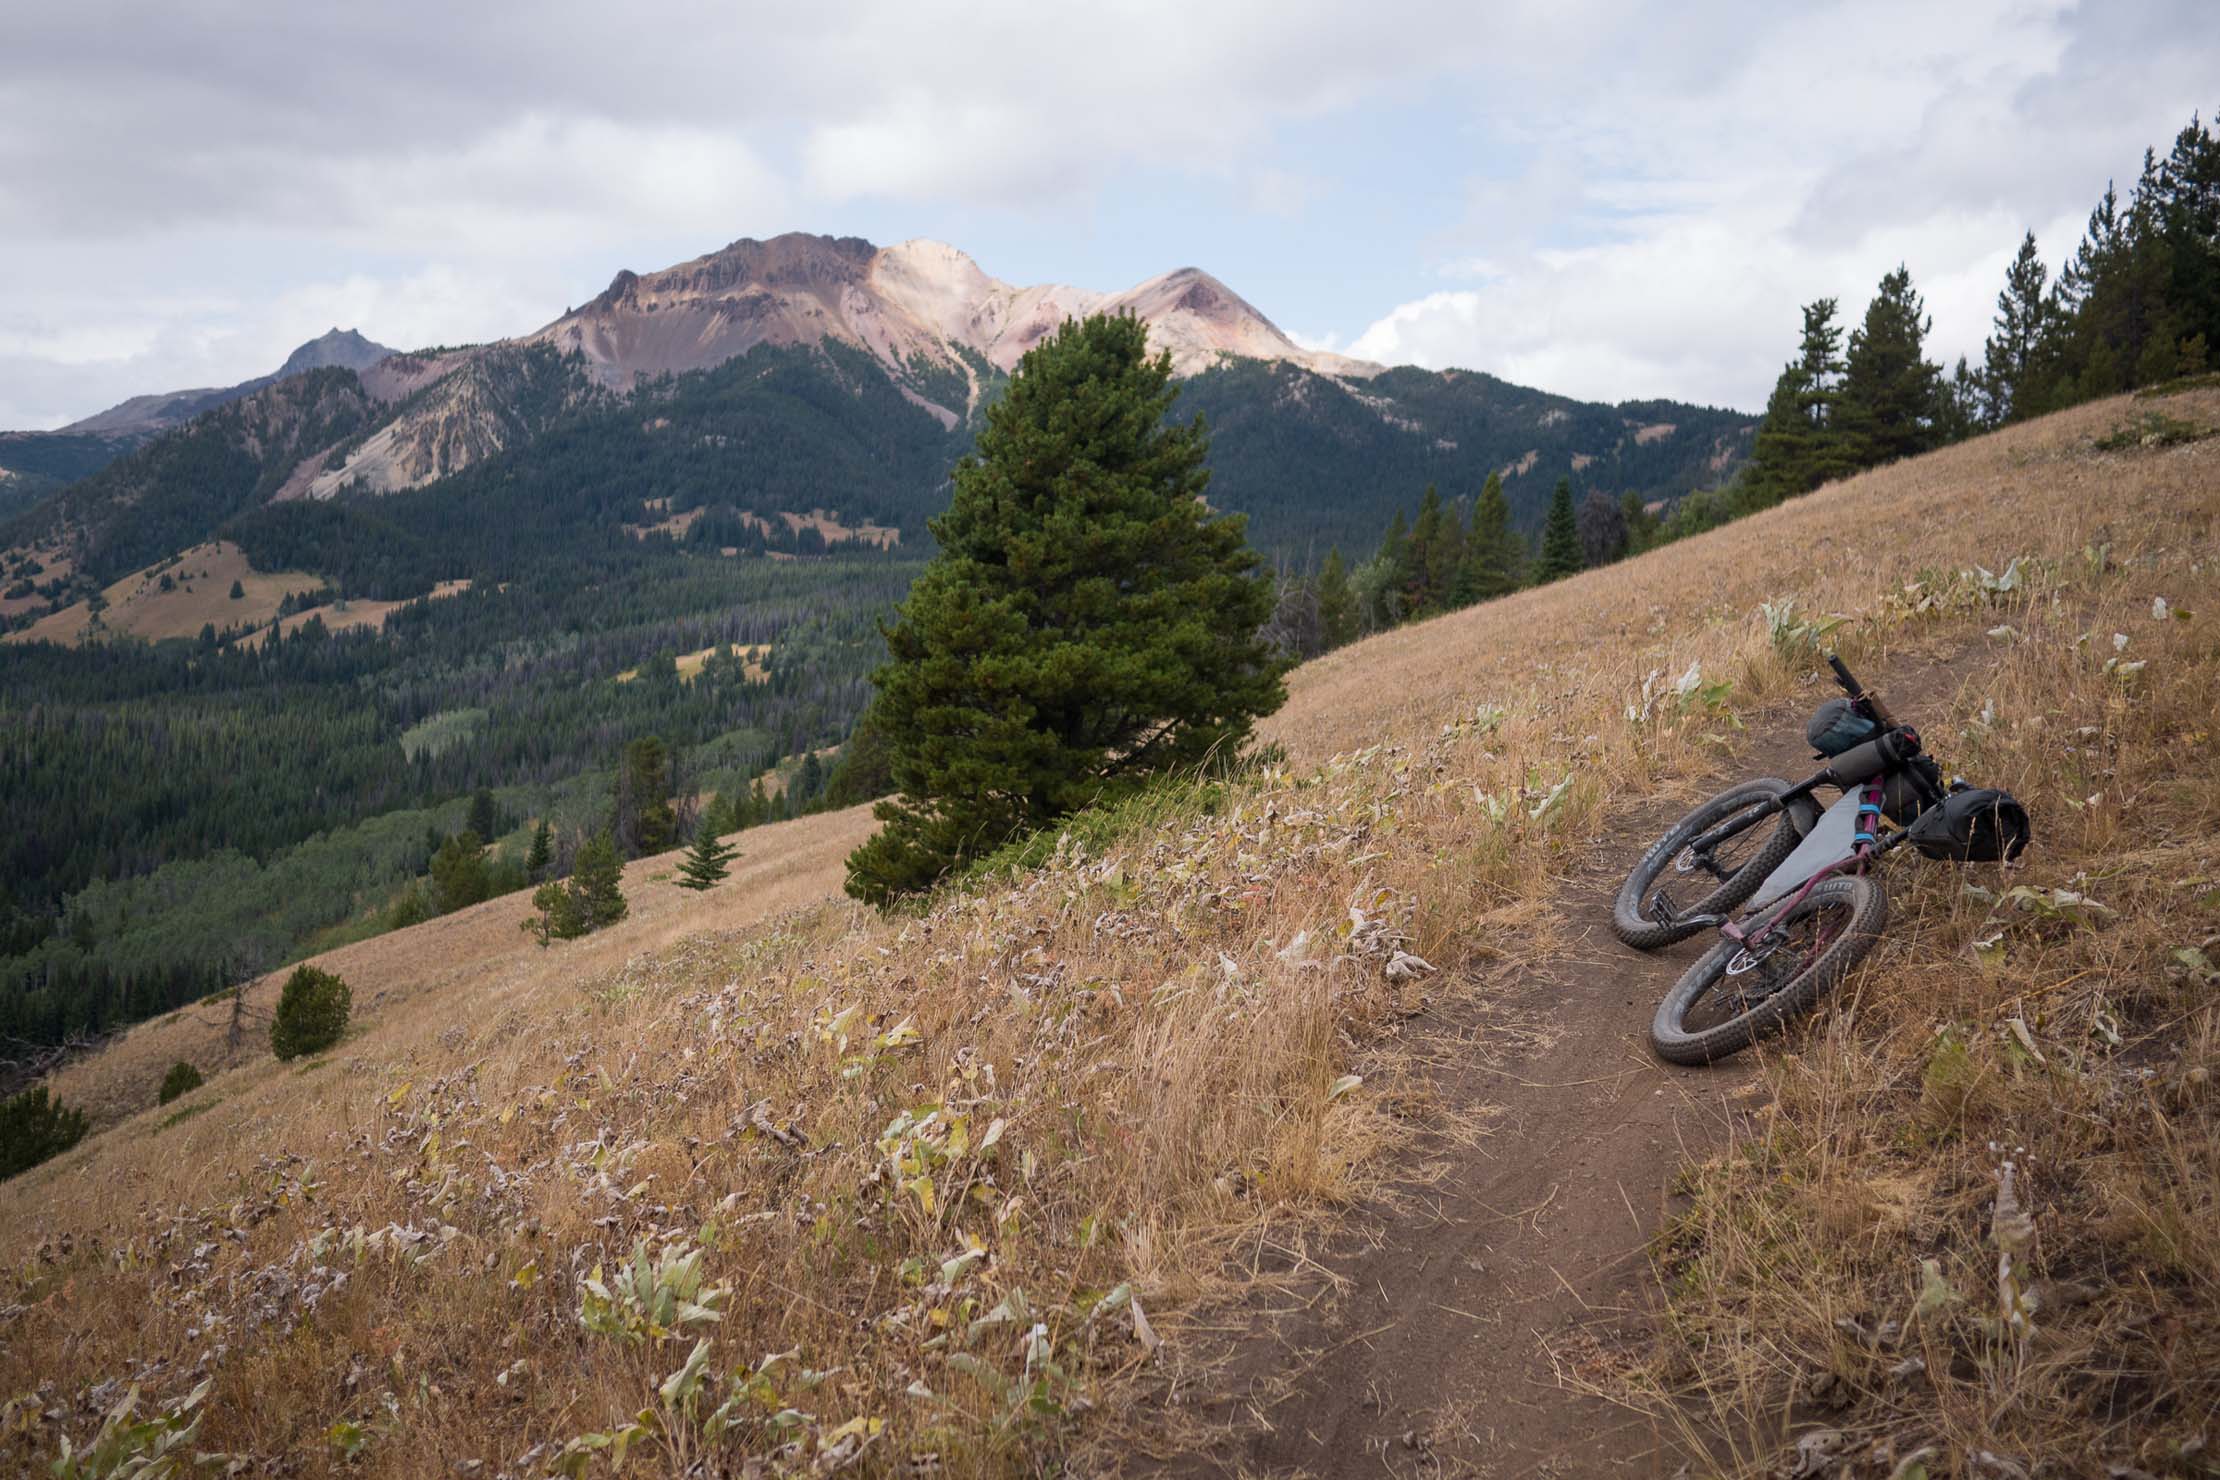
A third complaint of the current crop of non-custom trail hardtails is one that most bikepackers will be familiar with: there is no thought given to carrying luggage. Up to a certain point (where it might end painfully), I’m happy to trade standover height for additional frame bag space. Peter looked at how much seat post I’d need exposed to run a 150mm dropper to determine the length of the seat tube (allowing a bit of leeway for various droppers) and then ran the top tube as high as possible. As a result I can fit a cavernous frame bag, even paired with certain models of 175mm droppers.
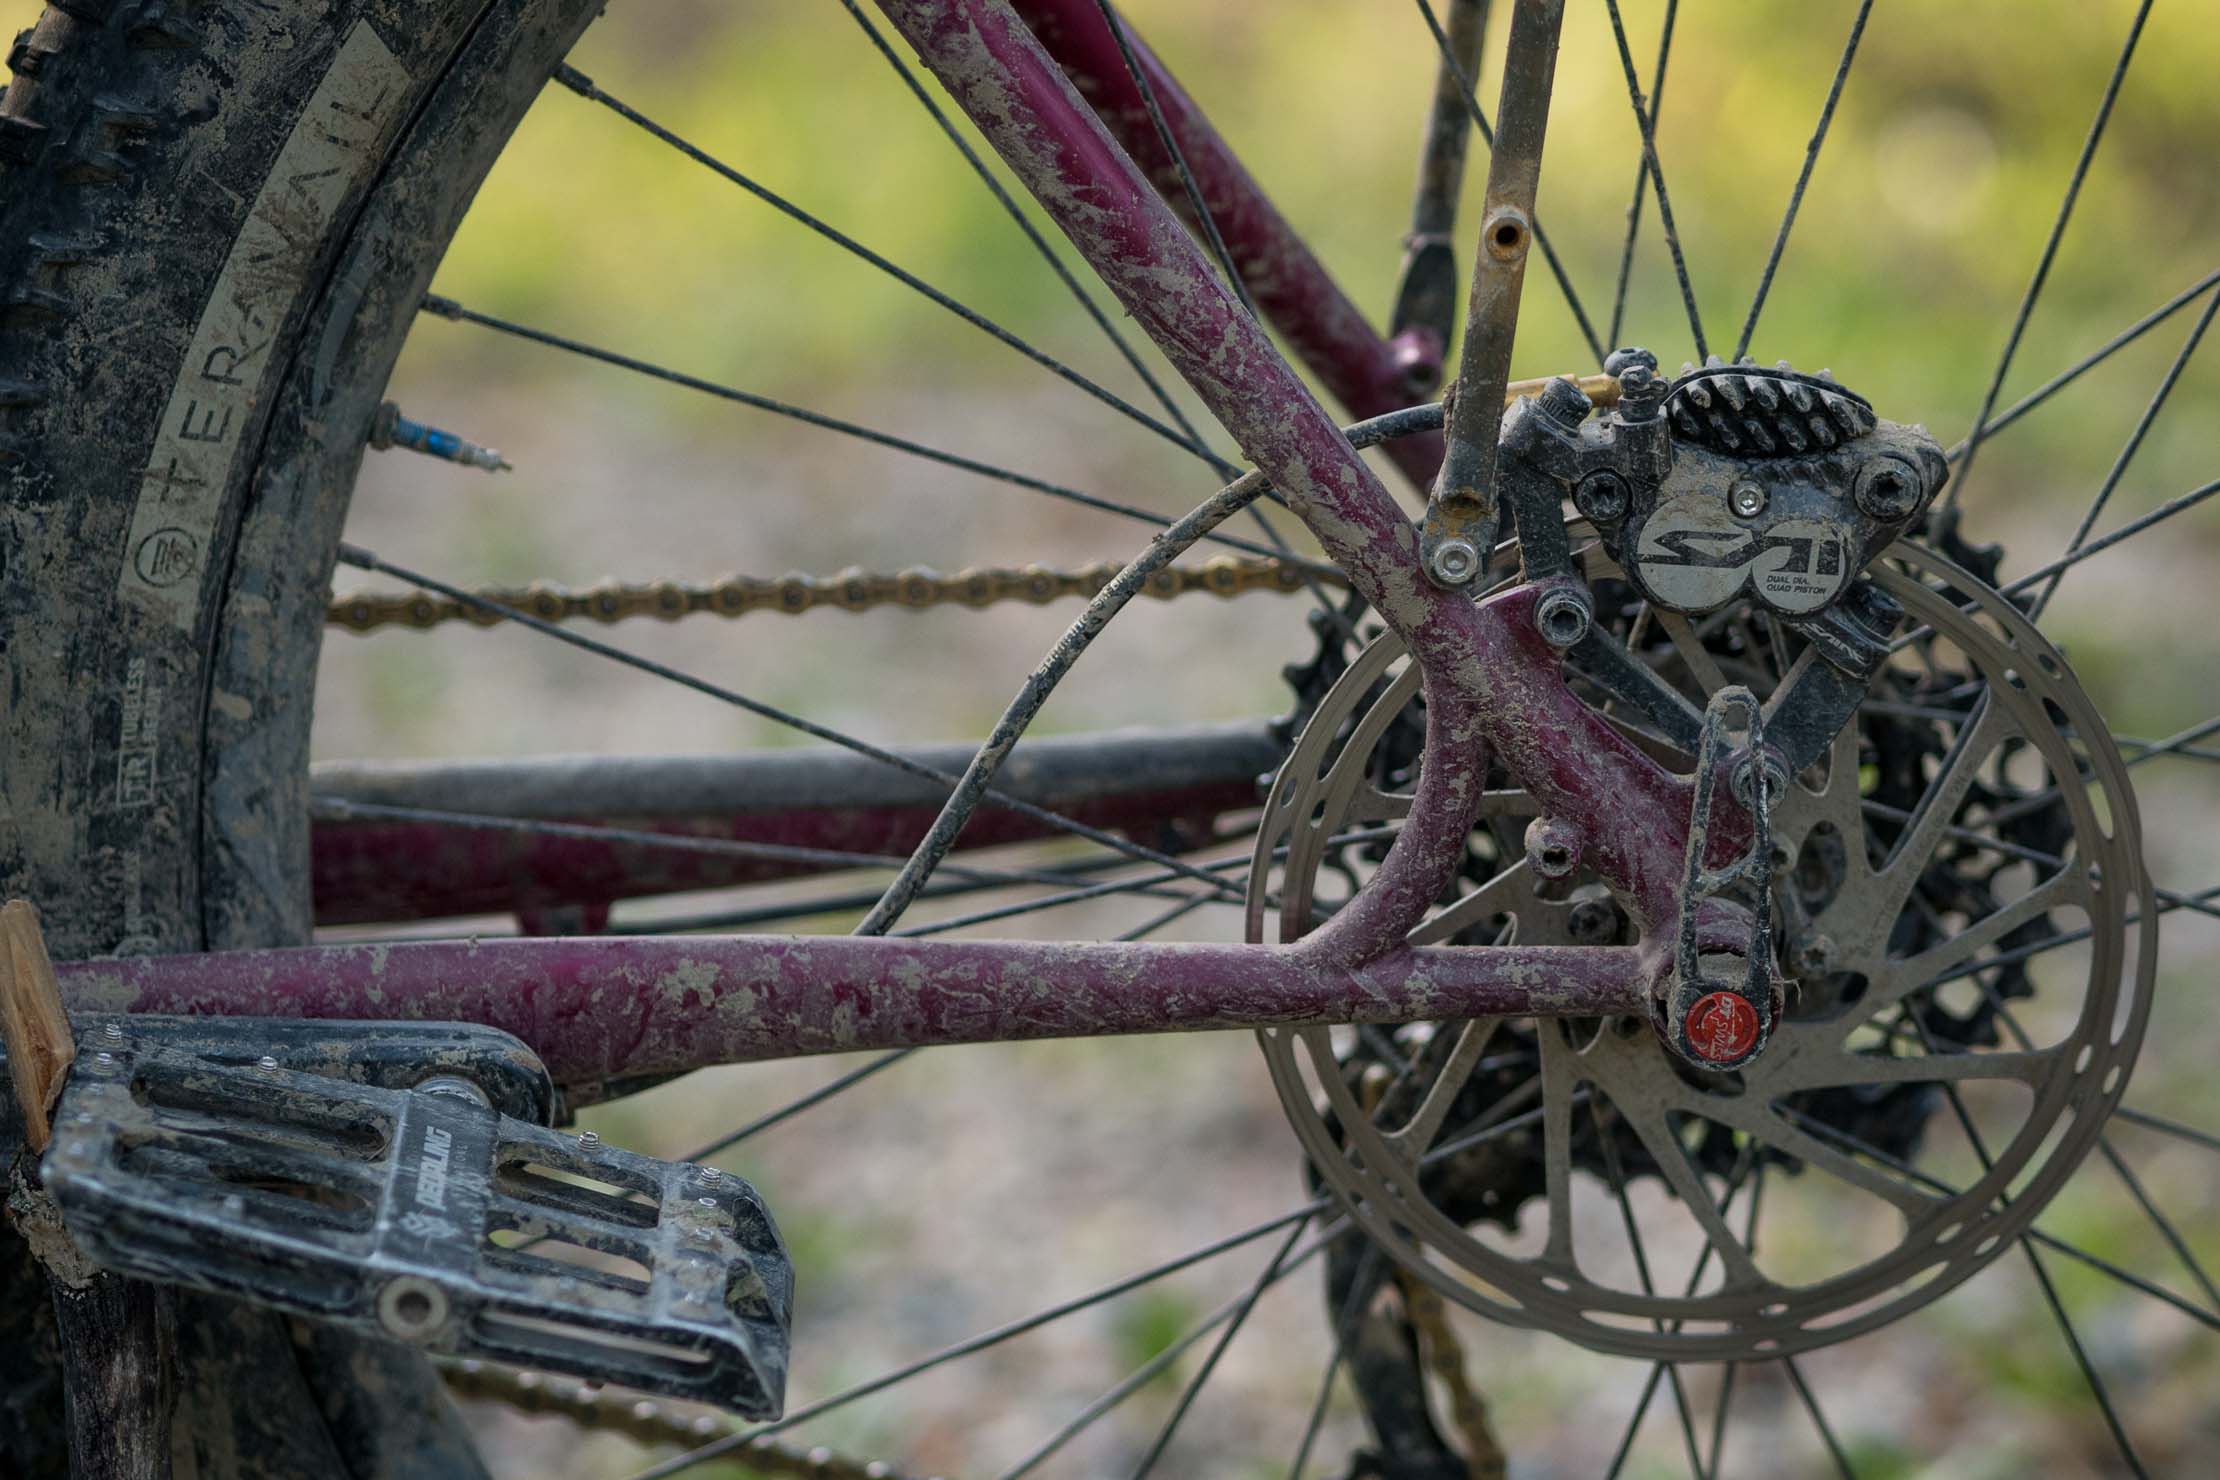
Additionally, there are three sets of water bottle braze-ons on the front triangle, two sets of rack mounts at the rear dropout that are spaced to fit additional bottle cages, and a direct mounting point for a Porcelain Rocket Mr. Fusion stabilized seat pack near the seat collar. Finally, because bikepacking on backcountry trails often involves lifting a loaded bike over logs and across creeks, I asked for a portage handle between the seat tube and drive-side chainstay.
Astute observers of bike geometry will probably still be wondering how this is different from a Kona Big Honzo. Here are some of the ways:
- 5mm higher bottom bracket height
- Seat tube angle is significantly steeper (nominally the same, but since the Honzo has a kink in the seat tube, my seat clamp lands 12mm further forward in space, similar to a Chromag Surface)
- Custom sizing lands between size L and XL, with 495mm reach
- Designed around 130-140mm travel fork
- Threaded bottom bracket, despite 415mm chainstay length
- Way more frame bag space
- Cable routing optimized for use with bikepacking bags
- Portage handle for lifting the bike with a frame bag installed
- Variety of rack and bottle mounts
The Kona I reviewed has inspired a lot of the ideas behind my custom DaamBuilt, but all these subtle differences add up to something distinct. And, after hundreds of hours on this bike, there is almost nothing I’d change.
The only thing I regret is the fact that 44mm to 56mm tapered head tubes, for zero-stack headsets, are still not readily available to custom builders. The 44/56mm zero-stack headset standard is desirable because it allows for a lower stack height while maintaining the same head tube length. The shorter the head tube, the greater the leverage on the head tube from the fork. Based on my 185lb weight and my history of breaking bikes, Peter determined that it would be imprudent to go any shorter than a 115mm head tube.
Had we been able to source a 44/56mm tapered head tube, it would have been possible to achieve my desired bar height with a 140-150mm travel fork without changing the geometry. The 12mm currently taken up by the lower headset cup could instead become extra fork travel. Alas, we were forced to settle for the classic 44mm straight headtube, so I chose to go with a shorter 130mm fork rather than compromising my desired riding position.
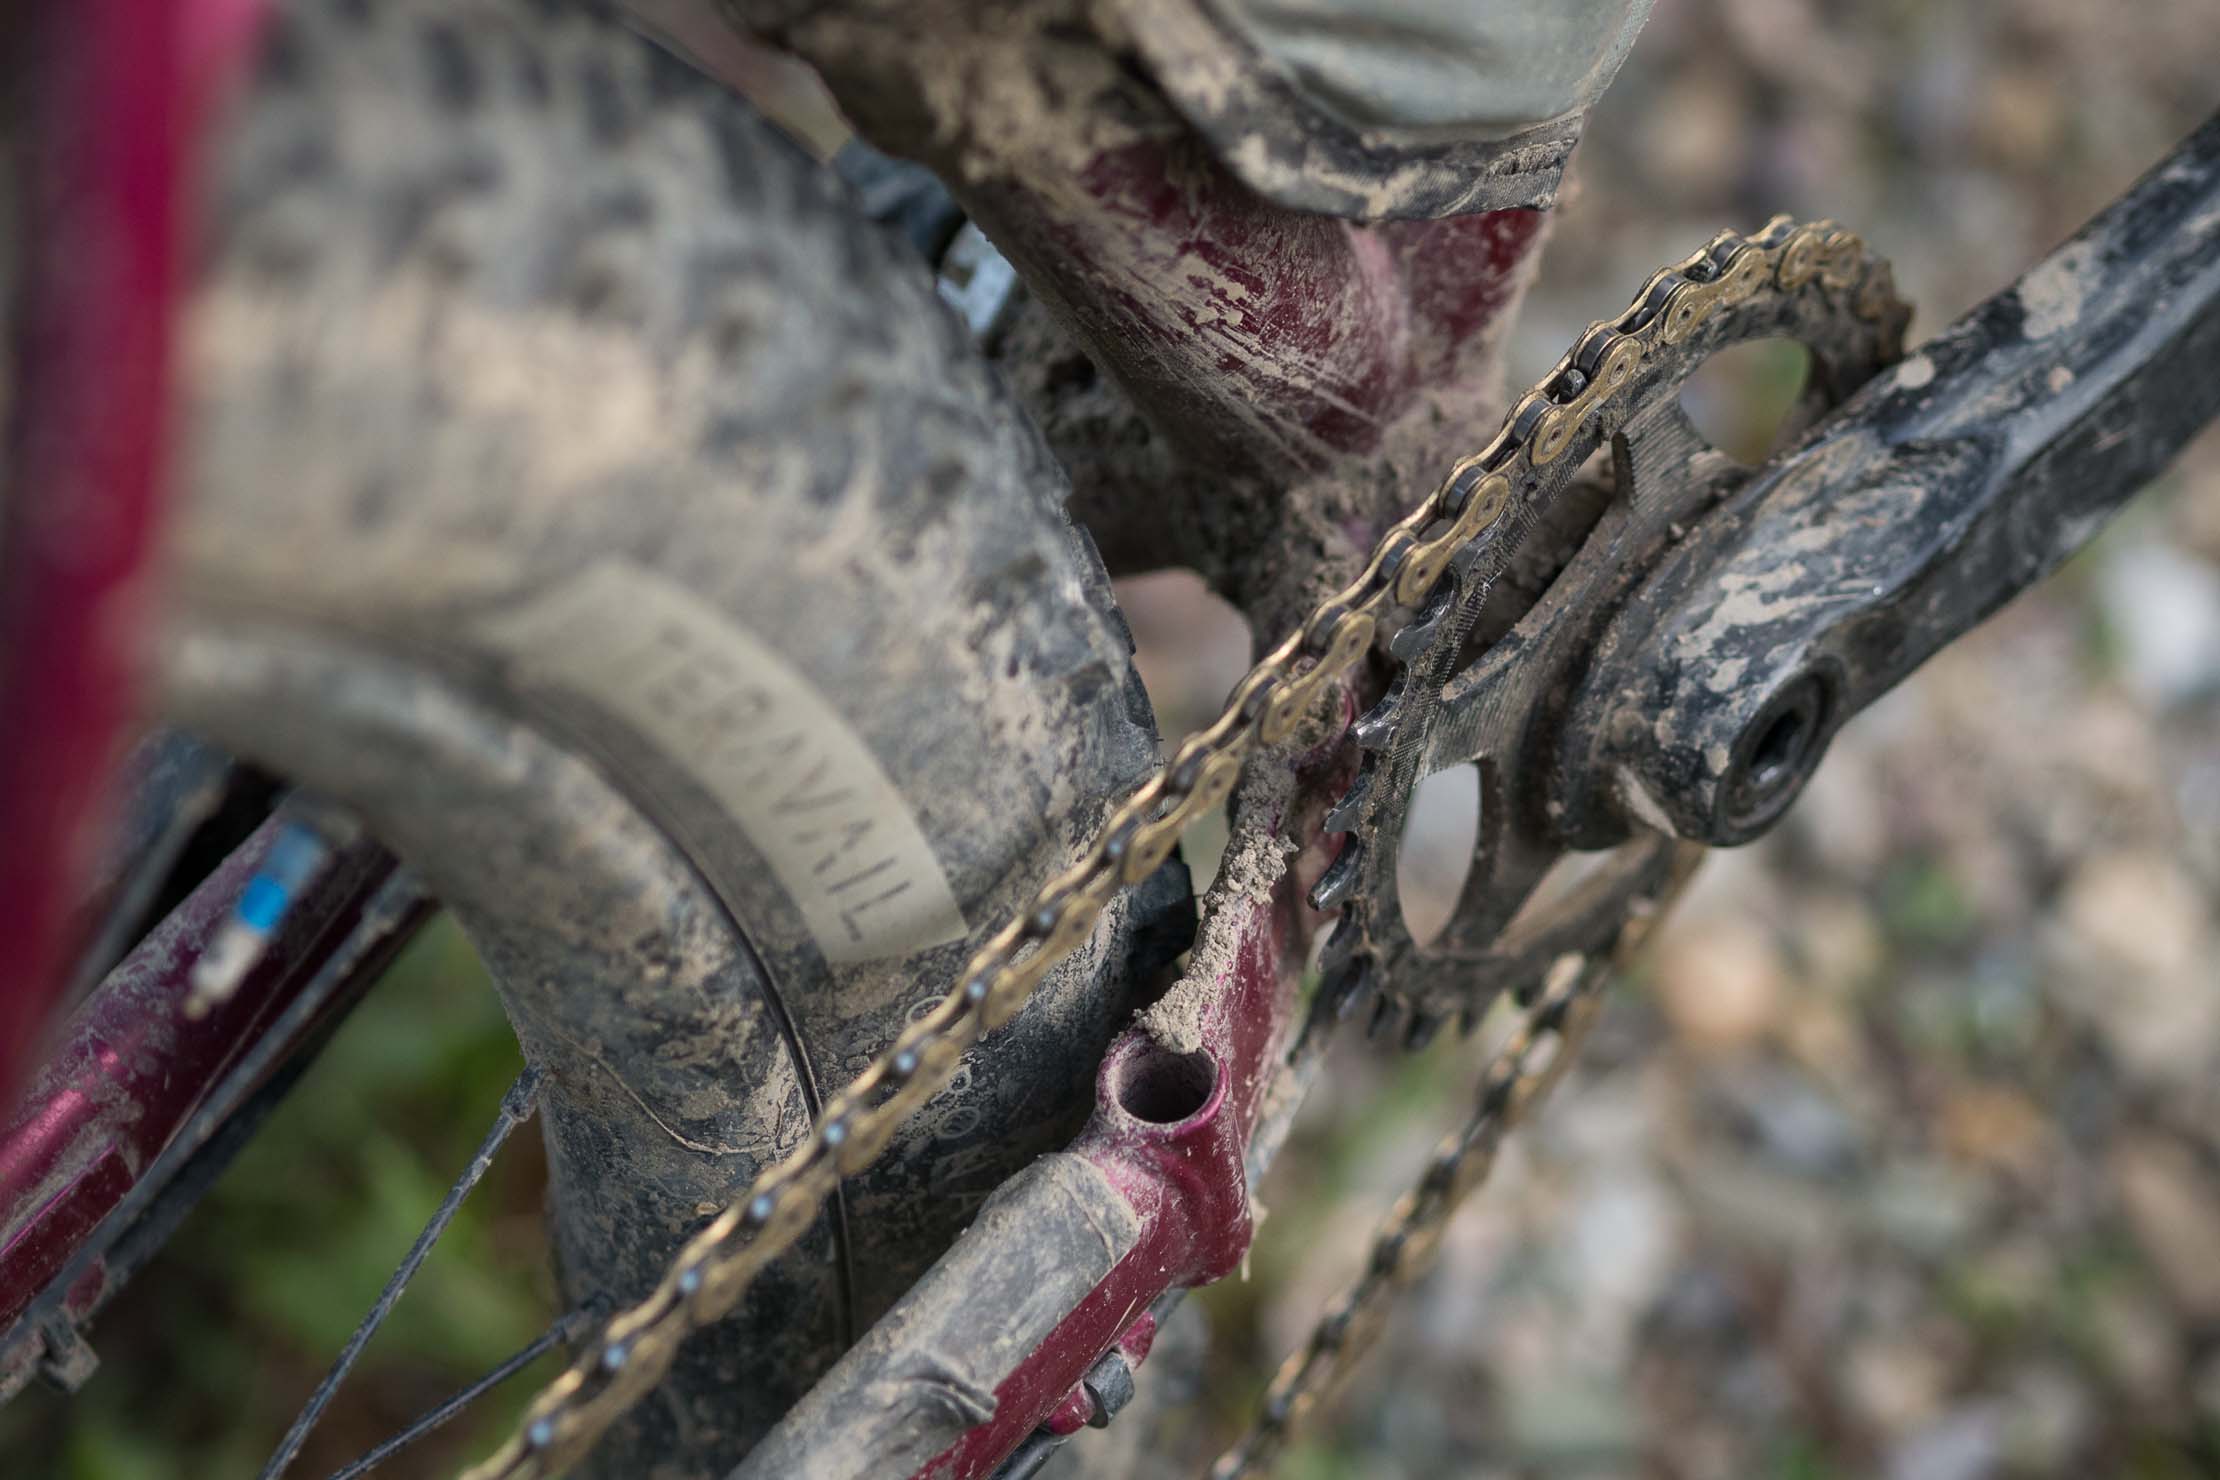
The main design challenge, however, was finding a way to fit 27.5 x 3.0” tires inside 415mm chainstays with a threaded bottom bracket. The area around the bottom bracket, chainring, crank arms, and chainstays gets very tight when everything is squished together by a short rear end. For everything to work, each millimeter must be accounted for. Fortunately, Peter Daam’s CAD-intensive approach leaves nothing to chance, and he concluded that with a simple half yoke he could make it all fit. The frame was delivered with the exact geometry we had planned.

The Build
I won’t dig too deep into my component choices, because with a couple exceptions, it’s nothing particularly unusual. This bike will continue to be my test rig for reviewing various components, as well as testing ideas in my new role as a bag maker and designer. As such, there have been near constant changes to the build in the year and a half that I’ve owned it. Generally, the parts were chosen on an entirely utilitarian basis, as I sought what I like to refer to as “affordable excellence”.
After many years on a Rohloff, I have happily made the move to an affordable, mixed 1×11 drivetrain, which we’ve dubbed “The People’s Liberation Drivetrain”. The fork was the best I could find for the price – a take-off purchased on the used market. The rims were chosen based on prior positive experiences and their competitive price. I already owned the gorgeous Easton/Race Face cockpit pieces, and in fact the frame fit was established with these in mind. I realize none of these parts are truly budget components, but by shopping sale items and browsing the used market, I was able to piece together a high-end and very durable build that has thus far provided very good value.
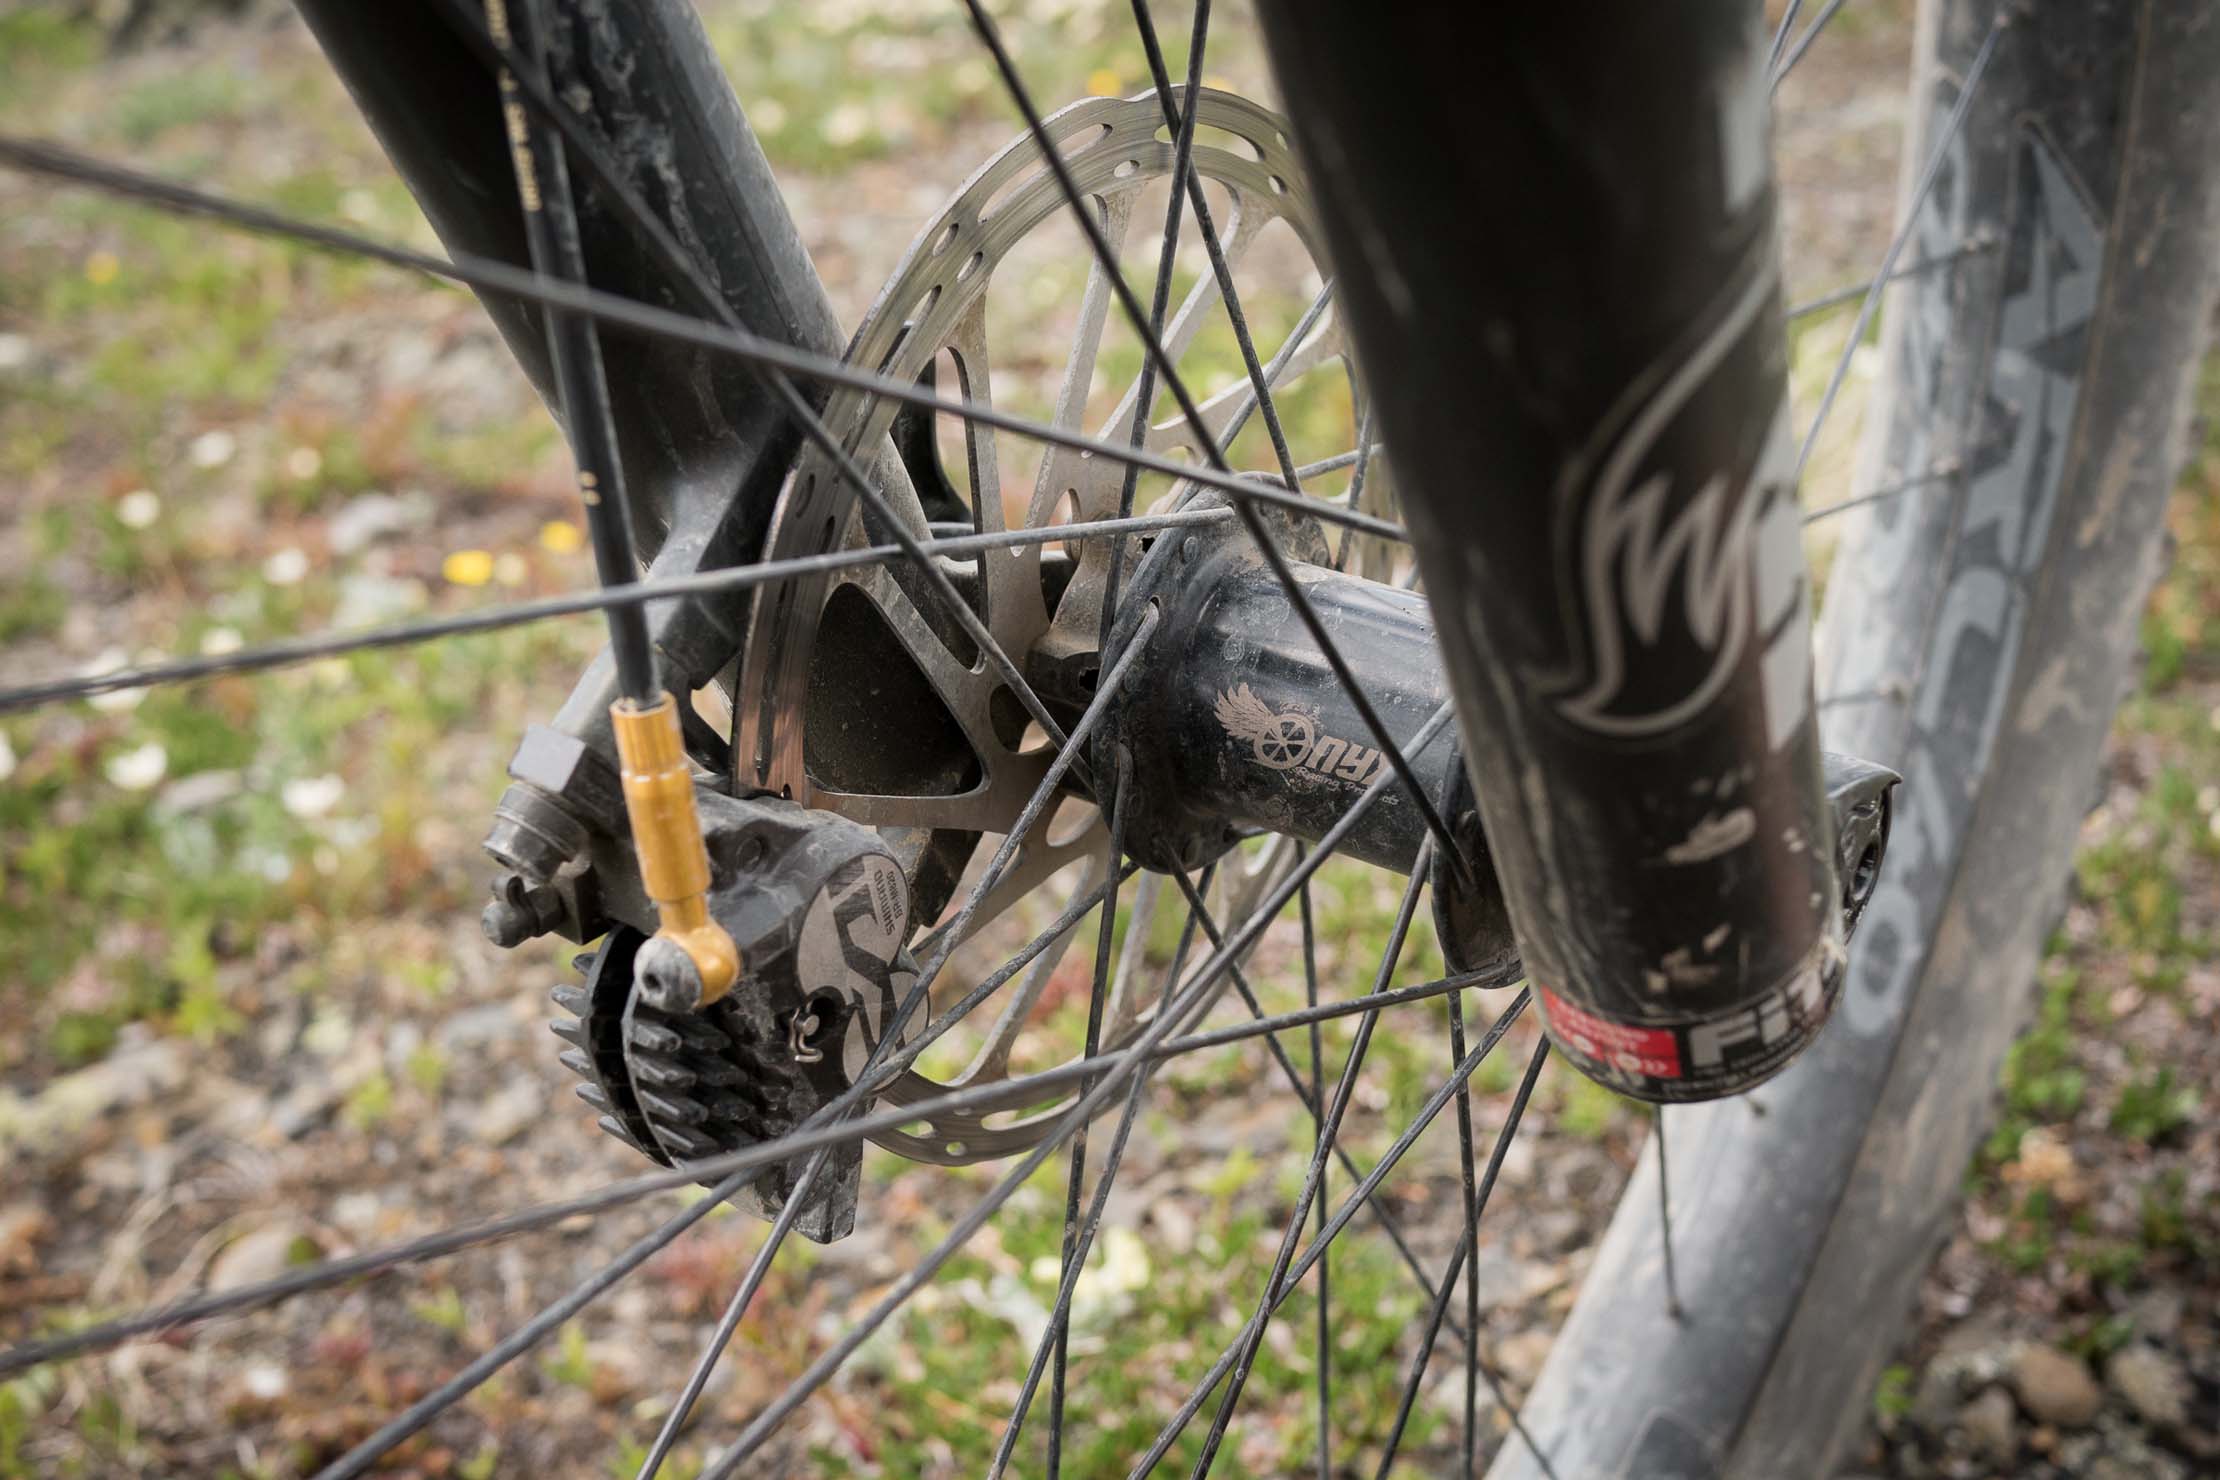
The real bling is well hidden in the Onyx hubs and Shimano Saint brakes. Bike manufacturers usually hide lower-end specs on complete bikes in brakes and hubs, even if they are some of the most critical places for reliability on a bikepacking rig. On that tangent, tires are also often under-specced on complete plus bikes to try to make a bike look lighter, even if lightweight casing tires are probably singularly responsible for the lack of popularity of plus tires among mountain bikers (and the many poor reviews they’ve received in mainstream mountain bike media). While supple casings excel on smooth surfaces, the feel and support of a reinforced casing is key when it comes to cornering on rougher surfaces.
I’ve had so many bad brake experiences, with the exception of an old set of Shimano M810 Saint brakes, that I finally shielded my eyes and paid an ungodly amount for new Shimano M820s. They’re just so good. In British Columbia, where we’ve unexpectedly unearthed 1,000m+ double-black level descents while bikepacking in the Coast Mountains, there’s simply no substitute. I won’t try to tell anyone that they need top-of-the-line downhill racing brakes for their bikepacking bike, but my experience with brakes has slowly taught me to “buy nice, or buy twice”. Mechanical disc brakes are popular among cycle tourists, but I’ve had even more frustration from mechanical brakes than hydros, and Shimano hydraulic brakes have proven much, much more reliable in my experience.
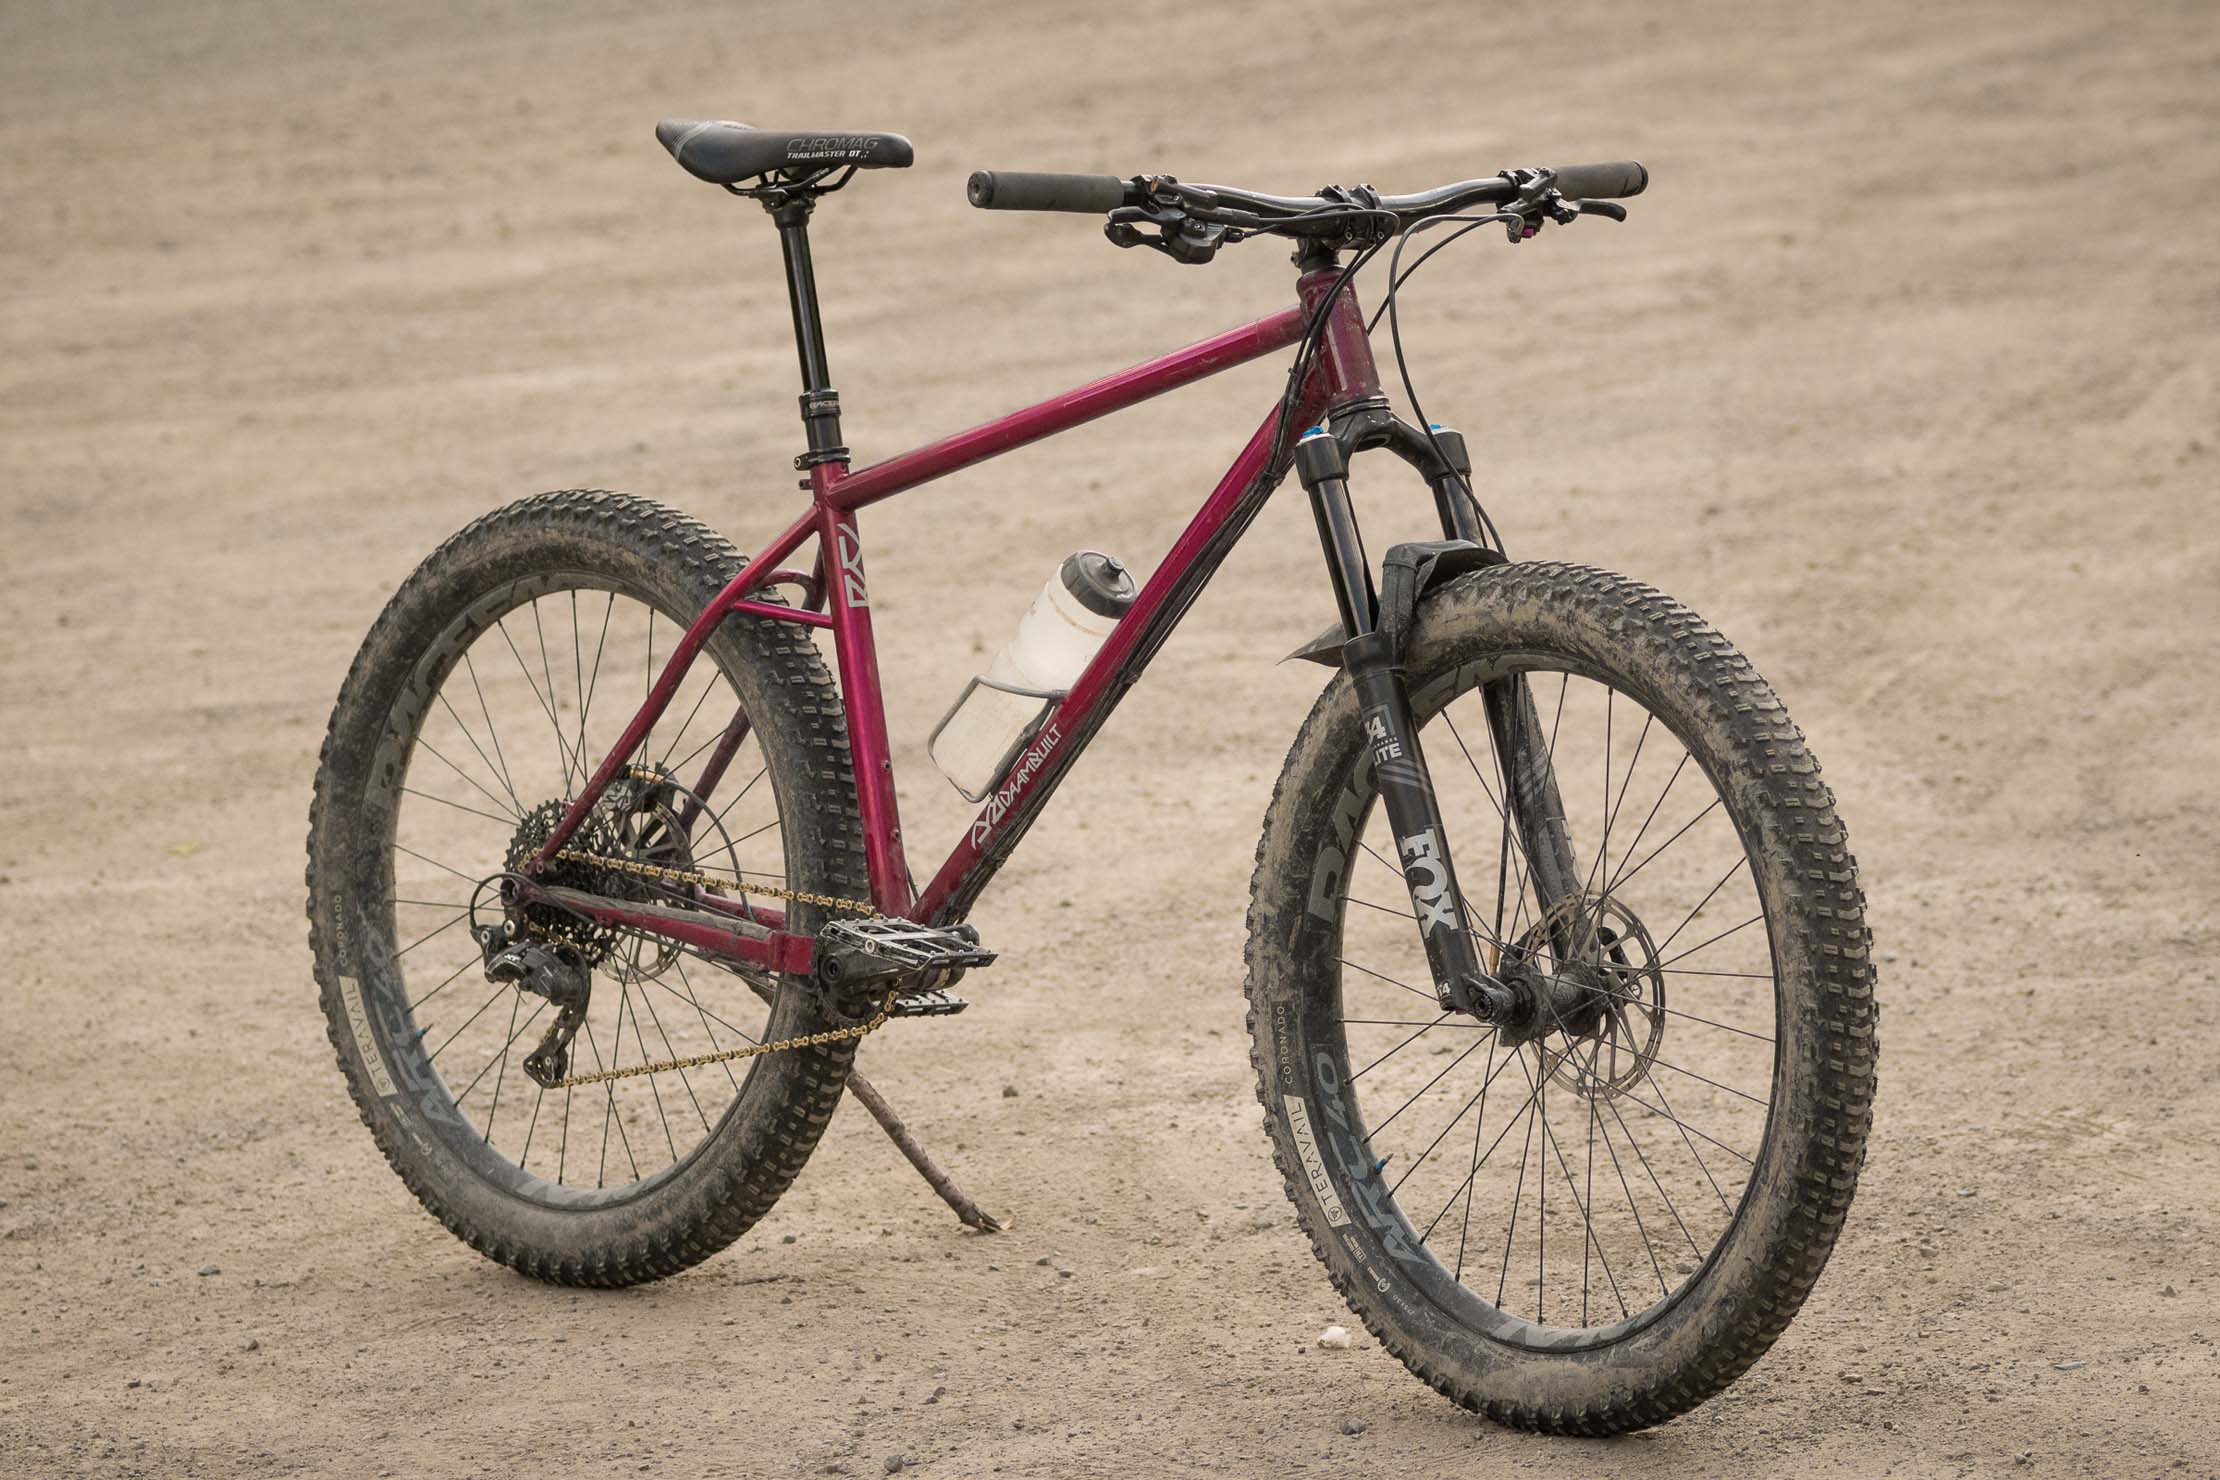
- FRAME: DaamBuilt custom No. 5
- FORK: Fox 34 Performance Elite Fit4 – 29er Boost, 130mm
- HEADSET: Cane Creek 40
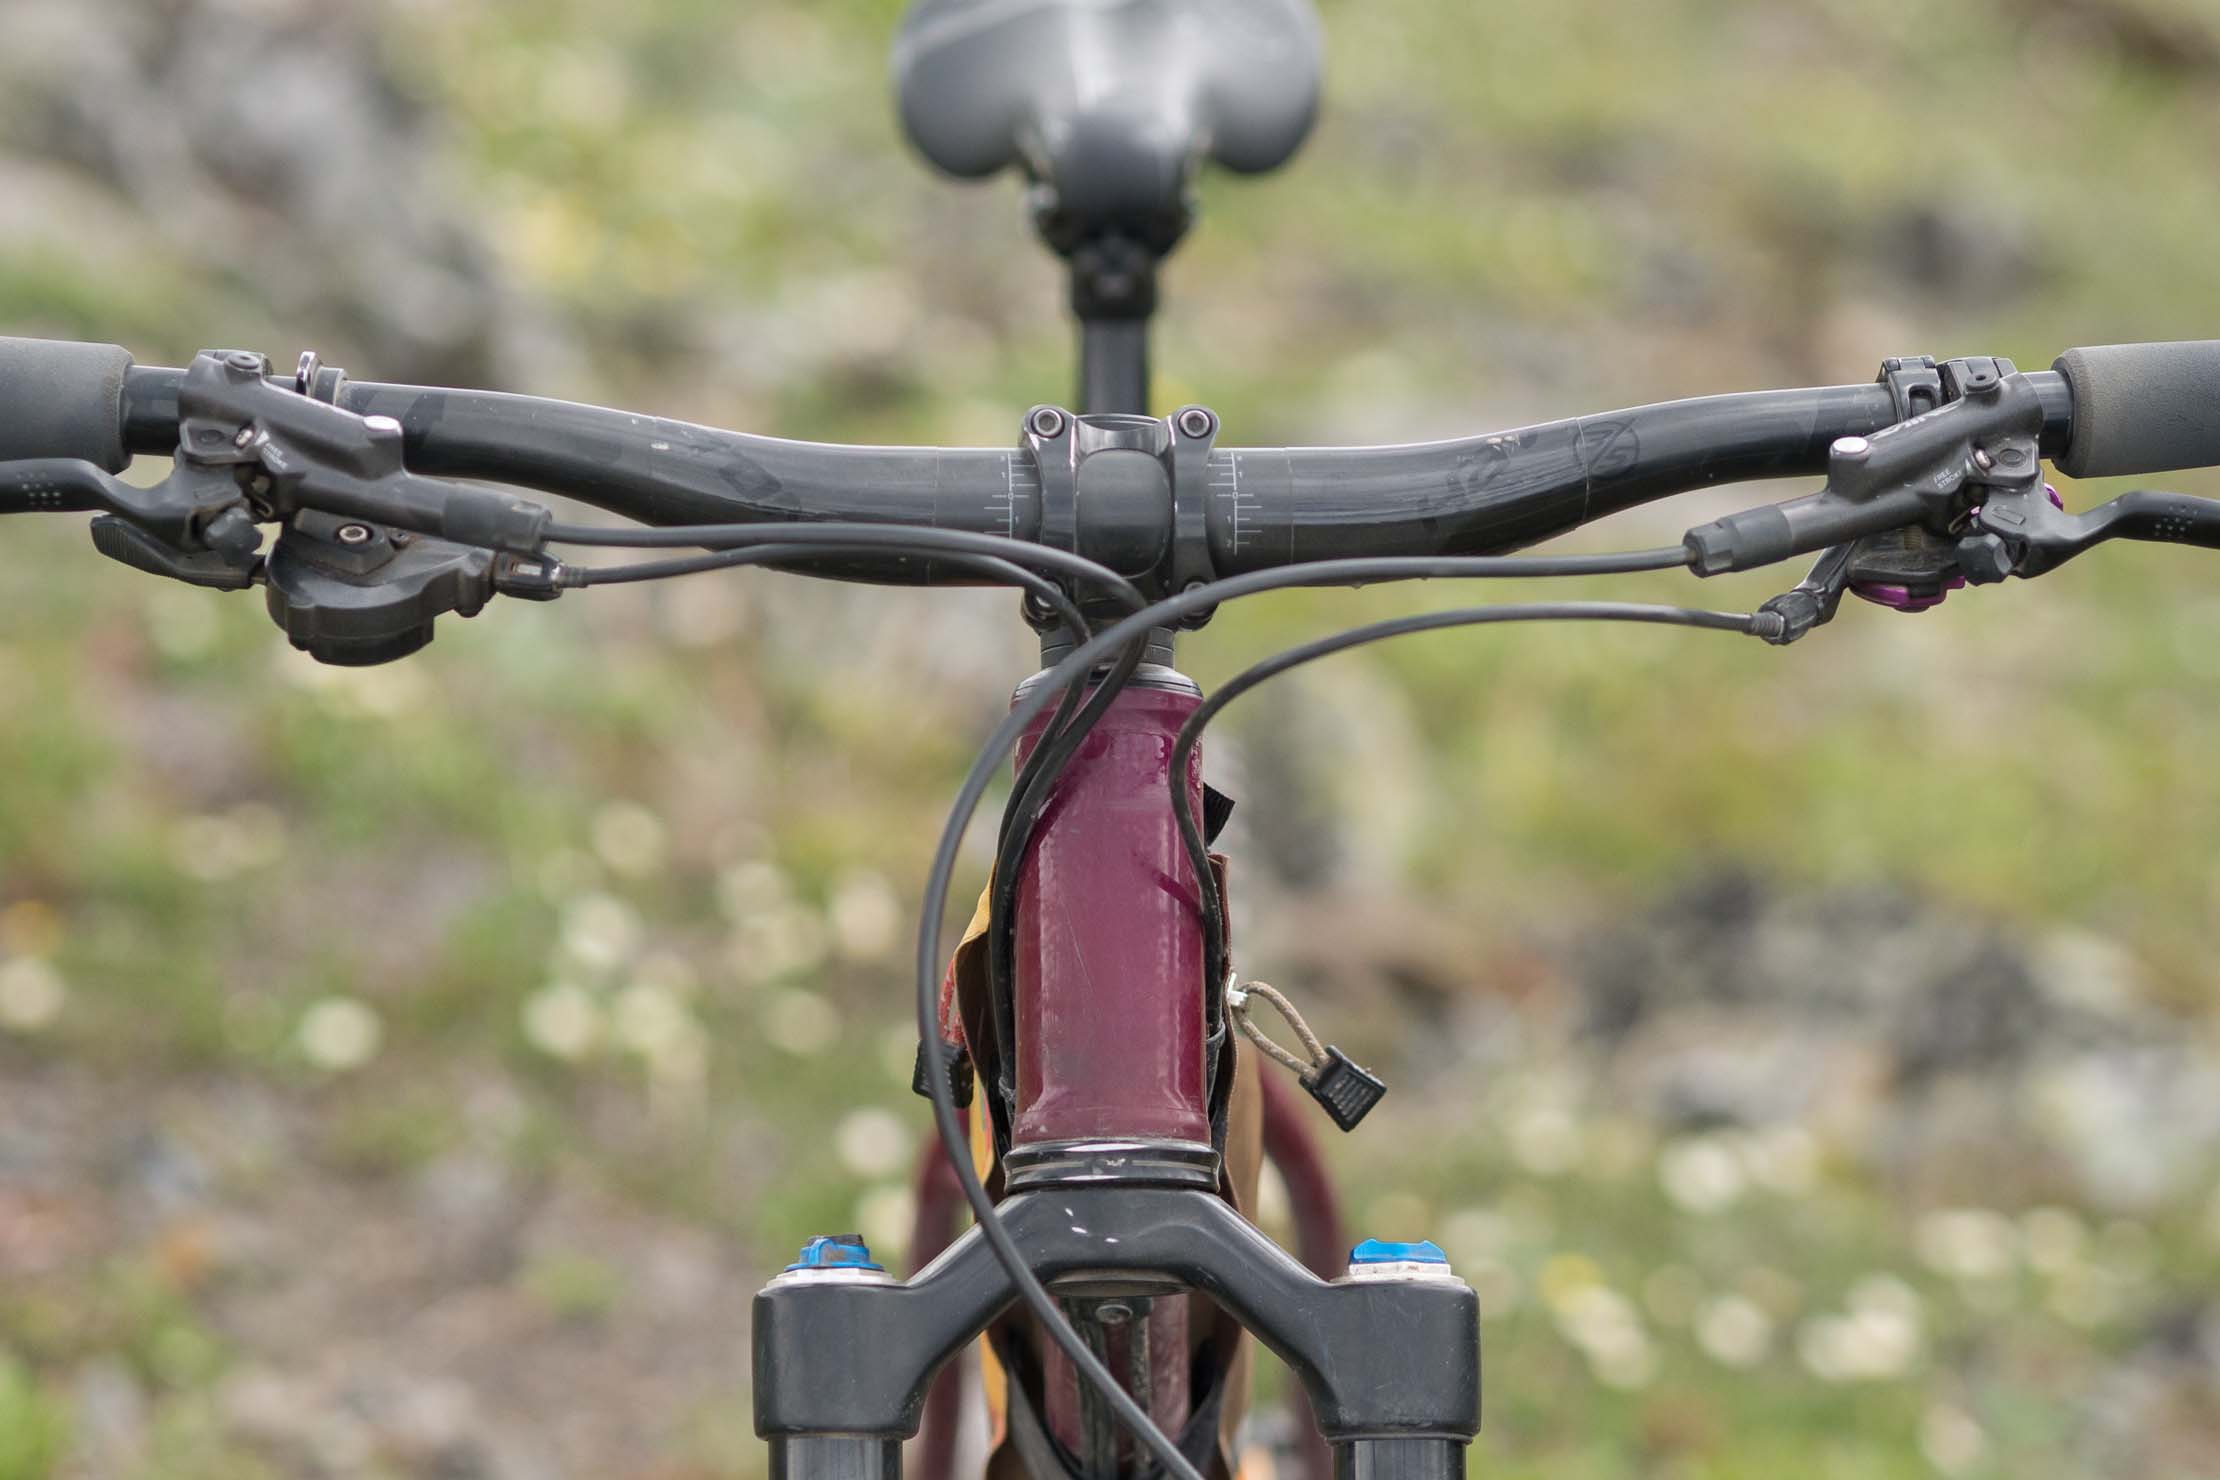
- HANDLEBAR: Easton Haven35 Carbon – 750mm
- STEM: Easton Haven35 – 50mm (Now called Race Face Turbine R)
- SEATPOST: Race Face Turbine 150mm – 31.6
- SADDLE: Chromag Trailmaster DT
- GRIPS: ESI Chunky
- BAR PLUGS: Odyssey BMX
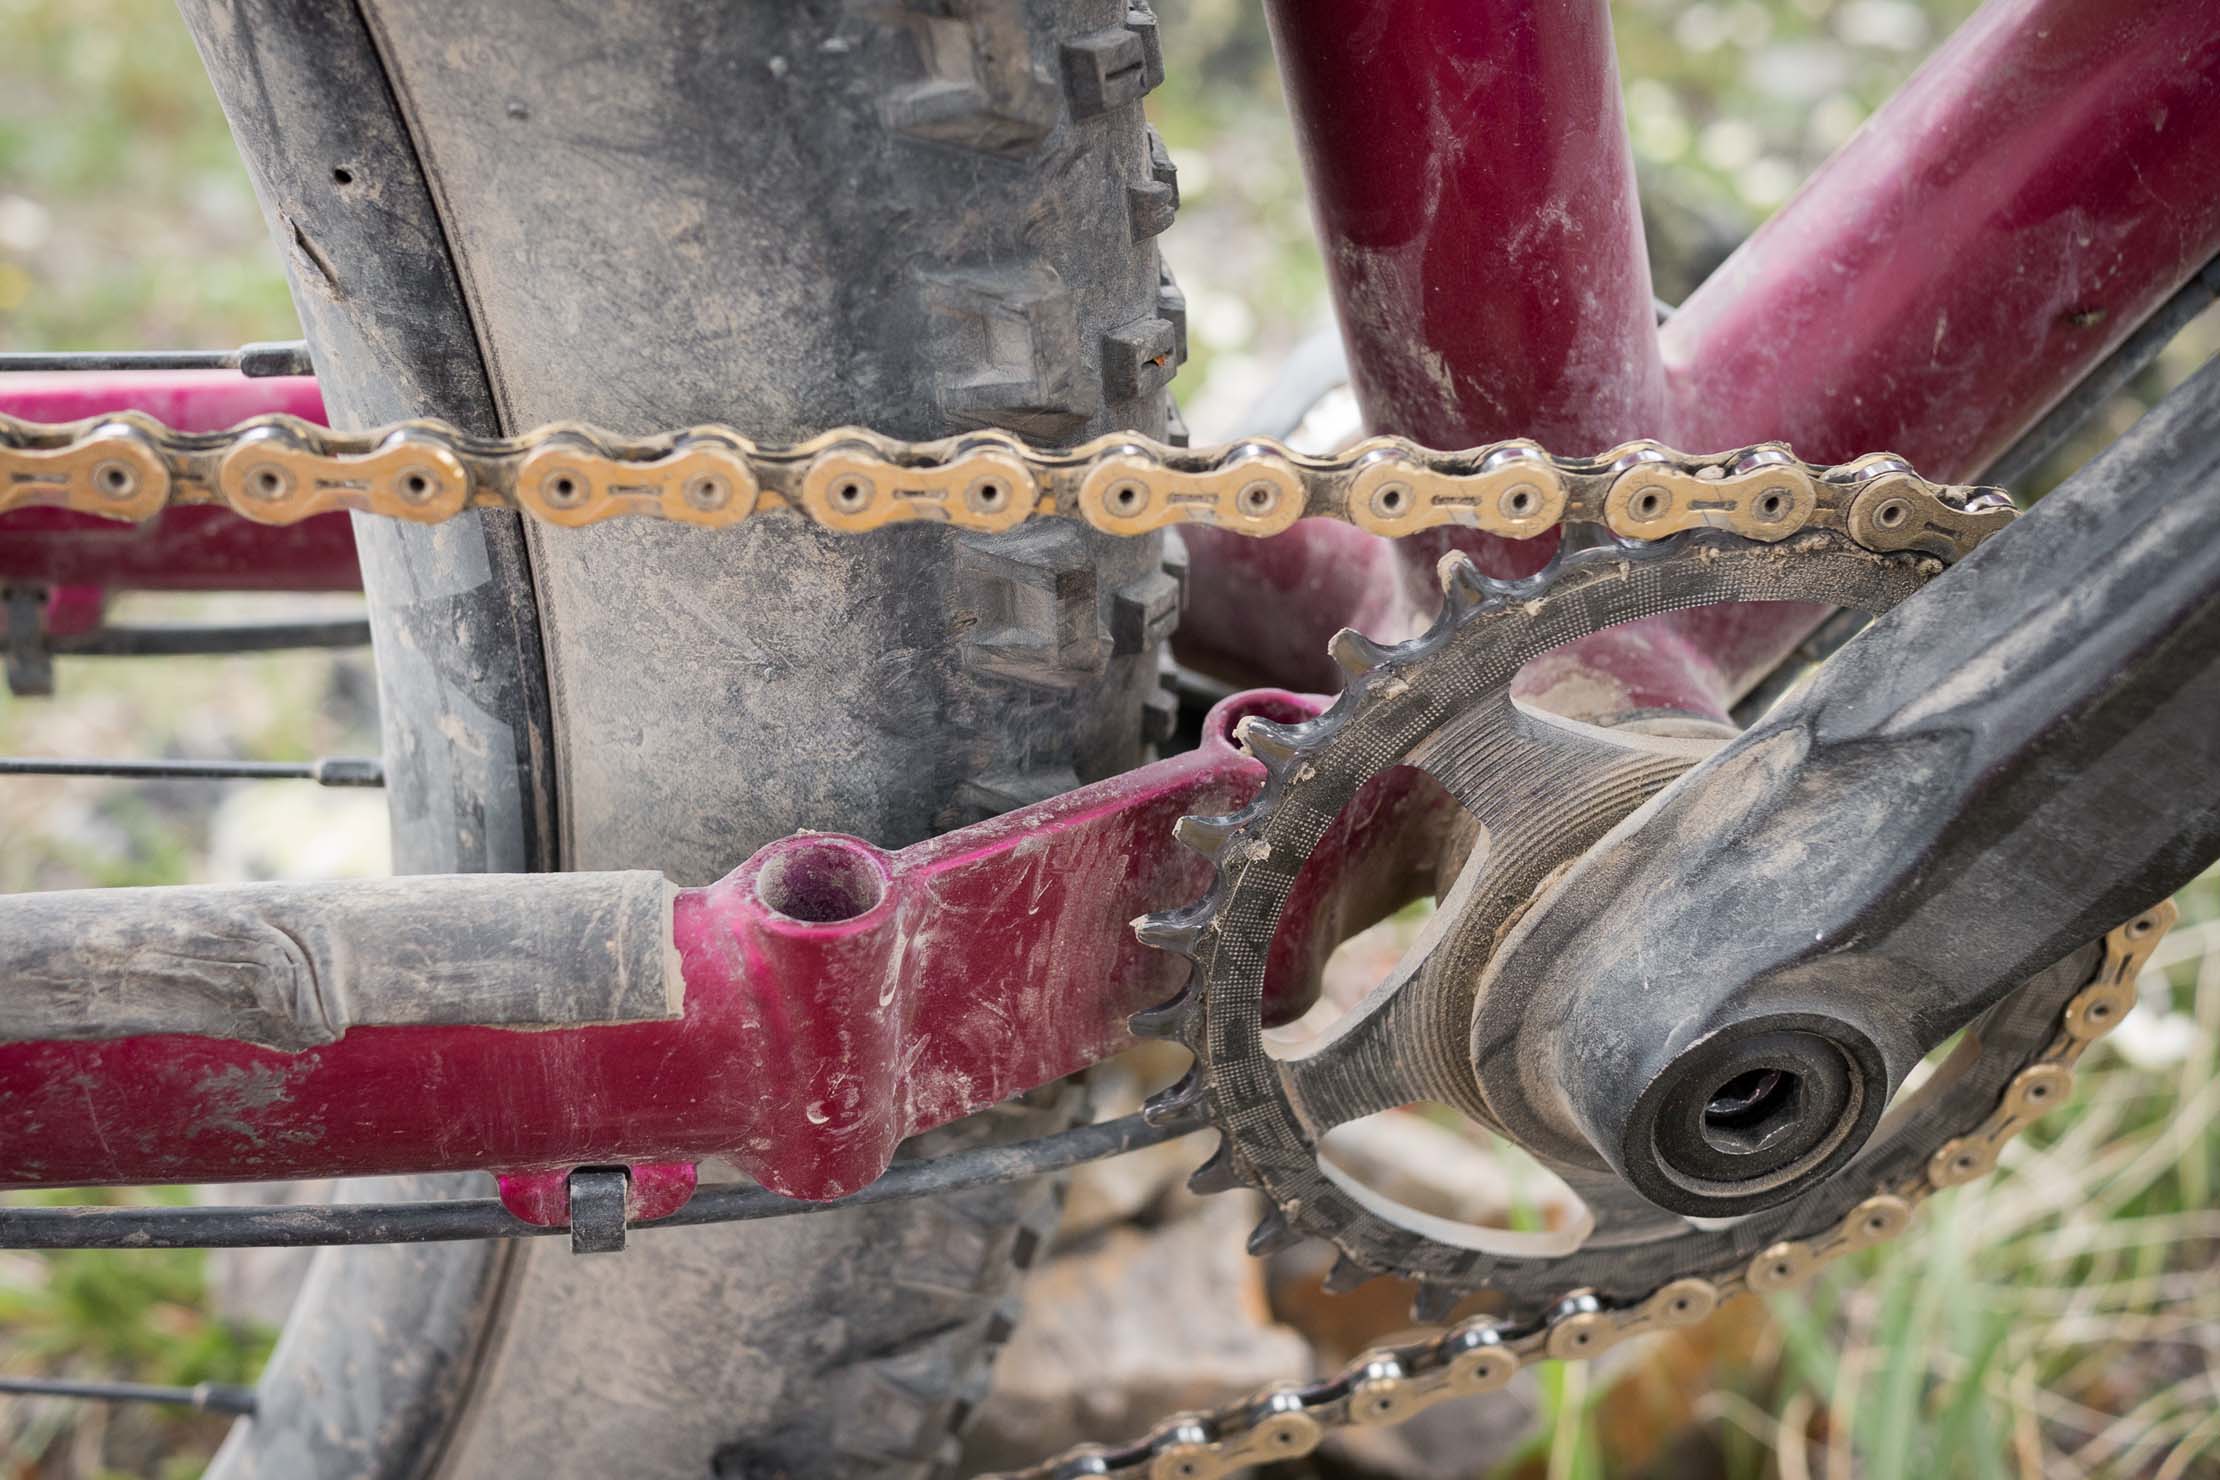
- CRANKS: Race Face Aeffect – 170mm
- PEDALS: various, currently Pedaling Innovations Catalyst
- BOTTOM BRACKET: Shimano XT/SLX
- CHAINRING: Race Face 28T
- CHAIN: KMC X11SL
- CASSETTE: Sram GX 1150
- SHIFTER: Shimano XT M8000
- REAR DERAILLEUR: Shimano XT M8000
- BRAKES: Shimano Saint M820
- ROTORS: SRAM Centerline 180mm
- RIMS: Race Face ARC40 27.5”
- HUBS: Onyx Racing – 15x110mm front, 12x148mm XD driver rear
- SPOKES: Sapim 14G
- TIRES: various*
- COMPLETE WEIGHT (without bags): 32lbs/14.5kg
*Surly Dirt Wizard 60TPI, Terrene Chunk – Tough casing, Teravail Coronado – Durable casing. I also sometimes run a Huck Norris tire insert in the rear tire.
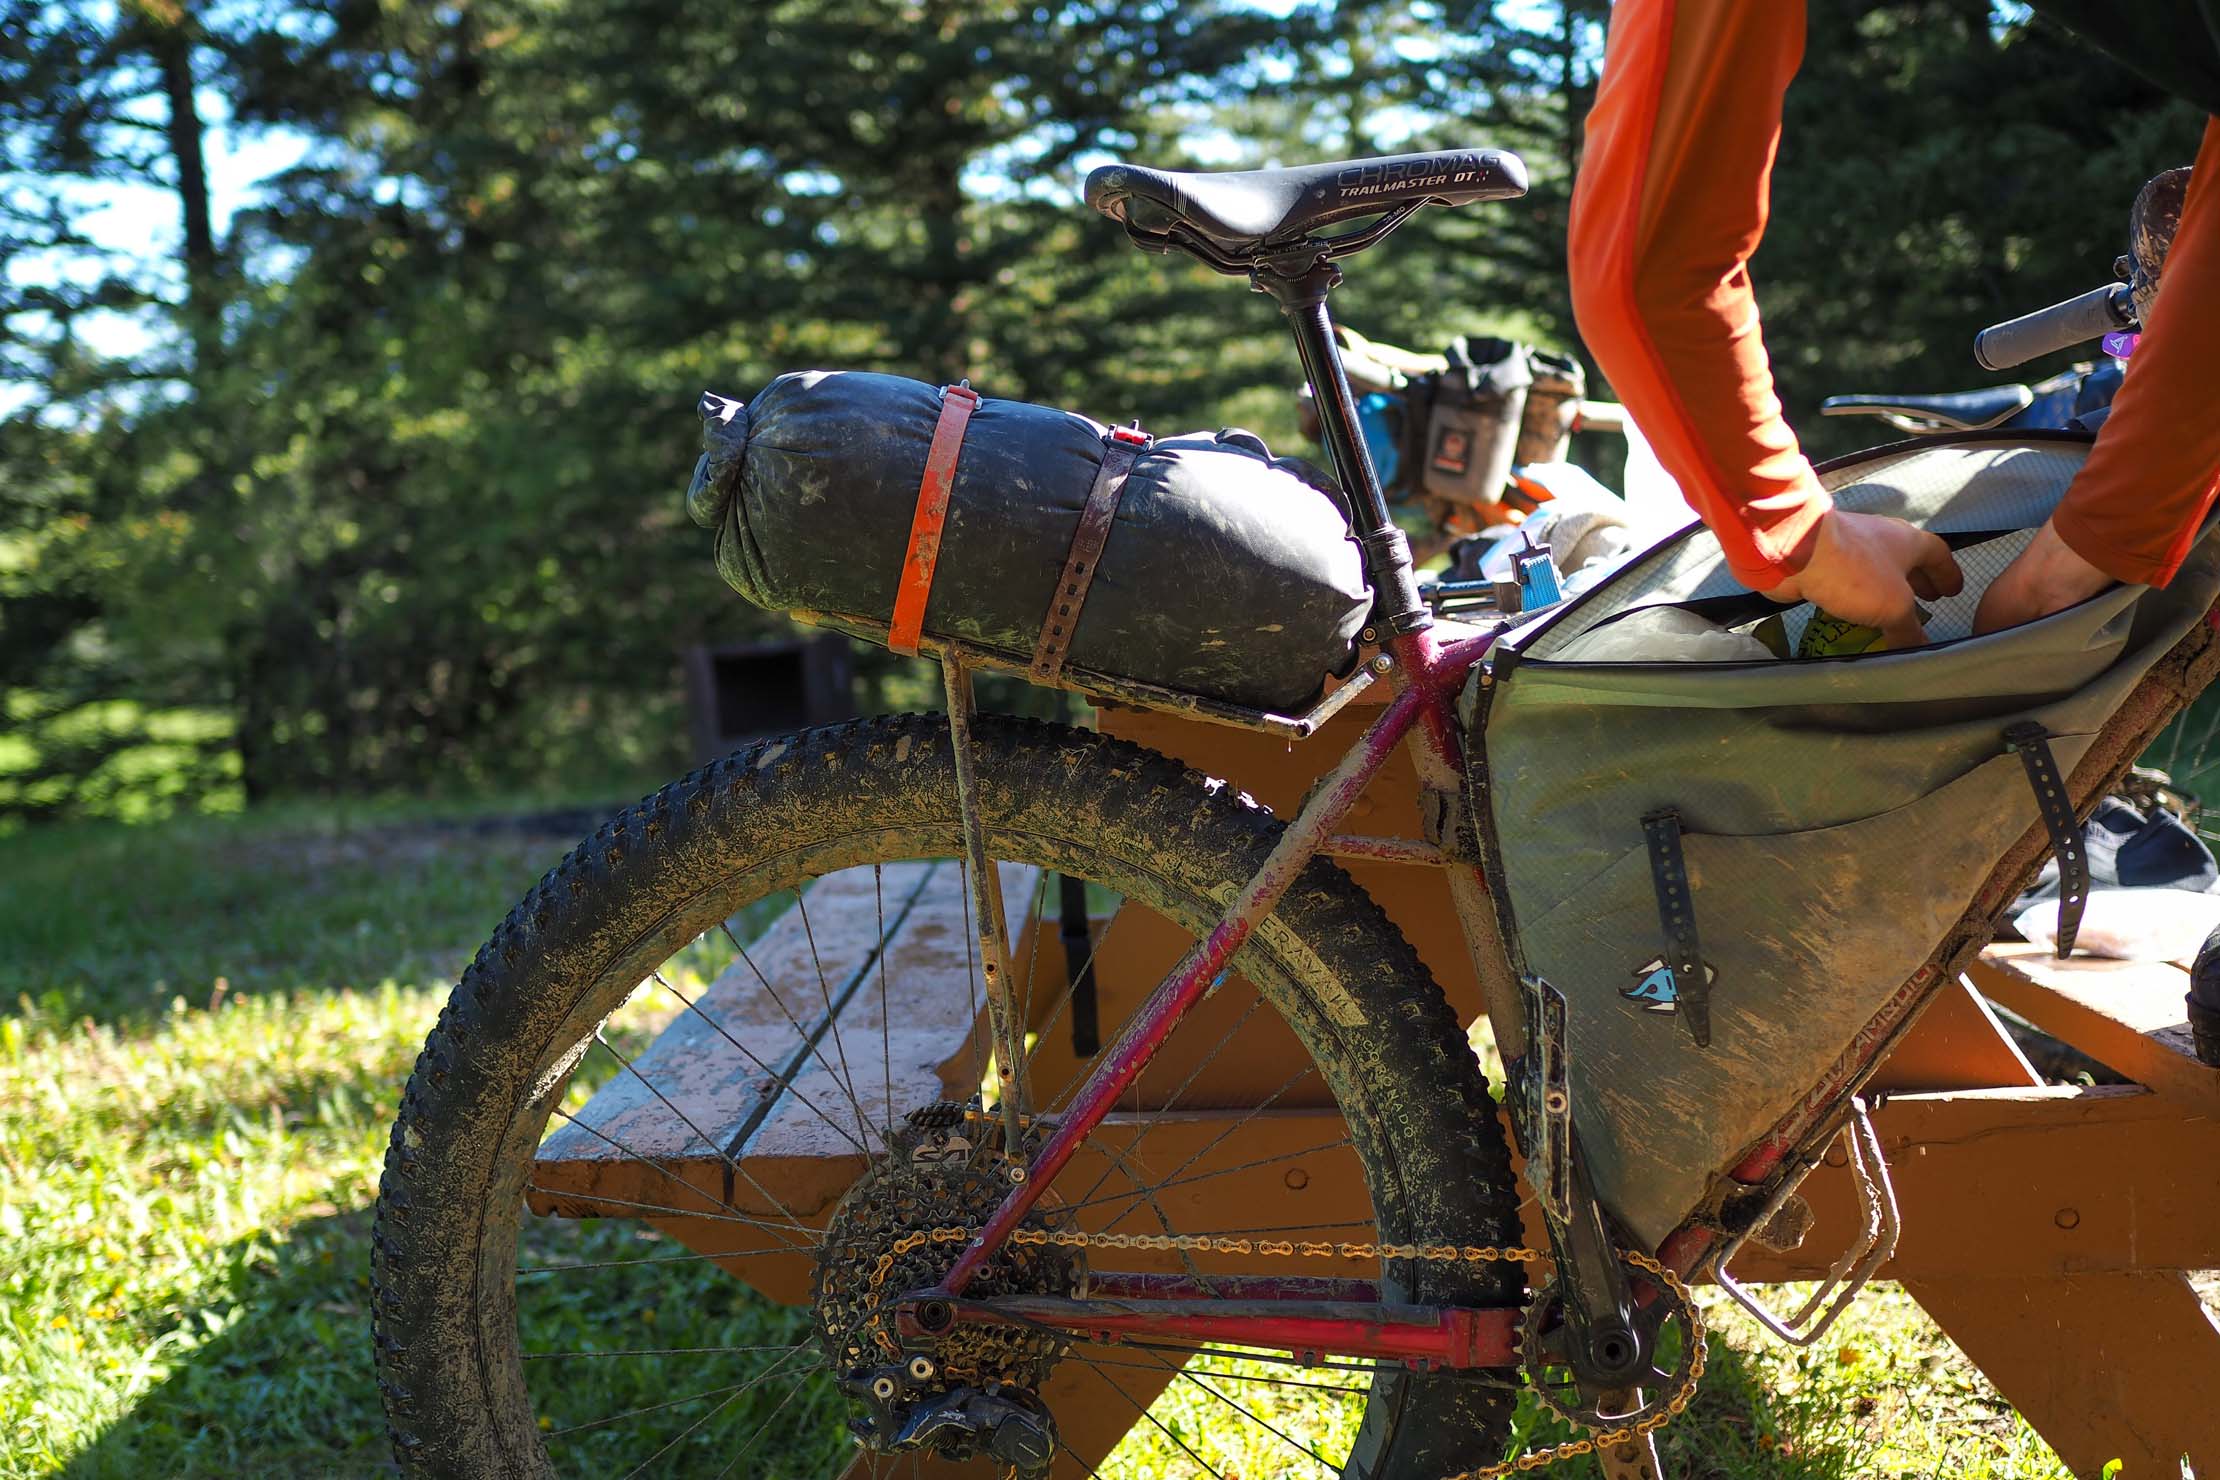
Fully Loaded
My bags are a collection of prototype and sample Porcelain Rocket bags that I made. They are all uglier and less considered than the production versions, because that’s how it goes with the first attempts at making something. Good enough. The exceptions are the MEC drybag I use up front – I prefer single-ended dry bags to double-ended ones, as I find them easier to pack densely – and my lovely old Randi Jo stem bags.
One of my objectives with this build was to find a way to get weight off the handlebar. Every time I’ve had to stretch my carrying capacity to the limit, such as when we carried 6L of water on the AZT, things tended to get added to the front of the bike by default. It’s easy to use a bigger dry bag in a modular handlebar harness. It’s relatively easy to attach some bottle cages to fork legs with electrical tape for more water, in addition to bottles in stem bags. But, I find that having a the weight biased to the front of the bike negatively impacts how the bike handles on rough trails. Adding water to the lowers of a suspension fork adds as much as 2kg of unsprung weight, confusing the suspension damping and making it perform terribly. So, I wanted ways to add capacity elsewhere to make it easier to keep things balanced.

The triple bottle mount below the downtube is one obvious solution, allowing a 2-3L water jug to be carried low and centered in a cargo cage. I tend to avoid mounting anything down there if I don’t need the extra capacity, as it’s all too easy to catch on logs or branches when riding singletrack.
The rack mounts at the rear dropouts are spaced 2.5” apart so that bottle cages can also be mounted back there, though I’d use a small adapter plate to have the cages sit more vertically. I also requested a direct-mount point for a Porcelain Rocket Mr. Fusion rack on the frame below the seat collar. This allows me to use a mammoth Mr. Fusion XL, despite otherwise having insufficient seatpost exposed. This mount point also acts as a rear rack mount.
My new dependence on using a dropper has led me to further explore alternative solutions to carrying luggage with a dropper. It’s not that there’s anything wrong with the Albert seat pack – it remains an excellent solution – but I wouldn’t be doing my job if I only used things that are known to work well. Besides, I want the potential to add more than 9L of gear to the stern of my bike.
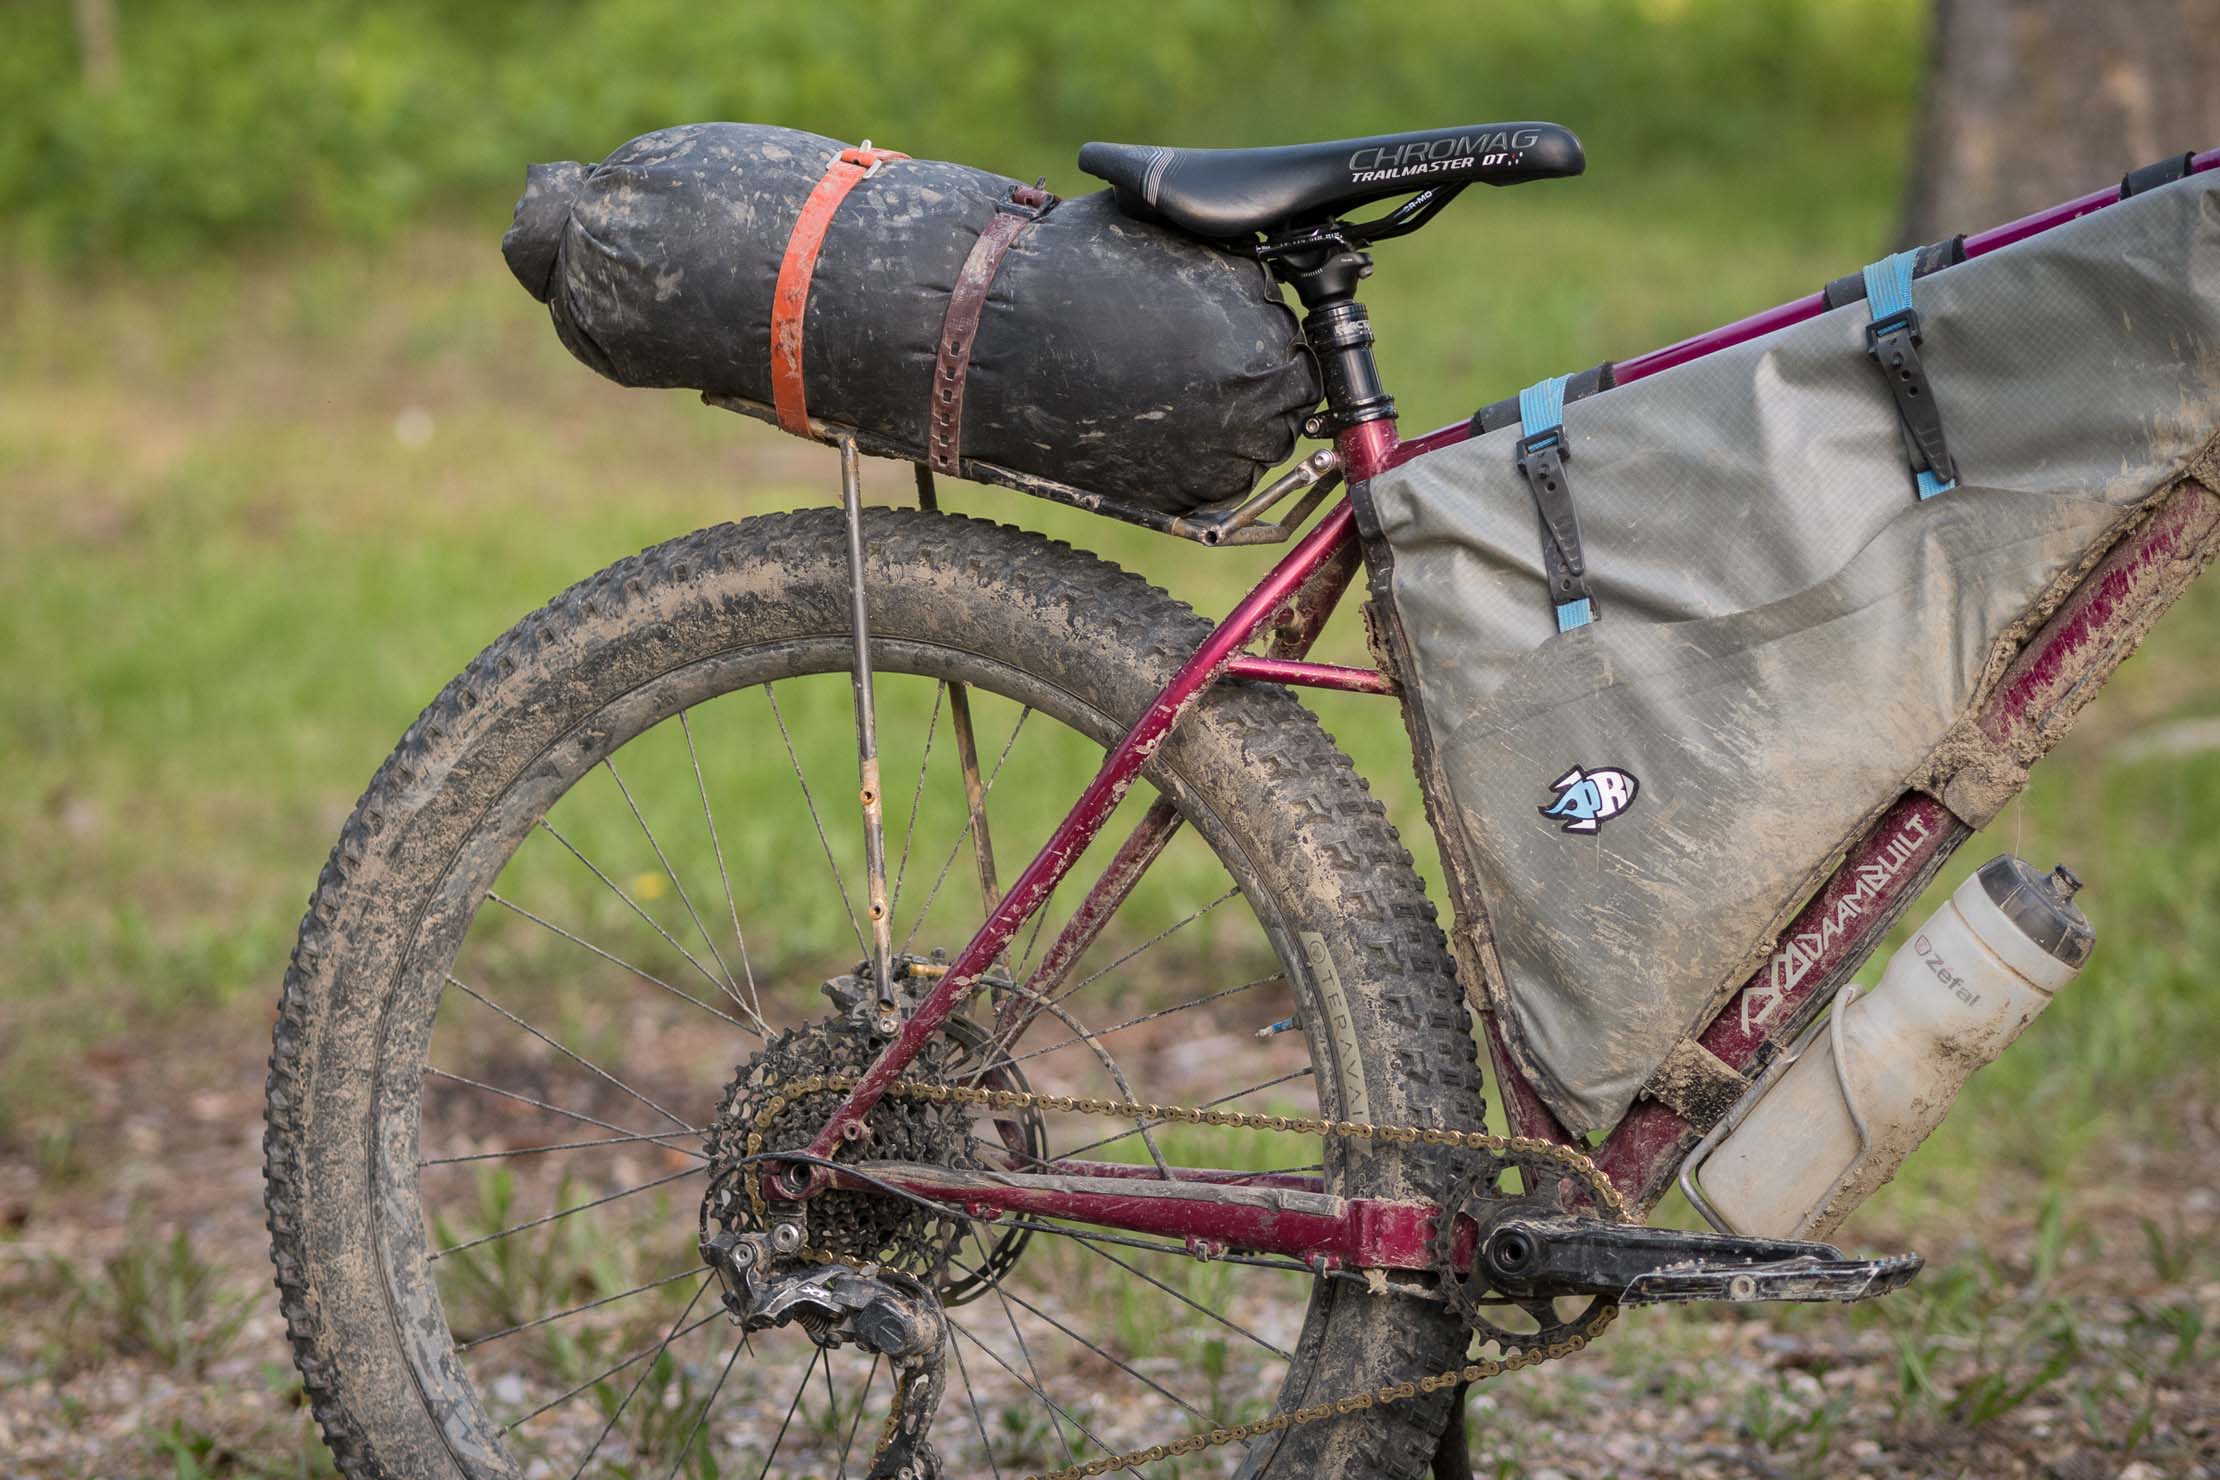
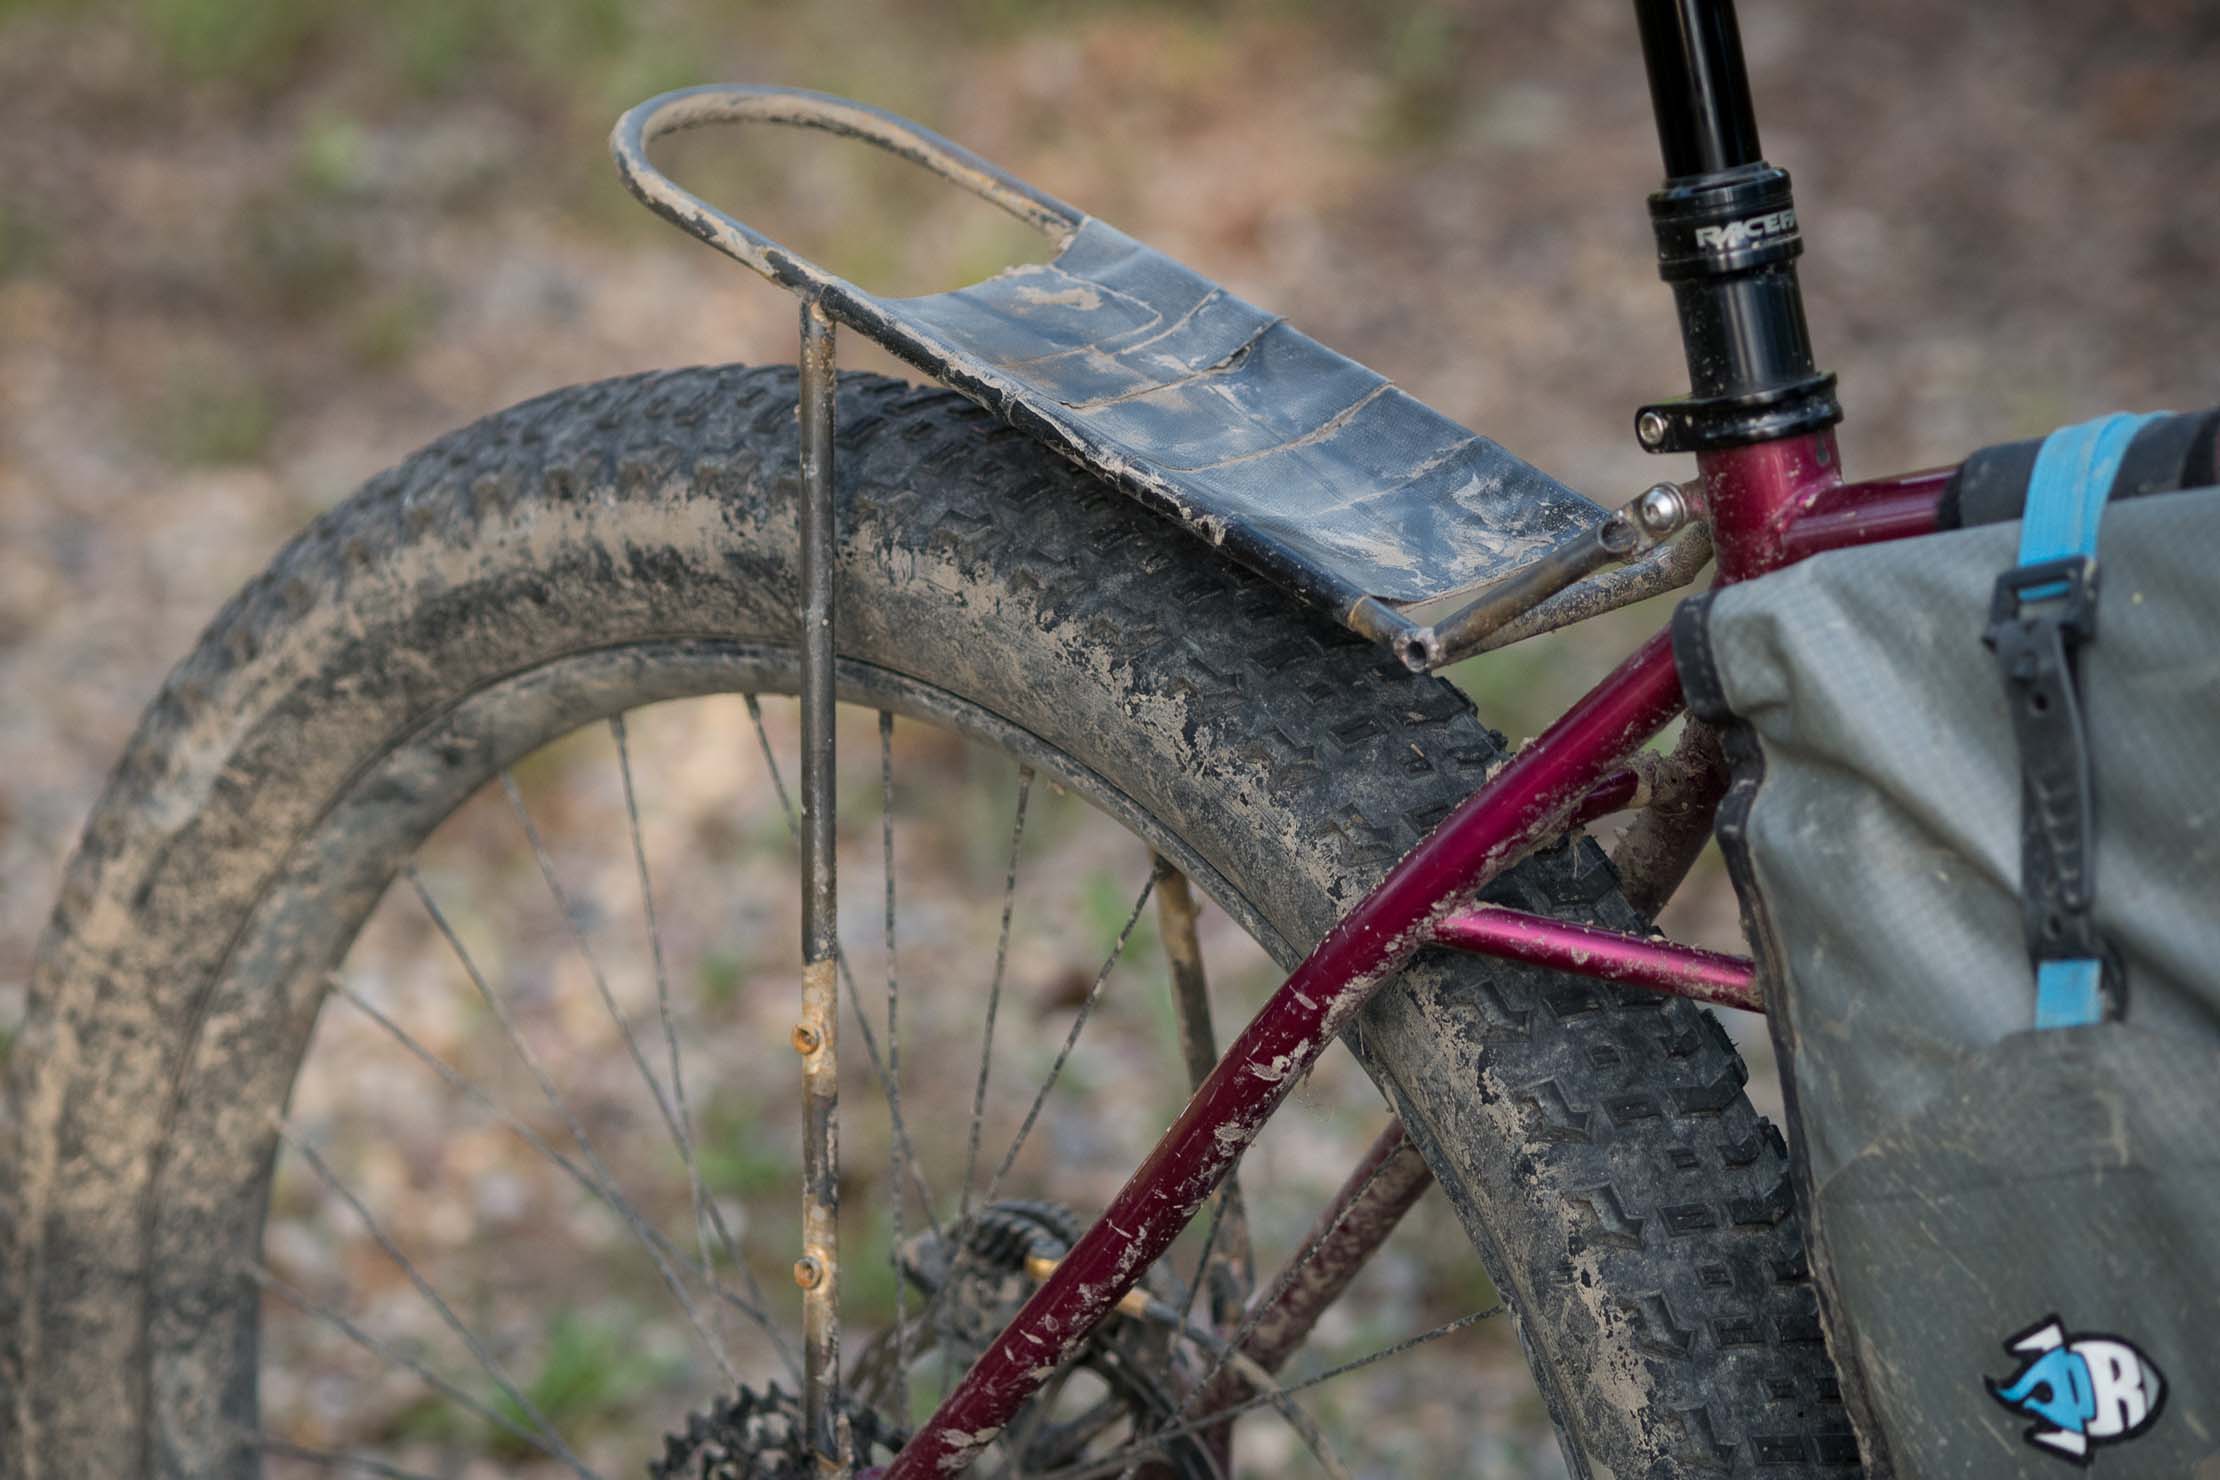

Earlier this year, I had Peter build me a custom rear rack intended only for carrying as much as you’d put in a seat pack. I wondered how light a rear rack could be made if the objective was not to carry panniers, but rather only lighter loads on top of the rack. Based on the minimum amount of tubing needed, we estimated it might be possible to actually end up with something lighter than a seat pack, and indeed this rack ended up at 320g using heavier than necessary tubing. Peter added a pair of braze-ons to each leg, spaced such that the lower rack mount can be used to attach cargo cages with triple bosses. The angled top allows me to use the full 150mm dropper travel while carrying a large drybag. I also enjoy that the position of the drybag maintains the angled look of a well-packed seat pack. The rear rack has proven to be one of my favourite experiments with this build, and we’ve endeavoured to design a similarly ultralight bikepacking rear rack that would offer a more universal fit for bikes without rack braze-ons.
On The Trail
Over many years, I’ve slowly accumulated gear that is lightweight without resorting to uncomfortable levels of minimalism. My partner and I are at a point where what we pack for a weekend is pretty much the same as we’d pack for a month-long trip in similar climates. Obviously our food/water needs vary with the remoteness of a route, but with a typical 3-4 day interval between resupply, our setups are relatively lightweight without leaving anything behind.
Up front, I can usually get away with carrying just the tent body in a tiny dry bag. My partner Panthea usually carries the poles strapped to her bike’s downtube. In my bar pocket I keep things that I want quick access to. I stuff my sleeping bag into the bottom of my “seat pack” first, followed by an inflatable sleeping pad, and all my extra clothing. Framebag space is reserved for dense items like a spare tube/sealant, the pot, stove, and all the food.
Handlebars
MEC 10L Dry Bag:
Tarptent Cloudburst 3 tent (review coming soon!)
Westcomb Shift LT hardshell jacket
Prototype Porcelain Rocket Horton pocket
Sunglasses in hard case
MEC Waterproof Enough gloves
Zebralight H600 headlamp
Leatherman
Crank Bros multi-tool
Snowpeak Spork
Sunscreen
Toothbrush/paste
Snacks
Stem bags – Randi Jo Bartenders
Water bottle in one (or both)
Bear spray, if needed, and random tools/spares in the other
Frame bag – Prototype Porcelain Rocket 52Hz
Optimus aluminum 1.7L pot
Snowpeak Ti mug
Fozzils folding cutting board/bowl
Trangia alcohol stove
Trangia triangle stand
Spare tube
4-8oz bottle of tubeless sealant
Food
Cordelette for hanging food in bear country
Downtube
Water bottle, if needed
Seat Pack – 12L dry bag strapped to DaamBuilt rack with 2 x 24” Voilé Straps
ZPacks 20° sleeping bag
Therm-a-Rest NeoAir Xtherm sleeping pad
MEC hooded T3 base layer top
Synthetic longjohns
Westcomb Cayoosh Hoody down jacket
Toque
Warm sleeping socks
Tiny pack towl
Spare batteries/chargers/cables/SD cards
Fanny pack – Taiga brand
Ancient MEC wind vest
Panasonic GX7 camera with 20mm/1.7 pancake lens + 75mm/1.8 Olympus lens
Phone
Wallet
Waterproof stuff sack to protect camera in the rain
Water treatment tablets
On me
Westcomb Scion top
MEC Crinkum knickers
Synthetic boxers or lycra short (sans chamois)
Thin, synthetic socks
Only What’s Necessary FR-01 shoes
7iDP M2 helmet
Some Final Thoughts
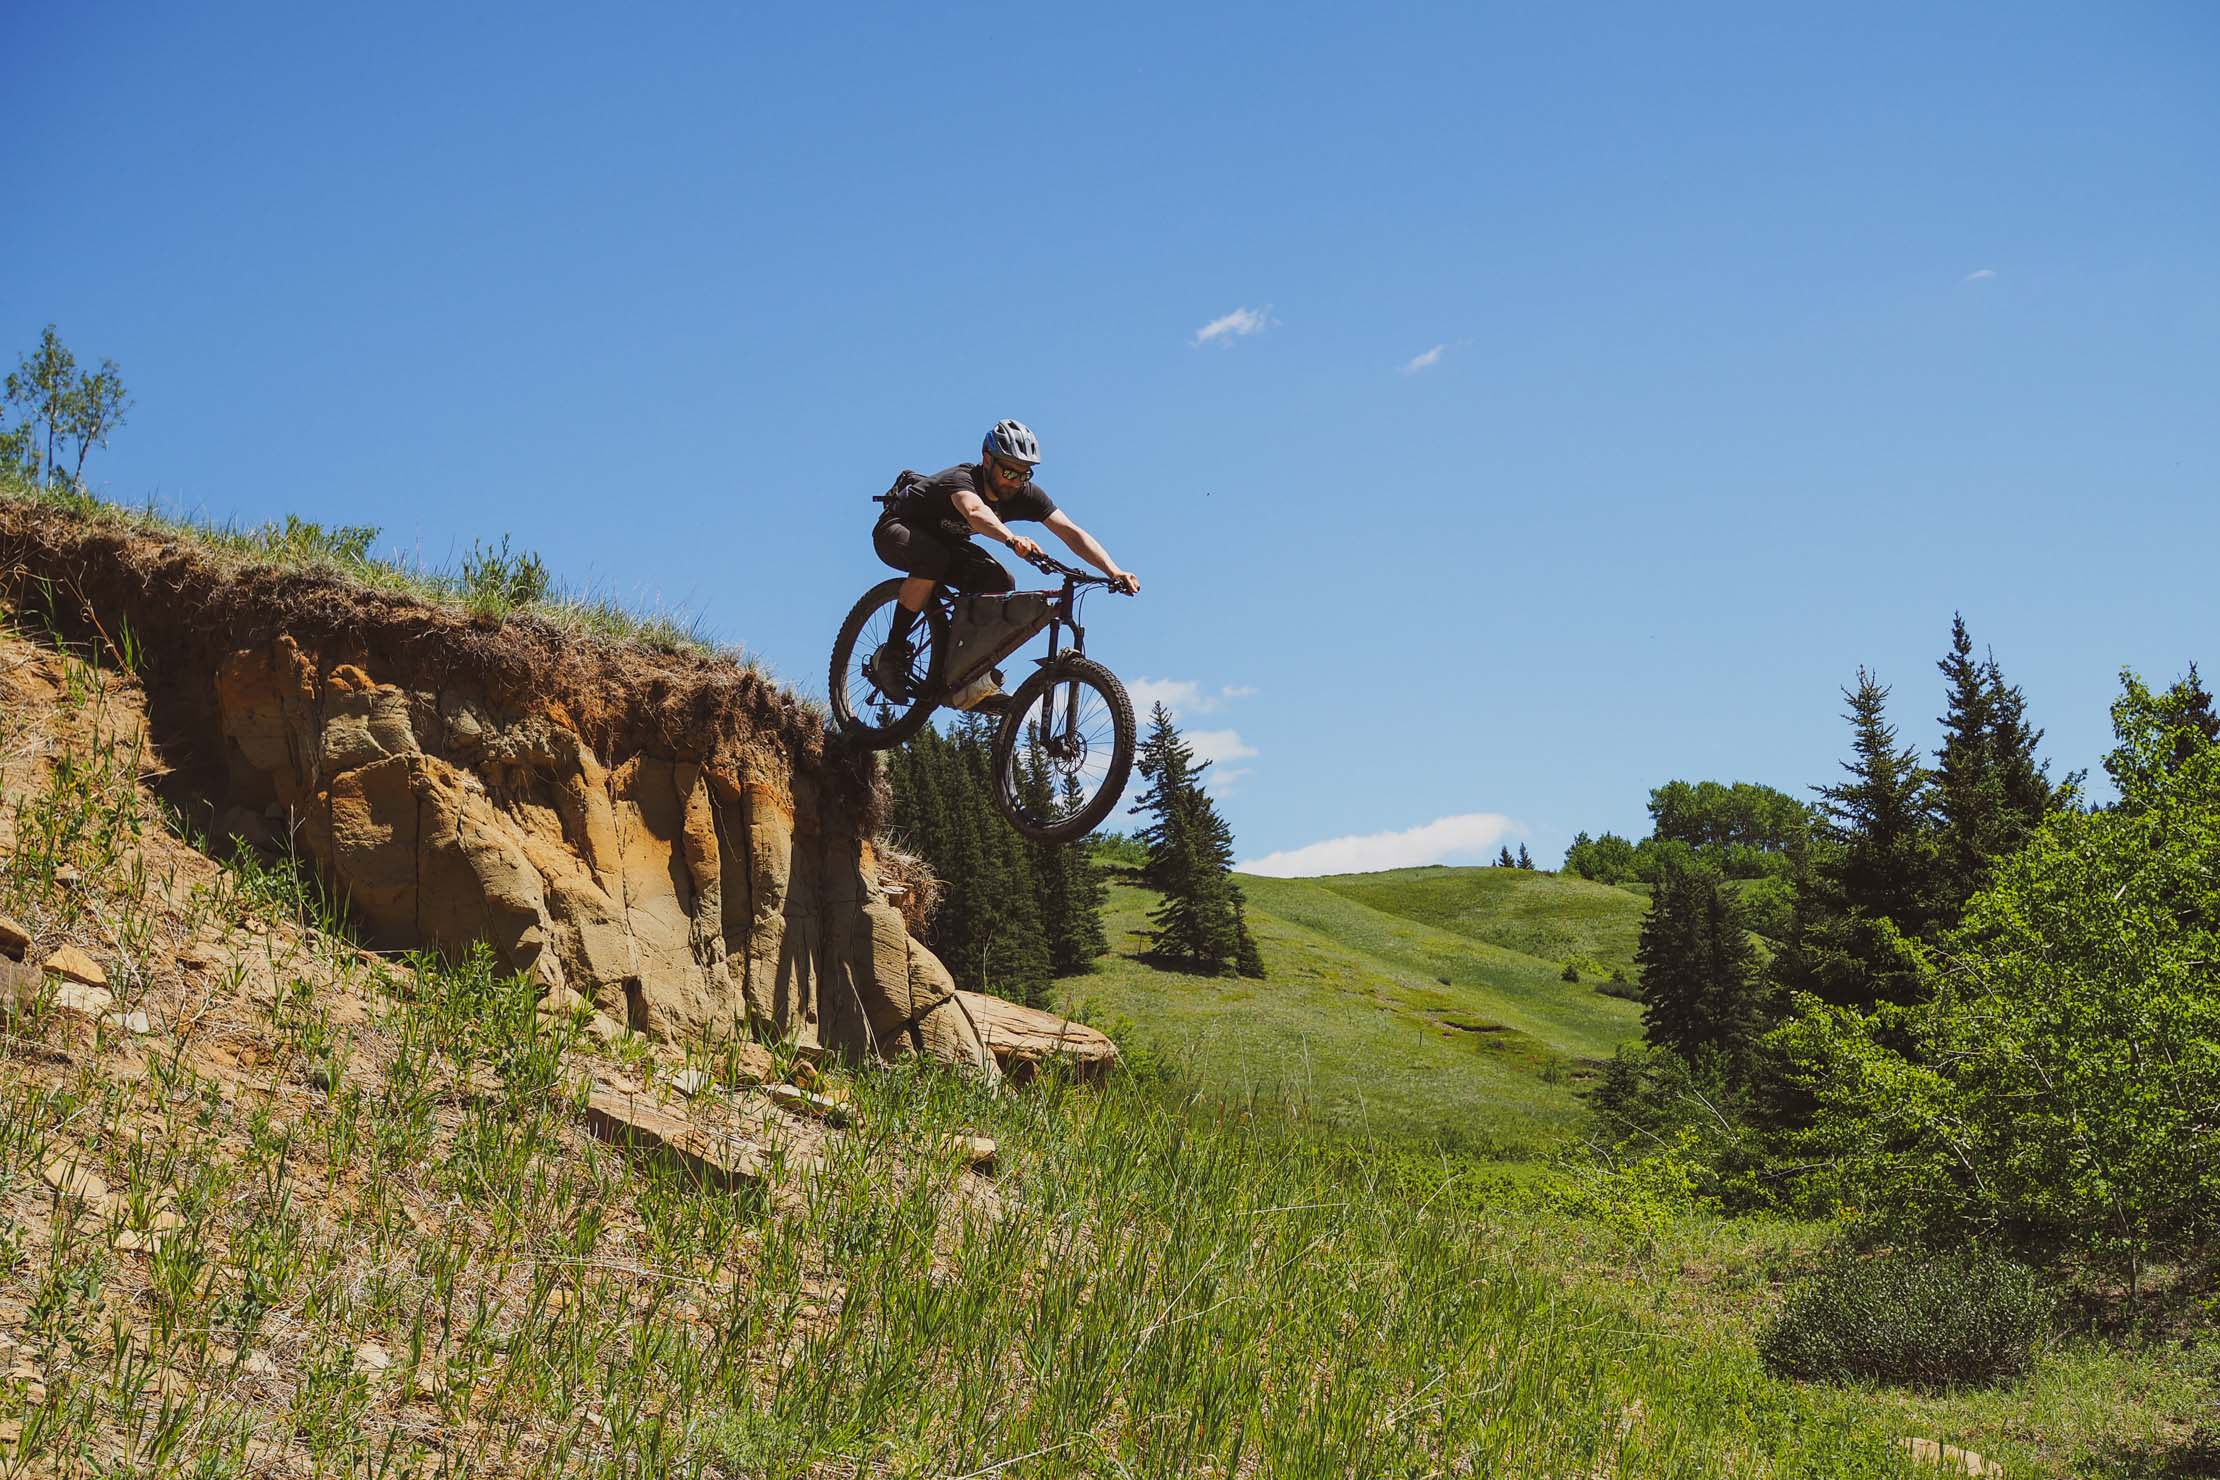
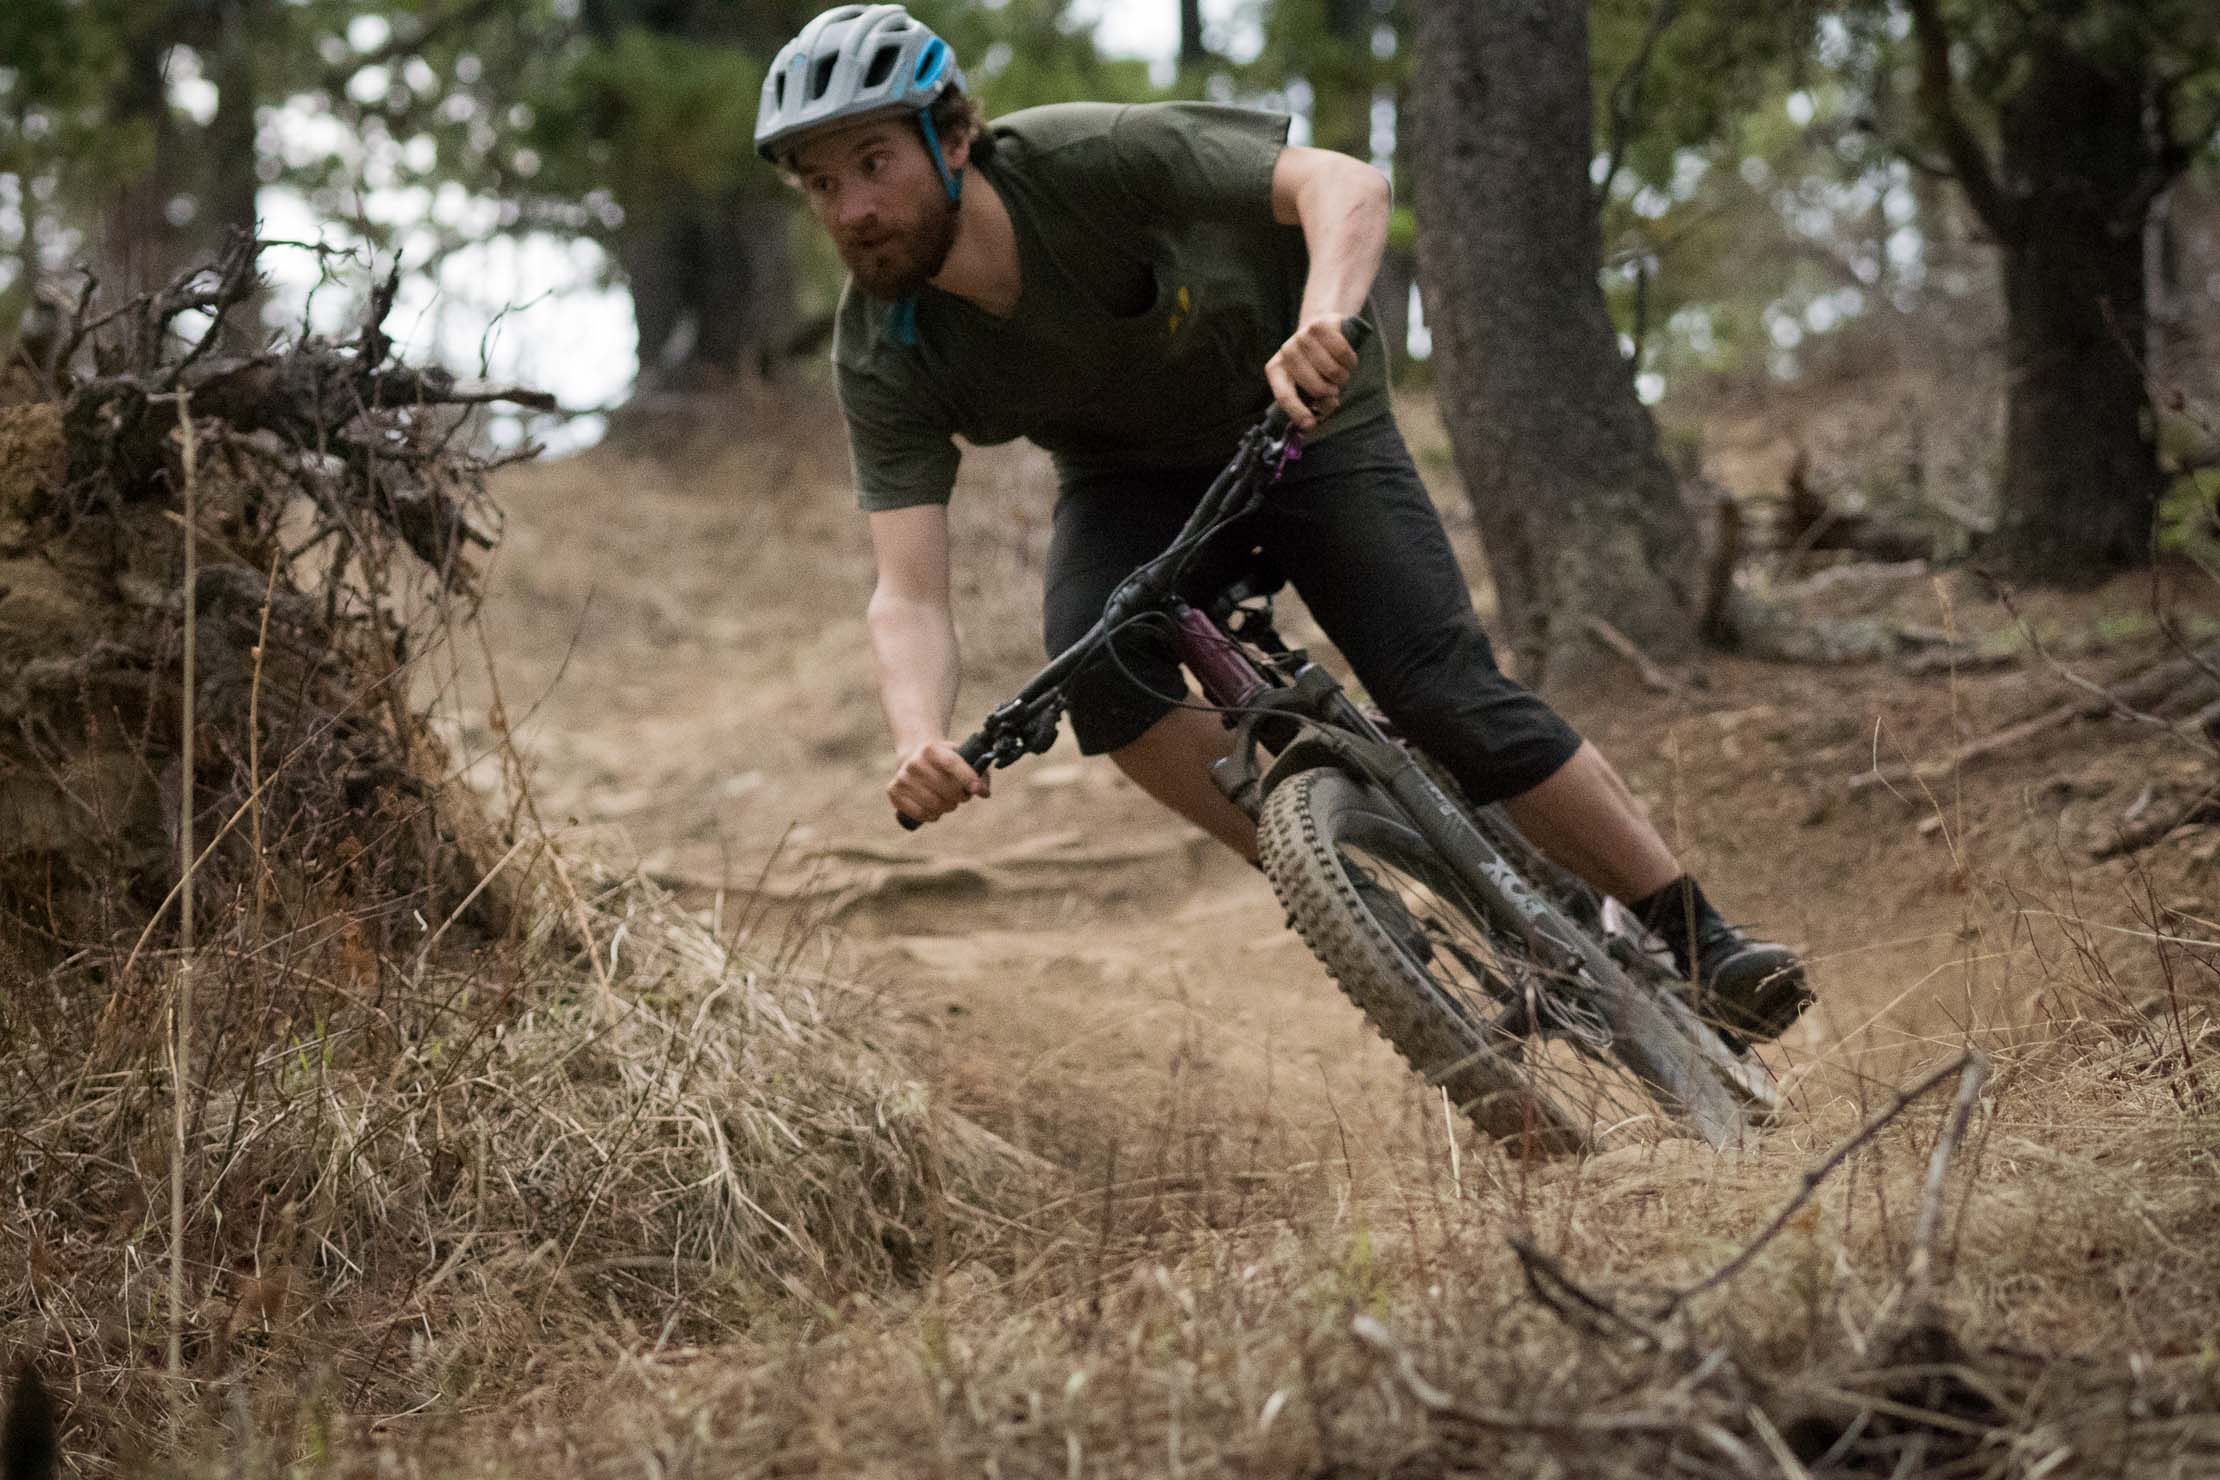
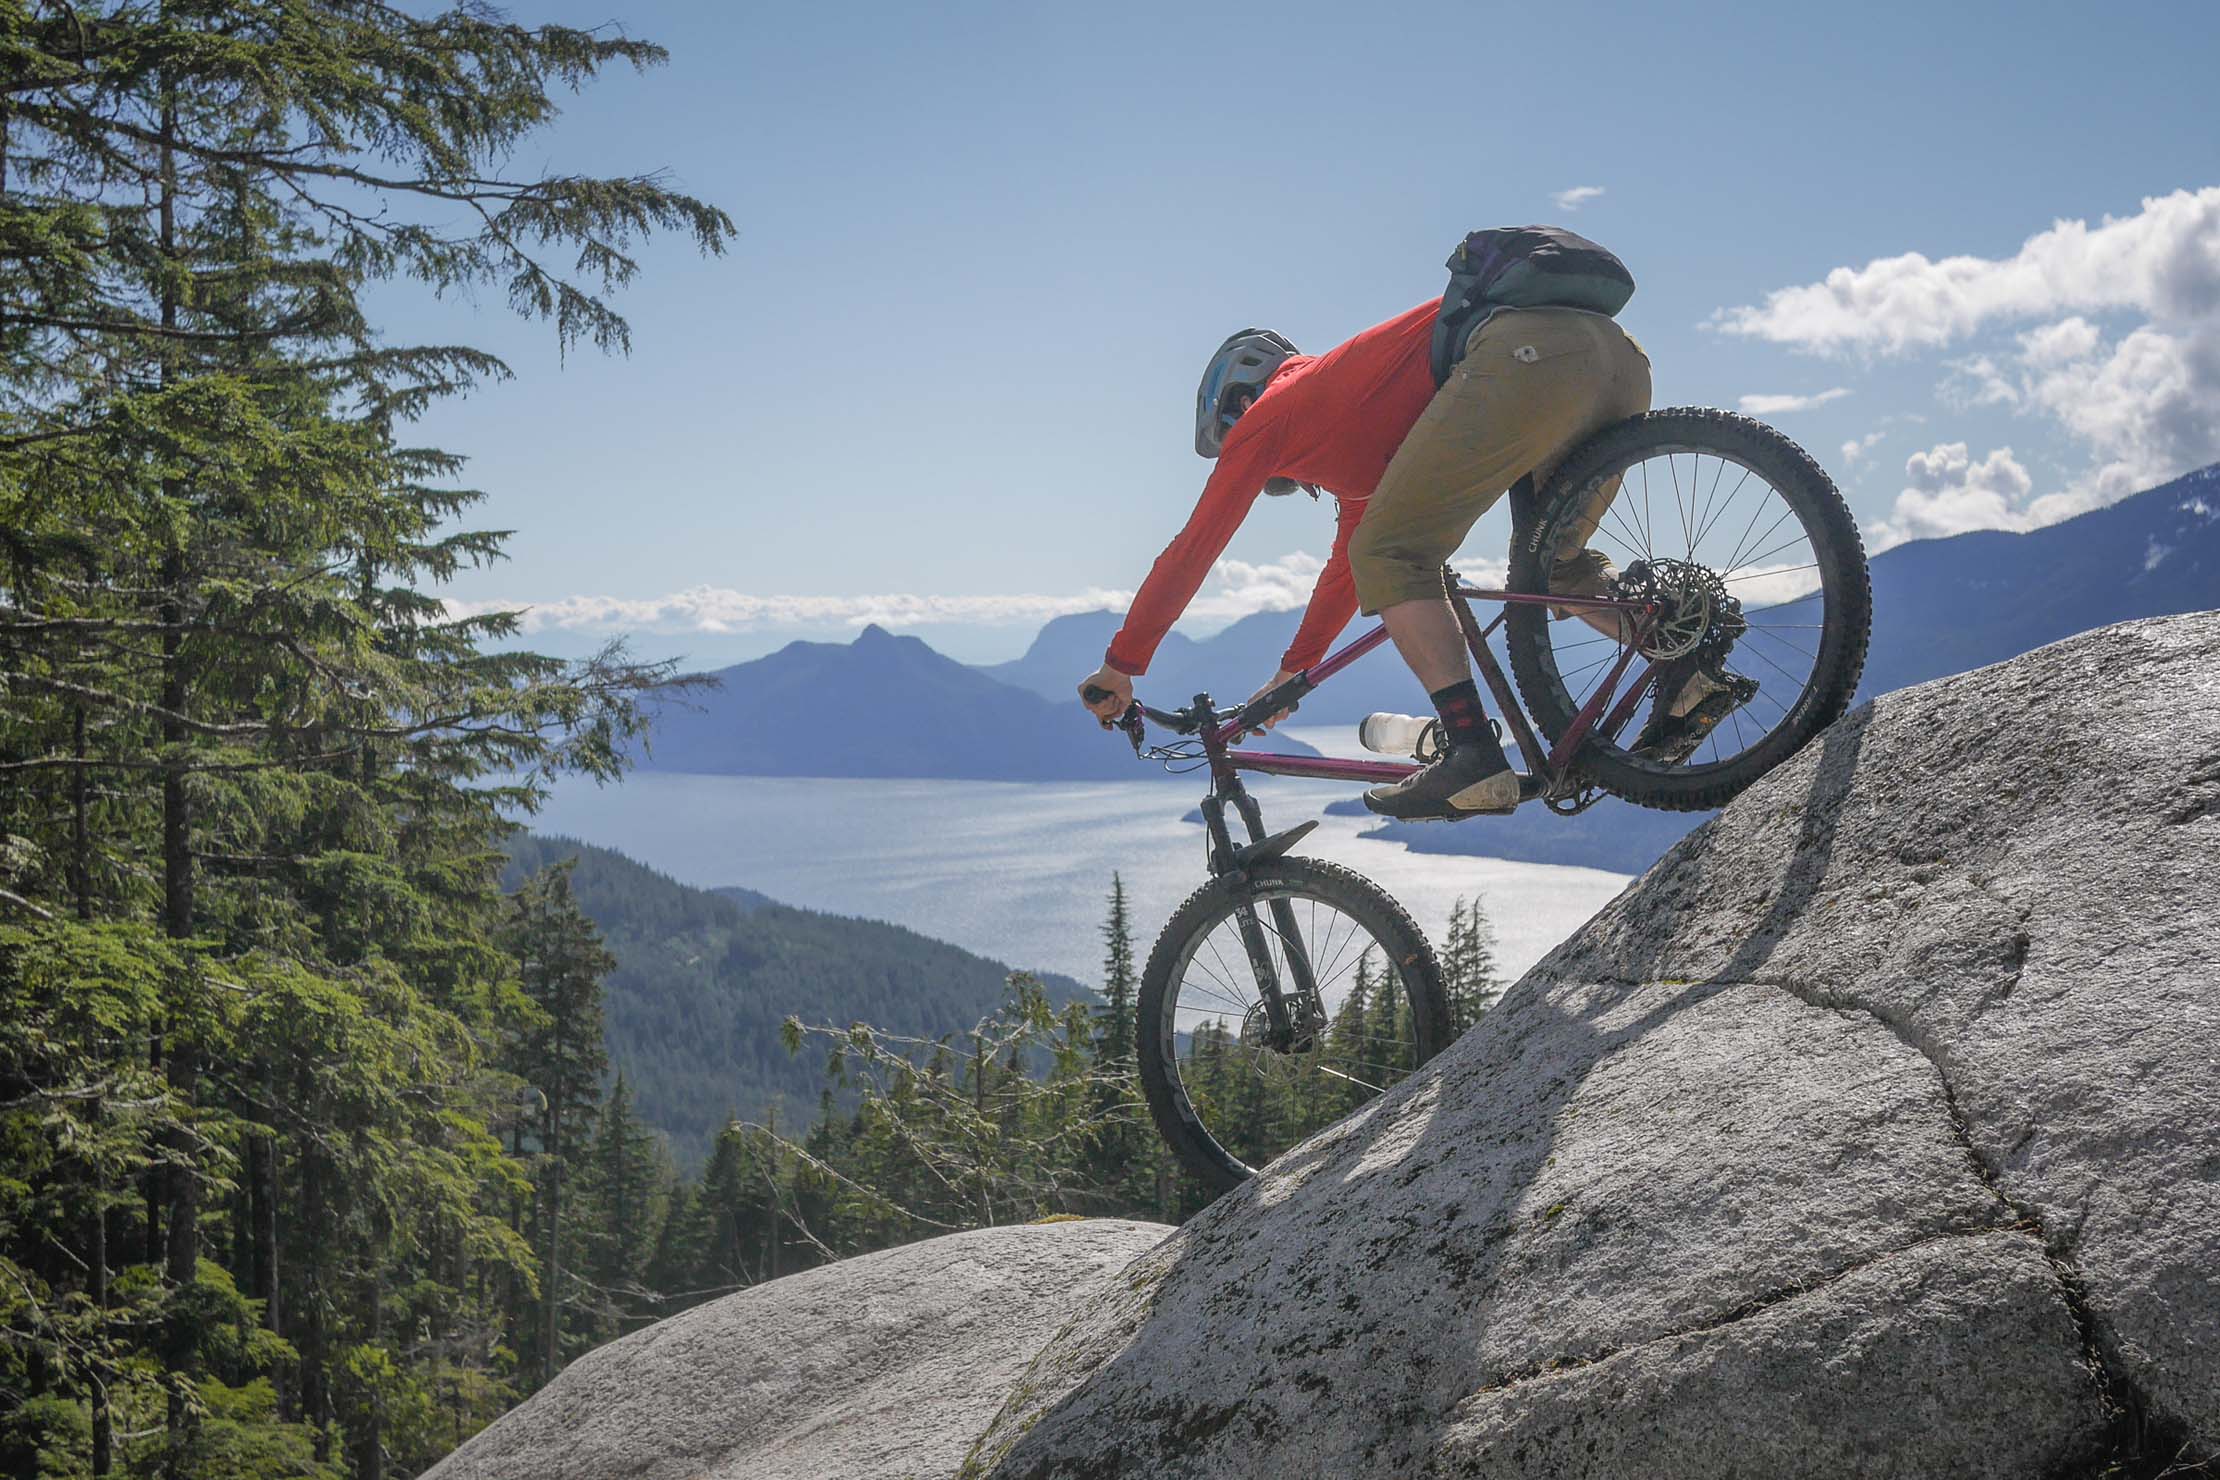
Much about this custom bike was an experiment. To say that it has worked out well would be an understatement. Loaded or unloaded, I find myself pedaling up much more than I ever did on my previous bikes. Last summer in the Chilcotins, where the trails are famous for requiring hiking up climbs, I found myself cleaning long, sustained ascents. And yet, thanks to its long front-center, my DaamBuilt has proven itself to be the most confident descending hardtail I’ve spent time on, and my riding has progressed tremendously in the last year and a half. Best of all, this is a bike that feels sprightly and enjoyable to ride when loaded up for a few days.
Please keep the conversation civil, constructive, and inclusive, or your comment will be removed.